Dreaming of a kitchen makeover but worried about breaking the bank? You’re not alone! Budget-friendly kitchen remodel ideas have skyrocketed in popularity because they prove you can create a stunning space without overspending. With clever tricks and affordable updates, transforming your kitchen becomes an exciting and achievable project.
In this article, you’ll find a variety of creative ideas that cater to different styles and needs—whether it’s a quick facelift or a more involved refresh. Get ready to explore practical tips, clever hacks, and stylish solutions that will help you enjoy a beautiful, functional kitchen without draining your wallet!
1. Paint Upper Cabinets in a Trendy Hue to Refresh Your Space
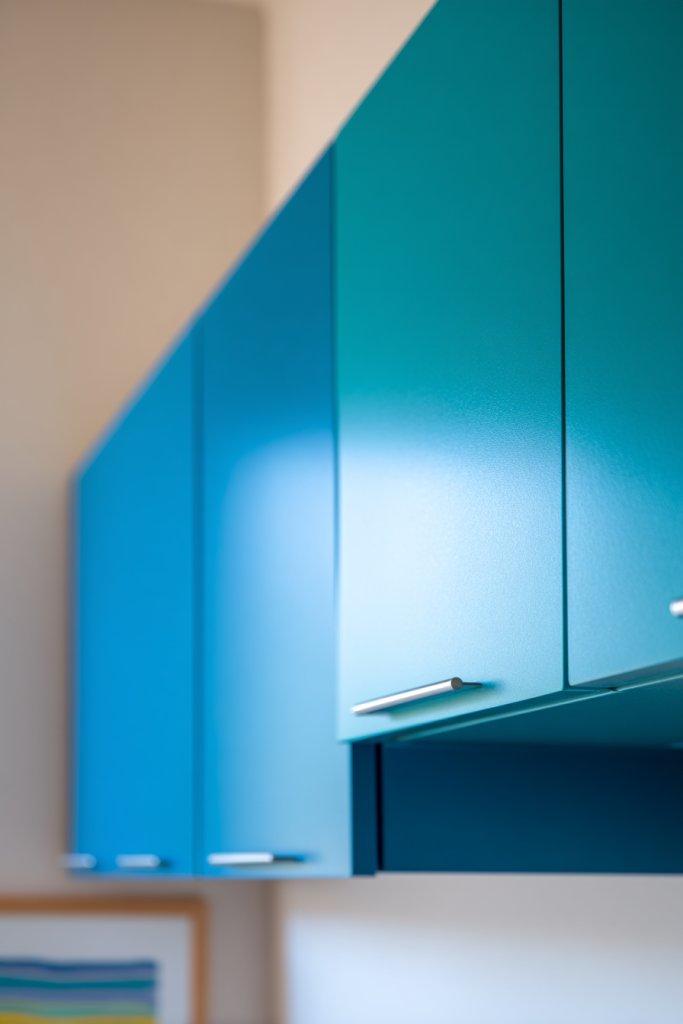
Is your kitchen feeling dull and uninspired? Sometimes a simple splash of color can transform the entire vibe. Instead of a costly overhaul, painting upper cabinets in a fresh hue is an easy fix that makes a big impact. It’s like giving your space a facelift without breaking the bank. Who knew a little paint could do so much?
Imagine opening your cabinet doors to reveal a soft cream tone that contrasts beautifully with dark countertops. The matte finish catches the light just right, adding warmth and brightness. The texture of the paint enhances the grain of the wood underneath, giving it a subtle depth. It’s a clean, modern look that instantly refreshes the room.
You can go bold with jewel tones or keep it subtle with pastel shades depending on your style. For a seasonal twist, switch to warmer shades in winter or cooler tones in summer. If your kitchen is small, light colors help open up the space. Larger kitchens can handle darker hues for a cozy, sophisticated vibe. The key is choosing a color that complements your overall decor.
Start by cleaning and sanding the cabinets to ensure the paint adheres well. Use a high-quality primer for better coverage and durability. Choose a semi-gloss or matte finish based on your preference—semi-gloss is easier to clean. Apply at least two coats with a brush or roller, allowing proper drying time. For a smooth finish, consider using a foam roller or a sprayer if you’re comfortable.
Add personal touches by replacing hardware with modern knobs that match your new color scheme. Consider adding decorative trim or stenciling for extra flair. You could also experiment with two-tone cabinets—paint the lower cabinets a darker hue for contrast. Incorporate accessories like colorful dish towels or a patterned backsplash to tie the look together. These small details make the space uniquely yours.
A fresh coat of paint on your cabinets can boost confidence and make your kitchen feel brand new. It’s a simple project that anyone can tackle, and the results are truly rewarding. Plus, you’ll impress friends and family with your DIY skills. Ready to splash some color and transform your space?
2. Replace Old Hardware with Modern, Budget-Friendly Knobs and Pulls
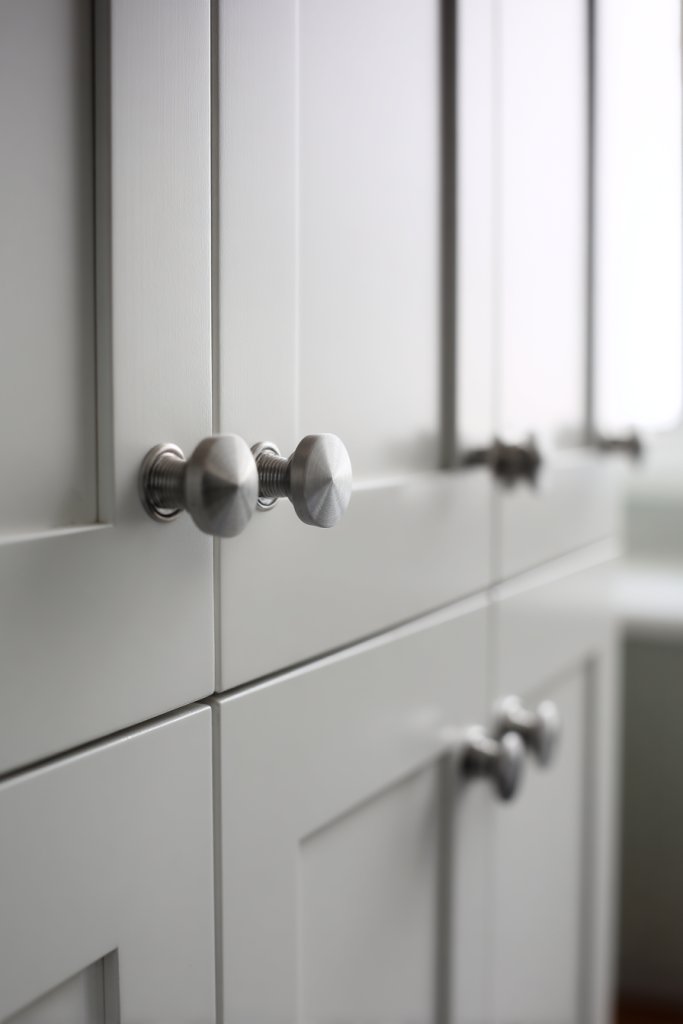
Tired of looking at outdated cabinet handles that make your kitchen feel stuck in the past? Swapping out old hardware is one of the easiest ways to give your space a fresh, modern vibe without spending a fortune. A quick upgrade can make even the most tired cabinets look stylish and new. Who knew tiny details could have such a big impact?
Picture sleek, matte black handles that contrast sharply against bright white cabinet doors. Or imagine vintage-inspired brass pulls adding warmth and character. The new hardware catches the light and provides a tactile experience—smooth, cool, and satisfying to grip. These small touches create an instantly polished look that elevates your entire kitchen.
Choose minimalist pulls for a contemporary look or ornate knobs for a traditional feel. Opt for finishes like brushed nickel, matte black, or antique bronze depending on your style. Smaller kitchens benefit from simple, unobtrusive hardware that doesn’t clutter the visual space. Larger kitchens can handle statement pieces that act as focal points.
Remove existing hardware by unscrewing the bolts from the inside of the cabinet. Measure the spacing between holes to ensure new pulls fit perfectly or drill new holes if needed. Use a level and painter’s tape to mark placement for symmetry. Attach the new handles with screws included in the package, tightening securely. Take your time to ensure everything lines up perfectly.
Mix and match different handle styles for a curated look. Add decorative washers or spacers for a custom fit if needed. Consider replacing knobs on drawers separately from cabinet handles for variety. You can also add adhesive-backed decorative film behind handles for an extra pop of color or pattern. Personal tweaks make your kitchen uniquely yours.
Swapping hardware is a simple project that instantly boosts your kitchen’s style quotient. It’s a quick win that leaves your space feeling more cohesive and thoughtfully designed. Once you see the difference, you’ll wonder why you waited so long. Ready to upgrade your hardware?
3. Add Peel-and-Stick Backsplash for a High-End Look
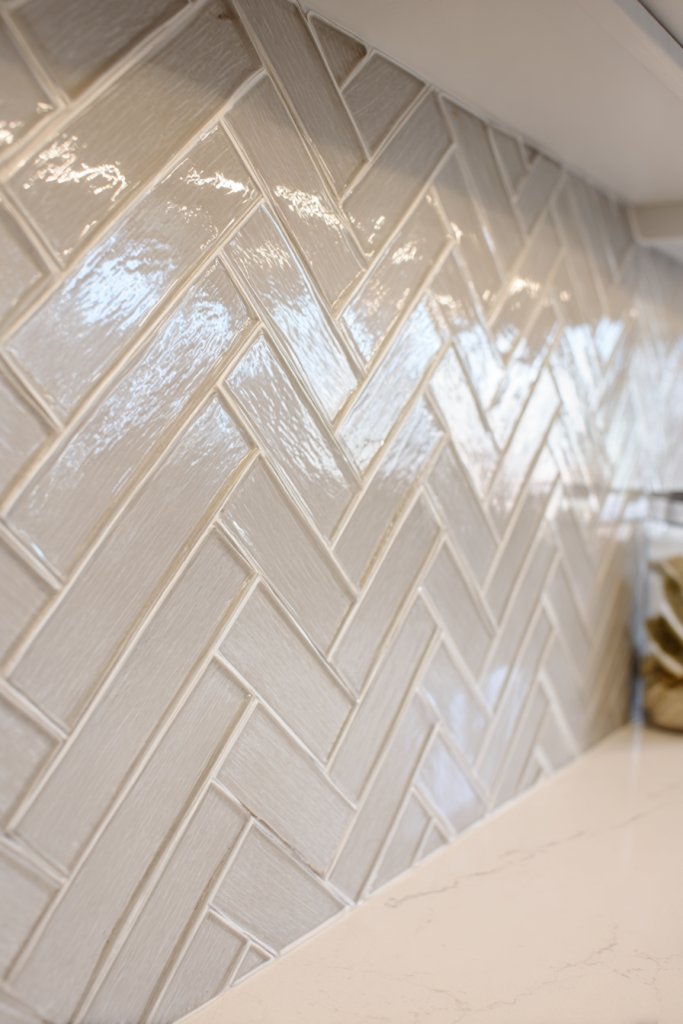
A real backsplash can cost a pretty penny and involve messy installation. But what if you could get the same high-end visual effect without the hassle or expense? Peel-and-stick backsplash tiles are your new best friend. They let you mimic expensive materials like subway tile or marble with minimal effort and cost. Who says luxury has to be complicated?
Imagine a wall covered in glossy, faux marble tiles that shimmer under the kitchen lights. The textured surface mimics real stone, adding depth and elegance. The tiles are easy to cut to size, fitting perfectly into corners and around outlets. It looks polished and professional, transforming your backsplash area into a stunning feature.
Choose from a variety of patterns—herringbone, chevron, or classic brick—to suit your style. For a rustic kitchen, opt for faux wood planks or stone textures. Seasonal updates are simple: peel off and replace with new designs for a fresh look. Small spaces can benefit from vertical patterns that elongate the room, while larger areas handle bold, large-scale designs.
Start with a clean, dry surface free of grease or dust. Measure and cut the tiles to fit your space, using a utility knife for clean edges. Peel off the backing and carefully press the tiles onto the wall, starting from one corner. Use a smoothing tool to eliminate air bubbles and ensure good adhesion. For outlets or switches, cut around the fixtures with a utility knife. Finish by sealing edges with clear caulk if needed.
Add decorative trim or molding at the top and bottom for a finished look. Mix different textures or colors to create a custom pattern. Incorporate small LED strip lights beneath upper cabinets to highlight your new backsplash. Personal touches like a hand-painted tile or monogrammed initials can make the space truly unique.
This DIY-friendly upgrade proves that you don’t need to be a professional to achieve a designer look. It’s affordable, quick, and customizable—perfect for renters or budget-conscious homeowners. Once done, you’ll love showing off your stylish, high-end kitchen update. Time to peel and stick your way to a gorgeous new backsplash?
4. Refinish or Repaint Kitchen Island for a Focal Point
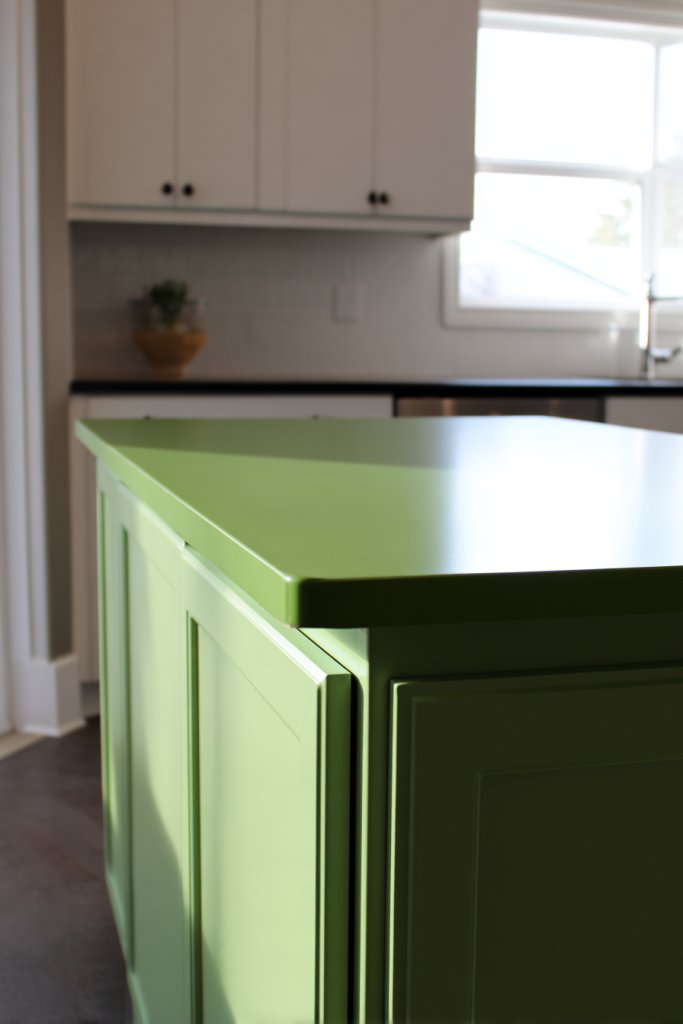
Does your kitchen island look tired and worn out? It’s often the centerpiece of the room, yet it can easily become an eyesore if neglected. Refinishing or repainting is an affordable way to breathe new life into it. Transforming this focal point boosts your entire kitchen’s vibe without a full remodel. Who wouldn’t want a statement piece that’s also budget-friendly?
Picture a rustic wooden island painted in a vibrant teal. The fresh coat of paint enhances the grain and texture, giving it a new character. Or imagine a sleek matte black finish that adds a modern, sophisticated touch. The surface feels smooth and inviting, perfect for prep or casual dining. It becomes the room’s visual anchor, drawing eyes and compliments.
Choose bold colors for a statement look or subtle shades for elegance. Staining the wood can add warmth and highlight natural grains, especially if you prefer a more rustic aesthetic. For small kitchens, a light, airy color can make the space feel larger. Larger kitchens can handle darker hues for a dramatic effect. Mix and match with your existing decor for a harmonious look.
Start by sanding down the surface to remove old paint or finish. Use a primer suitable for wood or laminate surfaces for better adhesion. Apply a high-quality paint or stain in thin, even coats, allowing proper drying time between layers. For a durable finish, seal with a clear polyurethane or wax. Consider adding decorative hardware or a contrasting countertop for extra flair.
Add decorative trim or stencils to create unique patterns or borders. Attach a removable fabric cover or a chalkboard panel to the side for notes and recipes. Incorporate a different textured paint or metallic accents to add interest. Personal touches like DIY decals or custom handles can make your island truly one-of-a-kind.
Refinishing your island is a rewarding project that instantly elevates your kitchen’s style. It’s a chance to showcase your creativity and DIY skills. Plus, a freshly painted island becomes a conversation starter and a proud centerpiece. Ready to give your kitchen a standout feature?
5. Install Open Shelving Using Affordable Wood or Repurposed Materials
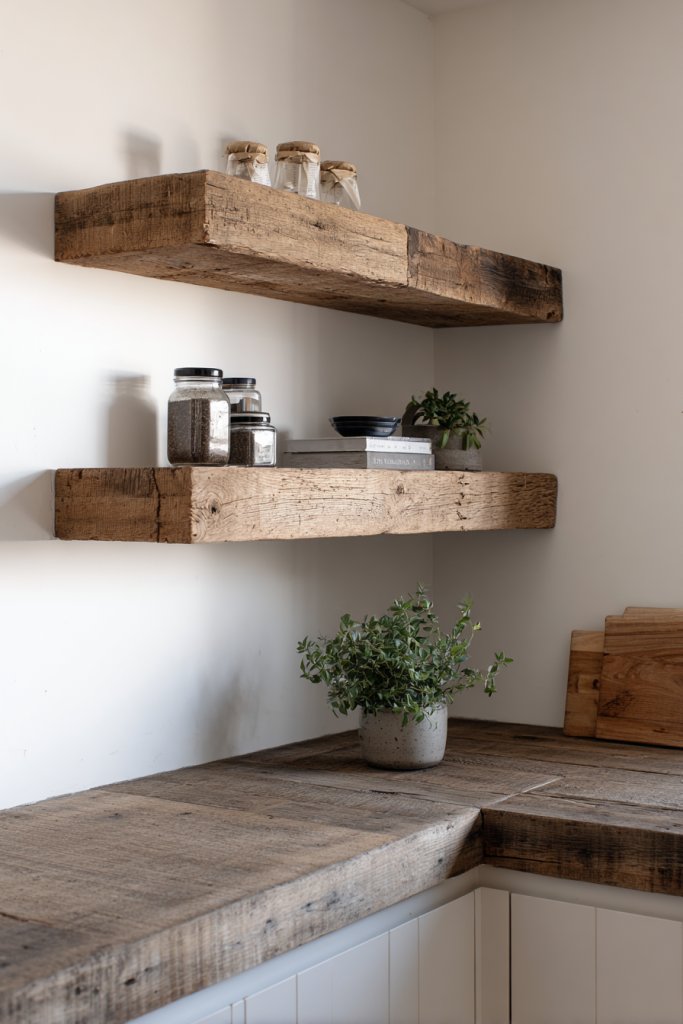
Cluttered countertops and closed cabinets can make your kitchen feel cramped. Open shelving offers a stylish way to display essentials and keep everyday items within reach. The best part? You can install it on a budget using inexpensive or repurposed wood. It’s a functional, trendy solution that adds personality and openness to your space.
Visualize rustic reclaimed wood planks mounted on the wall, holding colorful dishware and glass jars. The natural textures contrast beautifully with smooth cabinets, creating a layered, inviting look. The open shelves catch the light, making the room feel larger and more airy. Small potted herbs or decorative bowls add charm without overwhelming the eye.
Use different woods, finishes, or even painted planks to match your style. For a minimalist look, opt for sleek, uniform boards with hidden brackets. For an eclectic vibe, mix and match different materials and colors. Adjustable shelving allows you to change the arrangement as your needs evolve. Small kitchens benefit from floating shelves that maximize vertical space.
Start by measuring the space and selecting sturdy brackets compatible with your wood. Install the brackets at the desired height, using a level for accuracy. Cut your wood to size, sanding rough edges for safety and aesthetics. Secure the wood to the brackets, ensuring they are firmly attached to the wall studs. Arrange your items artistically, balancing functional and decorative pieces. Seal or paint the wood if desired for added protection.
Decorate with colorful cookware or vintage dishes for a charming look. Add small hooks underneath for mugs or utensils. Incorporate LED strip lighting under the shelves to highlight your display. Personal touches like framed vintage recipe cards or DIY signs can make the setup uniquely yours.
Open shelving is an easy, cost-effective way to upgrade your kitchen’s style and functionality. It encourages creativity and makes everyday routines more enjoyable. Once installed, it’s hard not to show off your new display area. Ready to add some character and practicality?
6. Update Lighting with Budget Pendant or Under-Cabinet Lights
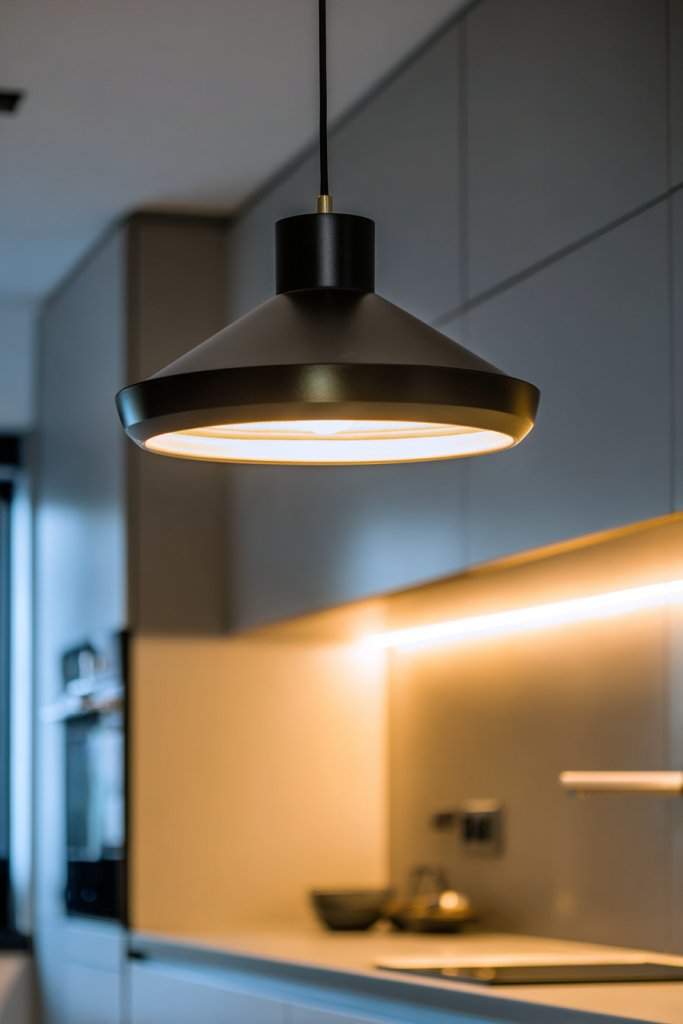
Poor lighting can make even the nicest kitchen feel dull and uninviting. Updating your lighting is an easy fix that instantly improves ambiance and functionality. Pendant lights or under-cabinet LEDs are affordable options that add style and practicality. Want your kitchen to shine—literally?
Imagine warm, golden light hanging from sleek black cords over your island, creating a cozy focal point. Under-cabinet strip lighting casts a gentle glow on your countertops, making meal prep safer and easier. The soft illumination highlights your backsplash and surfaces, elevating the room’s overall look. These lights create a layered, inviting atmosphere.
Choose minimalist pendant fixtures for a modern look or vintage-inspired designs for charm. Adjustable cords or dimmable options allow customization for different moods. For small spaces, compact fixtures work best, while larger kitchens can handle statement pendants. For seasonal variation, switch between warm or cool-toned bulbs to match the decor.
Measure the space carefully to select the right fixture size and placement. If installing pendant lights, drill holes in the ceiling, ensuring you hit the joists for support. Wire the fixtures according to the manufacturer’s instructions or hire an electrician for safety. Under-cabinet lighting can be plugged in or hardwired; adhesive-backed LED strips are the easiest to install—just peel and stick.
Add dimmer switches to control brightness levels for different occasions. Use colored or vintage bulbs to set a mood. Incorporate decorative cords or fixtures that match your decor style. For a cohesive look, match hardware finishes or fixtures with other accents in the kitchen.
Good lighting isn’t just functional; it’s transformative. It can make your kitchen appear larger, cleaner, and more welcoming. Plus, installing your own lighting fixtures is a satisfying DIY project that adds to your home’s value. Want your kitchen to glow with style?
7. Use Decorative Adhesive Films on Appliances or Backsplashes
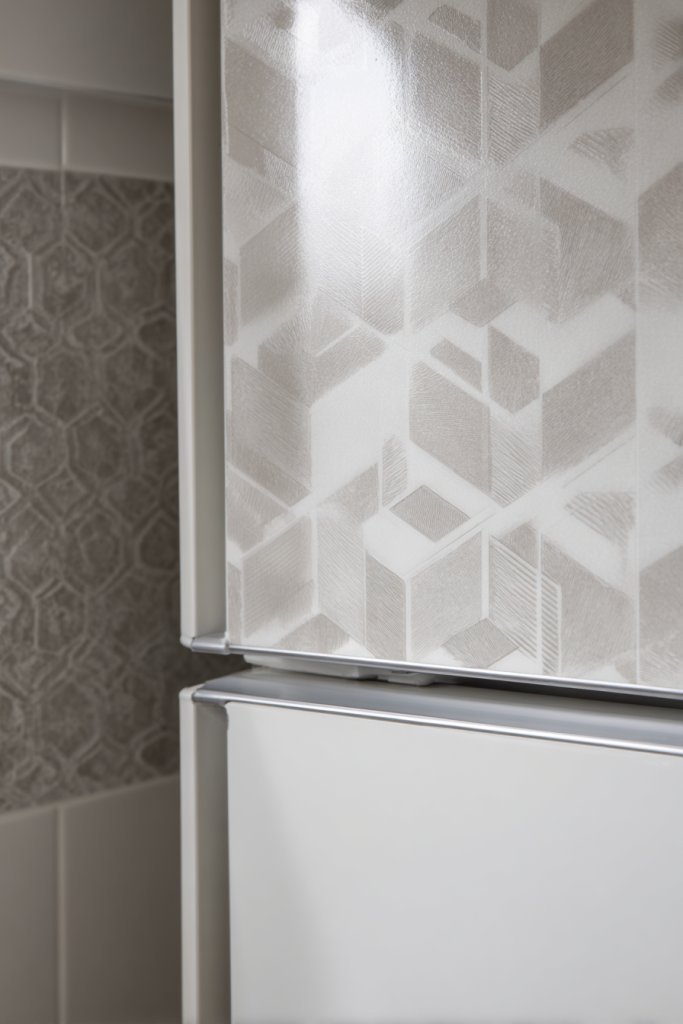
Stuck with outdated or boring appliances and backsplashes? Covering them up can be tricky and costly. Enter decorative adhesive films—a budget-friendly way to upgrade without replacing. They mimic high-end finishes like stainless steel or marble at a fraction of the cost. Want a quick makeover that’s easy and mess-free?
Imagine a fridge wrapped in a sleek brushed steel film, seamlessly blending with modern appliances. Or a countertop covered in a faux marble pattern that looks just like stone. The textured surface adds depth, and the films come in various colors and patterns. They instantly elevate the look of your kitchen with minimal effort.
Choose from metallic, matte, or glossy finishes depending on your style. Use patterned films to add visual interest or create a uniform look. They’re perfect for small updates or seasonal changes. For a rustic vibe, opt for wood grain patterns. You can also combine different textures for a layered, eclectic feel.
Start with a clean, dry surface free of grease. Measure and cut the film to size, leaving a slight margin for trimming. Peel off the backing and carefully apply, starting from one edge and smoothing out air bubbles with a squeegee or credit card. Pay special attention around edges and corners. For appliances, use heat from a hairdryer to help conform the film to curves. Finish by trimming excess with a utility knife.
Add borders or decals to frame your new look. Mix different patterns for a custom patchwork effect. Incorporate small decorative elements like metallic accents or textured trims for extra flair. These films are removable, so you can change styles whenever you want—no damage or residue.
Using adhesive films is a clever way to refresh your kitchen in a weekend. It’s a DIY project that doesn’t require special skills—just patience and a steady hand. Once finished, you’ll feel proud of your quick, stylish upgrade. Ready to transform your appliances and backsplash?
8. Incorporate DIY Chalkboard or Magnetic Panels for Practical Style

Ever wish your kitchen had a dedicated space for notes, recipes, or grocery lists? Chalkboard and magnetic panels are an affordable, versatile solution. They combine functionality with a casual, stylish look. Plus, they add a personal touch that makes your kitchen more organized and lively. Who knew organization could look so cool?
Visualize a chalkboard painted on a side wall, filled with weekly menus and doodles. Or magnetic panels covered in colorful magnets holding reminders and kids’ artwork. The matte surface contrasts nicely with sleek cabinets and countertops. It brings a sense of charm and practicality, transforming blank walls into a creative hub.
Paint a section of the wall with chalkboard paint in a fun shape or border. Use magnetic primer beneath regular paint to create a magnetic surface. Change the look by framing the panels with trim or decorative molding. Seasonal or holiday-themed doodles keep the space fresh and festive. It’s adaptable for small or large kitchens.
Select a wall or surface that’s easy to access and visible. Clean thoroughly, then prime if needed. Apply chalkboard or magnetic paint in at least two coats, letting each dry completely. Use painter’s tape to create clean edges or geometric designs. For a professional finish, consider framing the panels with inexpensive trim or molding. Keep chalk or magnets nearby for easy use.
Customize with colorful chalks or decorative magnets that match your decor. Add small shelves or clipboards for holding recipes or notes. Incorporate themed stickers or decals for holidays. Personal touches like hand-lettered quotes or illustrations make it uniquely yours. It’s a fun, functional way to add personality.
DIY chalkboard and magnetic panels are simple projects that make your kitchen more interactive. They encourage family participation and organization, making daily routines smoother. Plus, they’re easily changeable, so your style can evolve. Ready to turn a blank wall into your new favorite spot?
9. Replace Kitchen Faucets with Affordable, Modern Designs
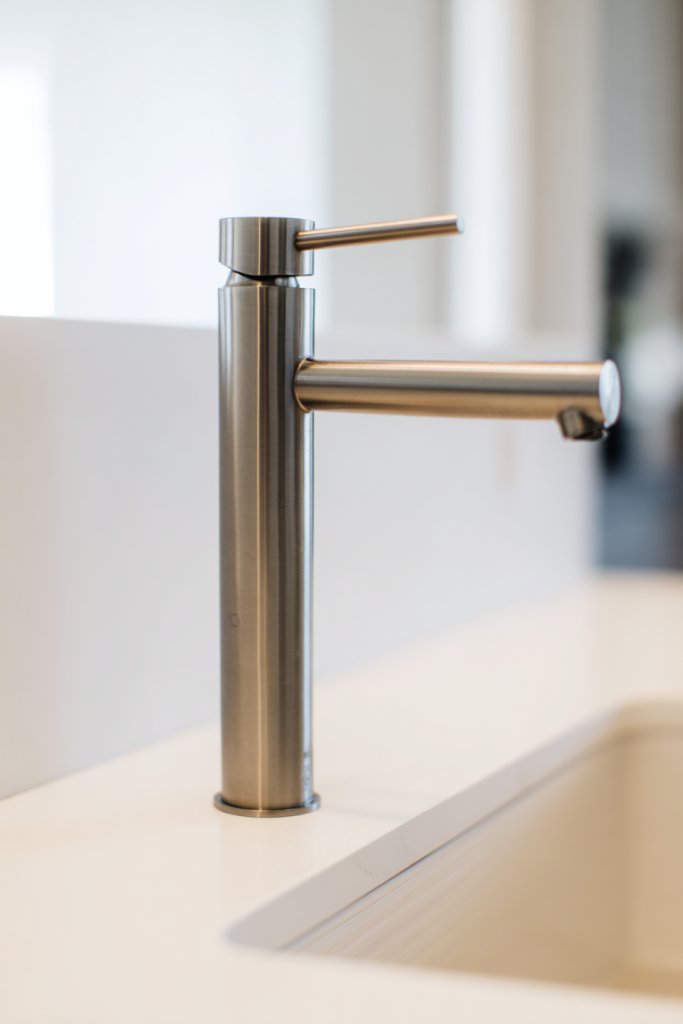
A dated or leaky faucet can ruin the look and function of your sink area. Upgrading to a modern, budget-friendly faucet instantly updates your kitchen’s style. It’s a small change with a big payoff, improving both aesthetics and usability. Who says you need to spend a lot to get a sleek, functional faucet?
Picture a matte black or brushed nickel faucet with clean lines and a high arc. It complements stainless steel appliances and brightens the sink area. The smooth handle design makes water control effortless, and the finish resists fingerprints and water spots. It becomes a focal point that elevates the entire sink setup.
Choose from single-handle or dual-handle styles based on your preference. For a minimalist look, go for a sleek, pull-down sprayer with touchless operation. Vintage-inspired models add charm and character. Match the finish to other hardware for a cohesive look. Consider the height and reach to ensure compatibility with your sink size.
Turn off the water supply before removing the old faucet. Disconnect hoses and mounting hardware carefully. Clean the sink surface thoroughly to ensure a good seal. Install the new faucet according to the manufacturer’s instructions, tightening all fittings securely. Turn the water back on and check for leaks. Adjust as necessary for a tight fit and smooth operation.
Add a matching soap dispenser or a filtered water attachment for extra convenience. Personalize with decorative handles or colored aerators. Consider installing a water-saving model to reduce utility bills. Small aesthetic upgrades make your sink area both functional and stylish.
A new faucet refreshes your entire kitchen look with minimal effort. It’s a practical upgrade that enhances daily routines and adds a touch of luxury. Once installed, you’ll enjoy the improved functionality and sleek appearance. Ready to upgrade your sink?
10. Refresh Countertops with Paint or Contact Paper
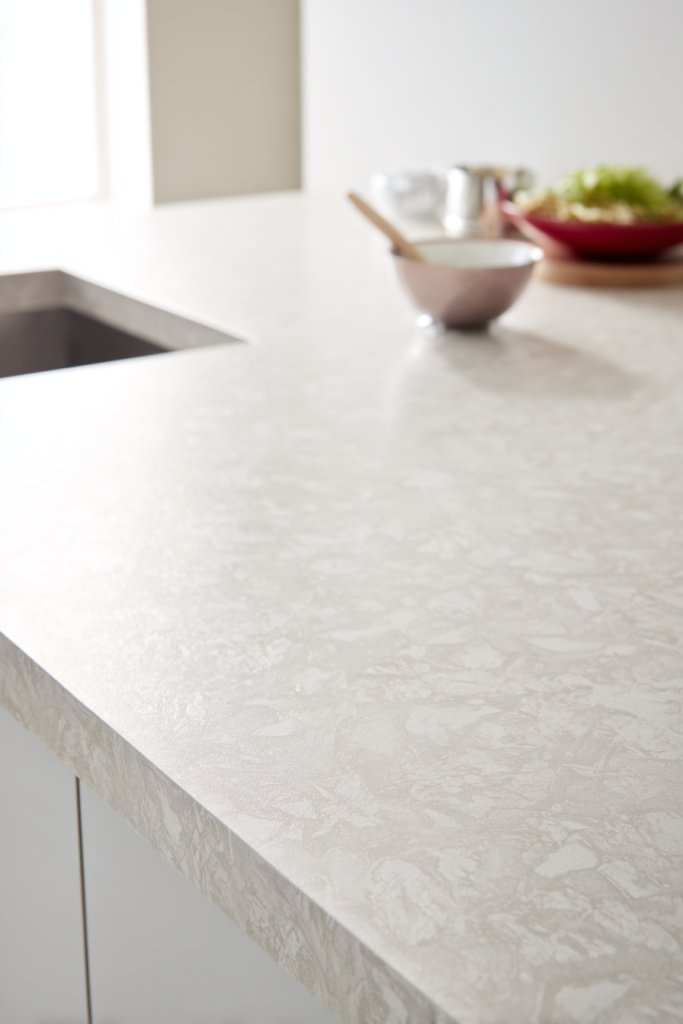
Countertops can quickly become worn, stained, or outdated, dragging down your kitchen’s look. Replacing them can be costly and messy, but there’s a clever alternative. Painting or applying contact paper mimics expensive materials like granite or quartz at a fraction of the price. Want a quick, budget-friendly upgrade?
Imagine a countertop transformed into a sleek marble surface with subtle gray veining. Or a vibrant, patterned contact paper that adds personality and color. The surface feels smooth under your fingertips, and the design adds a layer of sophistication. It’s a visual upgrade that makes your entire kitchen feel renewed.
Choose from realistic stone textures, wood grains, or bold patterns depending on your style. Smaller counters or islands benefit from bright, eye-catching designs, while larger surfaces might stick with subtle tones. Seasonal or trend-based patterns keep the look fresh. Make sure the contact paper or paint is suitable for high moisture areas.
Clean the surface thoroughly, removing grease and dust. Sand glossy areas lightly for better adhesion. For paint, use a countertop-specific kit with primer and sealant, applying in thin coats. For contact paper, measure carefully, cut precisely, and peel back the backing gradually while smoothing out bubbles. Use a squeegee or credit card to press out air pockets. Seal the edges with a clear, waterproof sealant for durability.
Add decorative accents like small trays or bowls to complement the new surface. Incorporate color-coordinated utensils or accessories for a cohesive look. For a more polished appearance, consider a clear epoxy coating over contact paper for extra protection. Mix different textures or colors for a custom, layered aesthetic. Personal touches like hand-painted designs can also add charm.
Transforming your countertops is a fun DIY project that yields impressive results. It’s a clever way to update your kitchen without major renovations or expenses. Once completed, you’ll love how your space looks and feels. Ready to give your counters a fresh new look?
11. Create a Budget-Friendly Backsplash Using Stained Wooden Planks
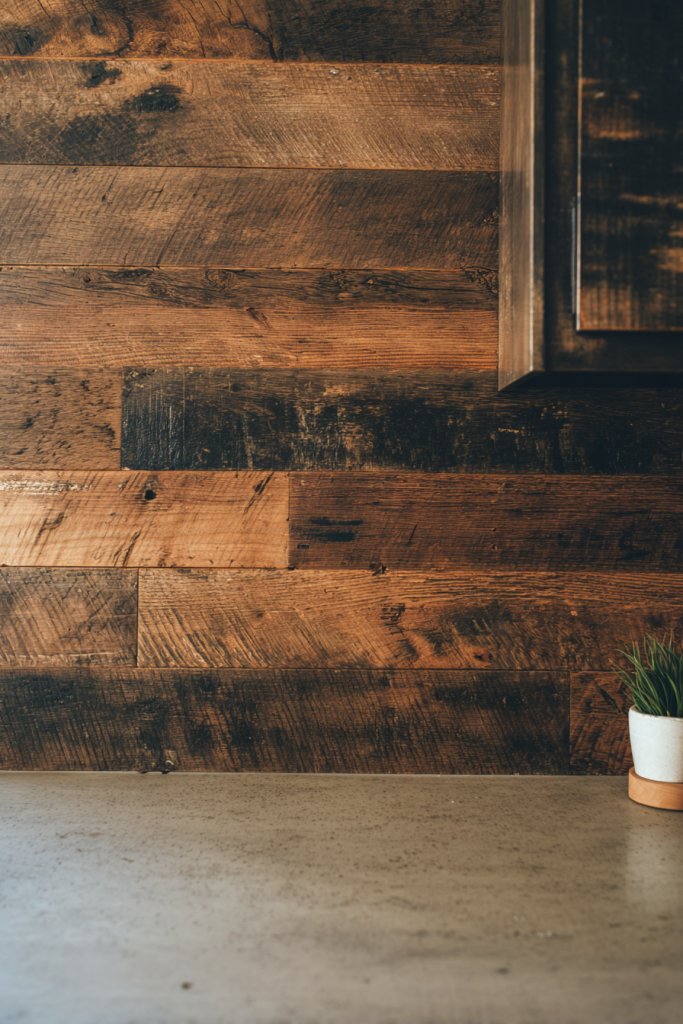
A stylish backsplash can elevate your kitchen’s aesthetic but often comes with a hefty price tag. Wooden planks offer a warm, rustic charm and are surprisingly affordable. Staining or painting them adds color and character, transforming your space without breaking the bank. Want a cozy, inviting look that’s easy on your budget?
Picture a wall lined with horizontally mounted stained wood planks in rich walnut or weathered gray. The natural grain and knots add texture, creating a tactile experience. The warm tones contrast beautifully with modern appliances and sleek countertops. It feels inviting, cozy, and perfectly imperfect, like a mountain cabin in the city.
Use different wood types or stain colors to match your decor. For a more refined look, install the planks vertically or in herringbone patterns. For a coastal vibe, opt for lighter, bleached finishes. Small kitchens benefit from lighter shades that make the space feel larger. Larger kitchens can handle darker, richer hues for a dramatic statement.
Start by choosing quality, affordable wood—pine or cedar work well. Cut the planks to fit your wall, then sand rough edges. Stain or paint the wood in your desired color, letting it dry thoroughly. Mount the planks horizontally using nails or adhesive, ensuring they’re level and evenly spaced. Seal the surface with a clear protective finish to resist moisture and stains. Finish by caulking edges and around outlets.
Add decorative elements like vintage hooks or small shelves for herbs and utensils. Incorporate contrasting stain shades for a layered look. Personalize with hand-painted designs or initials for a custom touch. Use LED strip lighting behind the planks for ambient glow. The result is a warm, welcoming focal point.
This DIY wooden backsplash showcases your creativity and makes a big impact for little money. It’s a project that feels rustic and authentic, perfect for adding charm. Once finished, your kitchen radiates warmth and personality. Ready to bring natural texture into your space?
12. Add a DIY Rug or Mat for Color and Comfort
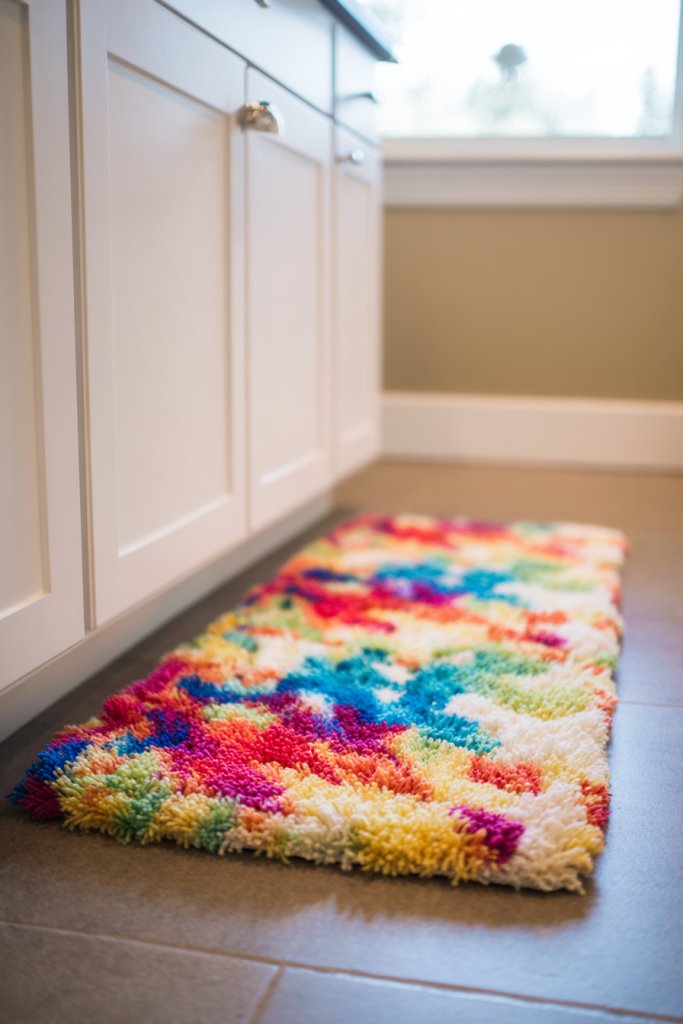
A hard kitchen floor can feel cold and uninviting, especially during long cooking sessions. Adding a soft, washable rug or mat introduces comfort and style without much expense. It’s an easy way to inject color, pattern, and personality into your space. Want to make standing in the kitchen more enjoyable?
Imagine a vibrant geometric rug in bold reds and blues placed in front of the sink. Or a plush, neutral-toned mat that adds a layer of softness underfoot. The textured surface enhances the room’s warmth while providing insulation from cold tiles. It’s both practical and decorative, making your kitchen more welcoming.
Choose washable, slip-resistant rugs for safety and easy cleaning. Layer multiple rugs for a boho-chic look or keep it simple with a single statement piece. Seasonal colors or patterns help refresh the space throughout the year. Small rugs work well in front of the sink or stove, while larger ones can define eating or prep areas.
Select a rug with non-slip backing or add a non-slip pad underneath for safety. Measure your space to choose the right size—don’t go too small or overwhelming. Place the rug in high-traffic areas for maximum comfort. Keep it clean by vacuuming regularly and washing according to the manufacturer’s instructions. Swap out rugs seasonally for fresh style.
Coordinate your rug with your kitchen accessories, like dish towels or utensil holders. Add decorative fringe or tassels for extra flair. Personalize with DIY painted patterns or monograms. Use washable rugs with fun prints or textures that reflect your personality. It’s a simple way to make your kitchen uniquely yours.
A cozy rug transforms your kitchen into a warmer, more comfortable space. It’s a quick, affordable upgrade that invites family and friends to linger longer. Once you see how it enhances comfort and style, you’ll wonder why you didn’t do it sooner. Ready to step up your kitchen comfort?
13. Incorporate Open Storage Baskets for Organization and Style

Cluttered countertops and disorganized cabinets make your kitchen feel chaotic. Open storage baskets are a simple, stylish solution to keep things tidy and accessible. They add a touch of charm while hiding clutter. Want to make organization effortless and attractive?
Picture woven baskets filled with fresh produce or neatly rolled dish towels on open shelves. Wicker or wire baskets add texture and warmth, complementing a rustic or modern aesthetic. The open design makes it easy to grab what you need and keeps your space looking neat. They turn chaos into charm effortlessly.
Choose baskets in natural fibers for a rustic look or sleek metal for an industrial vibe. Different sizes accommodate various items, from utensils to snacks. Stack baskets vertically or line them up for a clean, organized appearance. Incorporate labels for extra functionality and style.
Identify areas where clutter accumulates—under the sink, on open shelves, or inside cabinets. Select baskets that fit the space and purpose. Arrange items inside the baskets to maximize space and ease of access. Secure baskets with hooks or stacking units if needed. Regularly declutter and swap out items to keep everything fresh and functional.
Decorate baskets with fabric liners or personalized labels. Mix textures and colors to match your decor theme. Use decorative clips or tags for categorization. Personal touches like handwritten labels or DIY fabric wraps add character.
Open baskets make your kitchen look stylish while staying functional. They encourage organization without sacrificing charm. Once you see how easy it is to maintain, you’ll be motivated to keep things tidy. Ready to add some stylish storage?
14. Upgrade Window Treatments with Affordable Curtains or Blinds
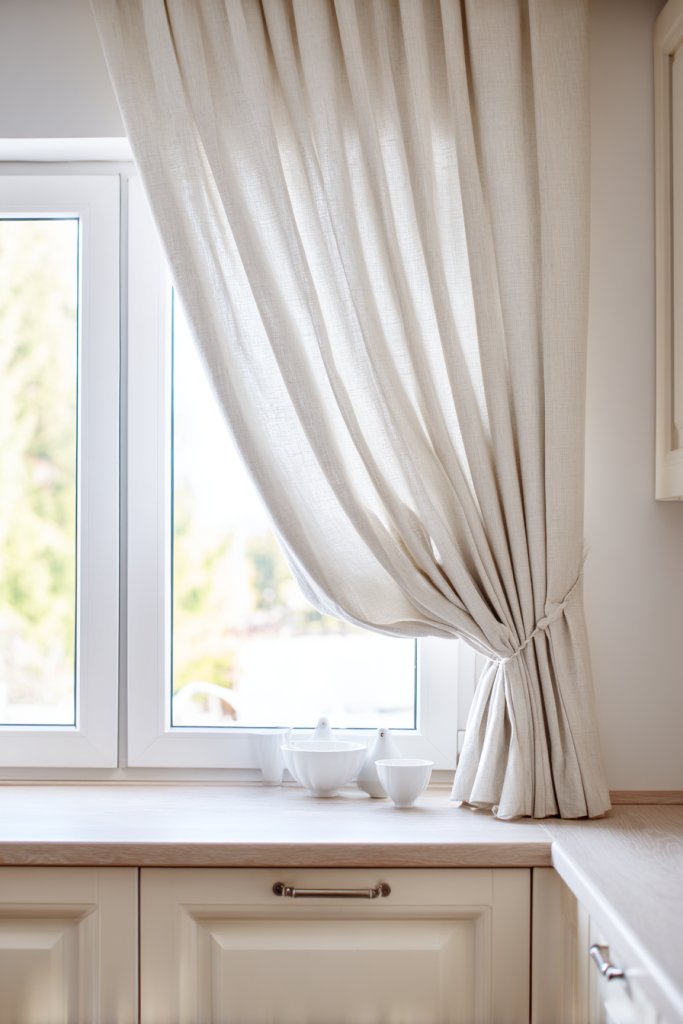
Window treatments can dramatically change the look and feel of your kitchen, but high-end options are often pricey. Budget-friendly curtains or blinds are a smart alternative that adds style and controls light. Want to upgrade your windows without overspending?
Imagine airy, white linen curtains framing your windows, softening the natural light. Or sleek faux-wood blinds that add a contemporary touch and provide privacy. The fabric or slats add texture and visual interest, tying the room together. It’s a simple swap that makes your space appear more polished.
Choose from lightweight curtains for a breezy look or blackout blinds for privacy and darkness. Patterned or textured fabrics work well for a cozy, layered effect. For small kitchens, light-colored or sheer fabrics keep the space feeling open. Larger rooms can handle heavier, statement fabrics or bold patterns.
Measure your window dimensions carefully before shopping. Install curtain rods or brackets at the right height and secure them into wall studs for stability. Hang your curtains or blinds, adjusting for evenness and length. Use tension rods or adhesive hooks for easy installation if you’re renting. Finish by tidying fabric or slats for a neat appearance.
Add decorative tiebacks or patterned valances for extra flair. Coordinate your window treatments with other textiles in the room, like tablecloths or seat cushions. Use fabric paint or embellishments for a DIY touch. Personal touches make your window treatments both functional and fun.
Updating window treatments is an easy project that instantly elevates your kitchen’s style. It’s a simple way to bring in color, texture, and personality. Once you see the difference, you’ll be inspired to refine other details. Ready for a window makeover?
15. Hang DIY Artwork or Printable Quotes for a Personal Touch
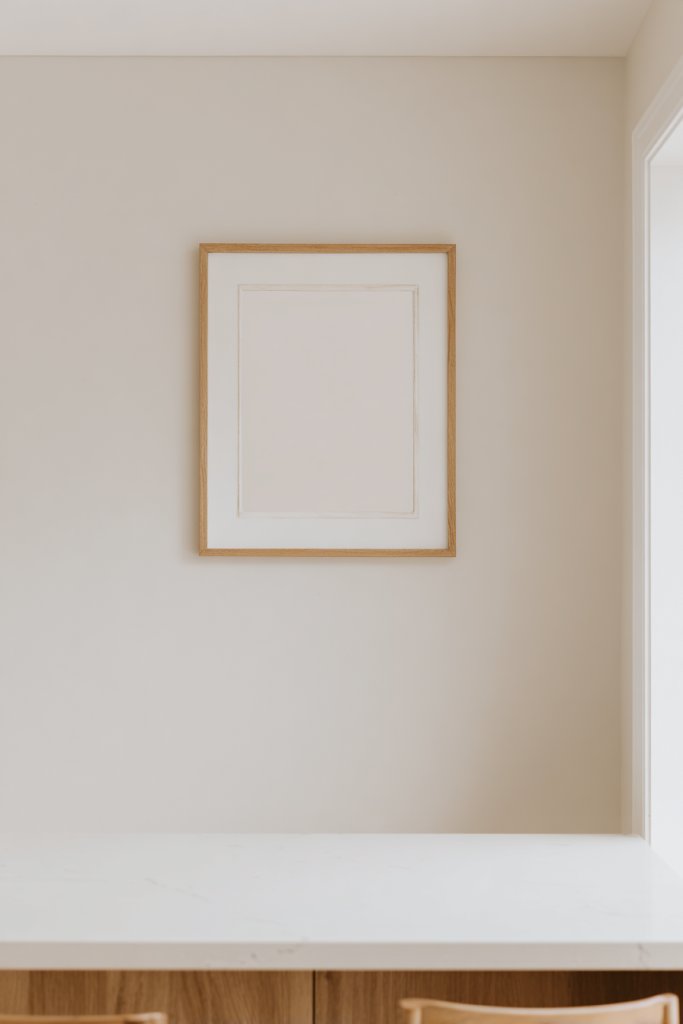
Your kitchen can feel bland and impersonal, especially if it’s full of generic decor. Adding DIY artwork or printable quotes is an inexpensive way to inject personality and warmth. It’s a canvas for your creativity and a reflection of your style. Want to make your space truly yours?
Picture a framed quote about coffee or family, hung proudly on the wall. Or a hand-painted canvas featuring vibrant abstract art that sparks conversation. The artwork adds color and character, breaking up plain walls. It’s a reflection of your personality that turns an ordinary kitchen into a cozy home.
Create your own art with paint, markers, or digital tools. Print high-quality quotes or images on inexpensive paper and frame them stylishly. Use different sizes and frame styles for an eclectic look. Change artwork seasonally or for special occasions to keep the decor fresh.
Choose a blank wall or space that needs visual interest. Create or select your artwork, then frame or mount it with removable adhesive hooks. Consider using a gallery wall layout for a dramatic effect. Mix different frame styles and colors for a curated, personalized vibe.
Add a personal touch by including family recipes or hand-drawn illustrations. Incorporate motivational quotes to start your day positively. Use washi tape or decorative clips to change out art easily. Personal touches make your kitchen a reflection of your life and values.
DIY artwork is a fun, inexpensive way to showcase your creativity. It makes your kitchen feel unique and inviting. Once you see your personal gallery on the wall, you’ll feel more connected to your space. Ready to hang some inspiring pieces?
16. Use Budget-Friendly Wall Decals or Stickers for Visual Interest
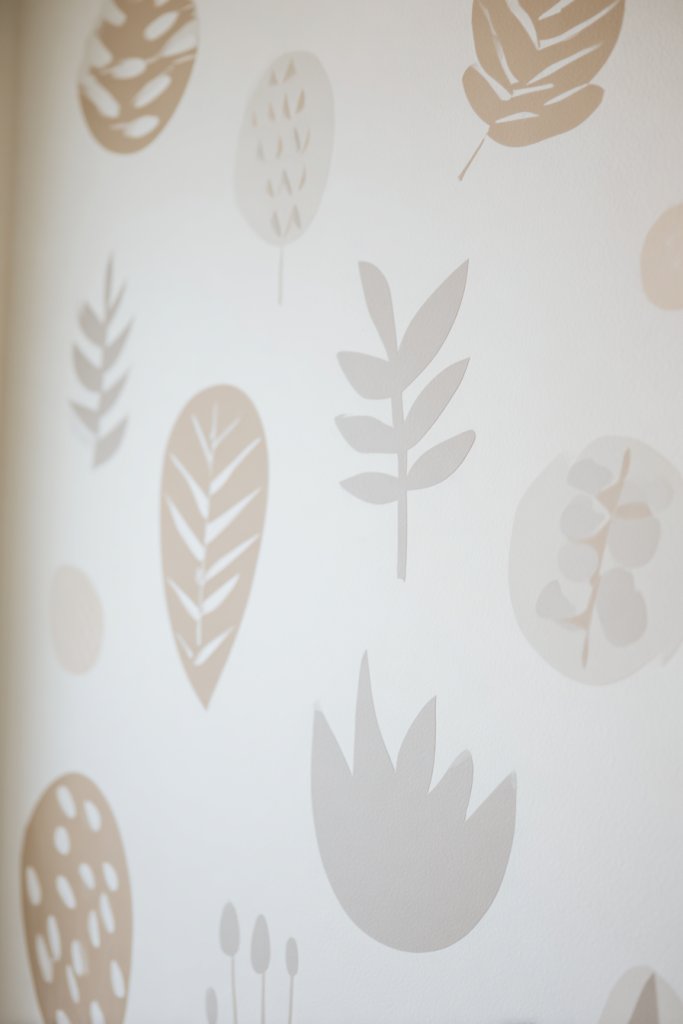
Bare walls can make your kitchen feel dull and uninspired. Wall decals or stickers are an affordable, easy way to add personality and color without the hassle of painting or hanging art. Want a quick transformation that’s removable and customizable?
Imagine playful geometric shapes or floral motifs arranged above the countertop. Or a bold quote sticker that motivates you every morning. The decals come in various styles, colors, and sizes, allowing you to create a dynamic, personalized look. They instantly add visual interest and character.
Apply decals to any smooth surface—walls, cabinets, or appliances. Create patterns, borders, or focal points depending on your preference. Change themes seasonally or for holidays by swapping out stickers. Keep the overall look cohesive by sticking to a color palette or style.
Ensure the surface is clean, dry, and free of grease before application. Peel and carefully place the decal, smoothing out air bubbles with a squeegee or credit card. Use masking tape to plan the layout before sticking. For curved or textured surfaces, consider decals designed for easy application or use a heat gun for better adhesion. Remove and reposition if needed, without damage.
Combine decals with hand-painted accents or additional stickers for layered effects. Use decals to brand a space, like labeling spice jars or storage areas. Incorporate fun or inspirational quotes that resonate with your personality. Personal touches make the design more meaningful.
Wall decals are a quick and inexpensive way to refresh your kitchen decor. They’re perfect for renters or anyone who loves changing styles frequently. Once you see your space transformed with simple stickers, you’ll be inspired to keep experimenting. Ready to decorate?
17. Repurpose or Refinish Existing Furniture for Functional Charm

Old or mismatched furniture can clutter your kitchen and detract from your decor. Instead of buying new, consider repurposing or refinishing what you already have. This approach saves money and adds a unique, personalized touch. Want functional furniture with a story?
Picture a vintage cart painted in bright turquoise, serving as a mobile prep station. Or a tired wooden table sanded down and stained in a rich walnut finish. The transformation adds character and charm, making your kitchen feel warm and inviting. It’s like giving your furniture a second life.
Sand and paint or stain furniture to match your decor. Distress for a rustic, shabby-chic look or keep it sleek for a modern vibe. Add new hardware or decorative elements to customize further. Small furniture pieces like stools or carts are easy to refinish and versatile.
Start by cleaning and sanding the furniture thoroughly. Choose a paint, stain, or finish suitable for the material—wood, metal, or laminate. Apply primer if necessary, then paint or stain in thin, even coats. Seal with a clear topcoat for durability. Replace or upgrade hardware for a fresh look. Consider adding caster wheels for mobility.
Decorate with stencils, decals, or hand-painted details. Personalize with custom hardware or fabric covers. Use distressed finishes or layered paints for a vintage feel. Incorporate decorative elements like knobs or hooks that match your style. It’s your chance to create one-of-a-kind pieces.
Refinishing furniture is a satisfying project that adds personality to your kitchen. It’s an eco-friendly choice that results in functional, stylish pieces. Once you see your DIY work in action, you’ll feel proud and motivated to tackle other projects. Ready to breathe new life into old furniture?
18. Incorporate Cost-Effective Decorative Items Like Mason Jars or Canisters
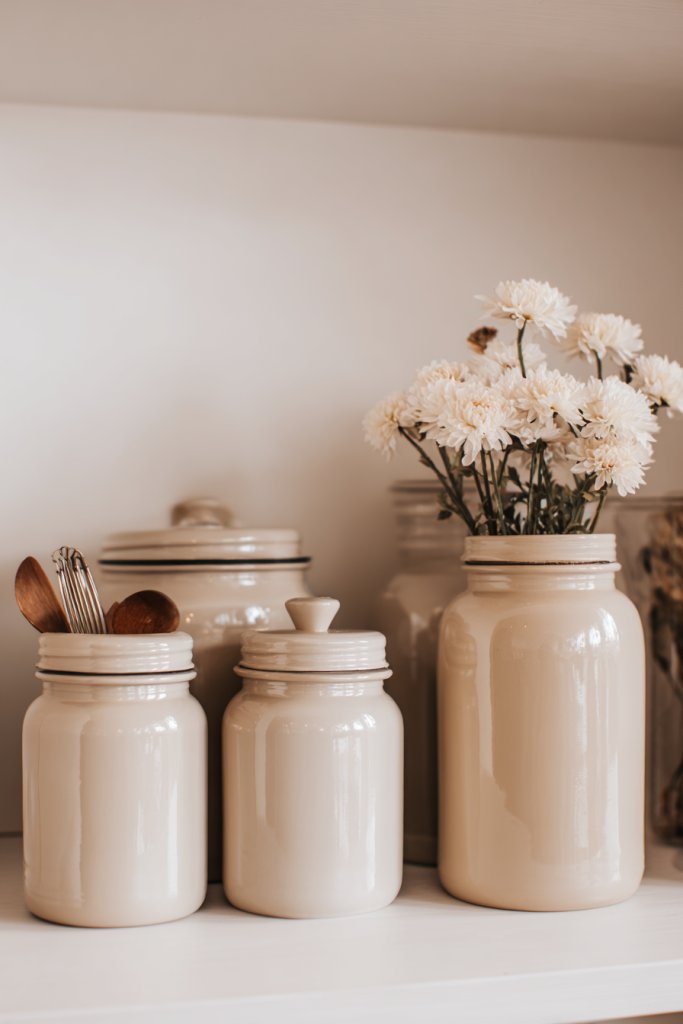
Cluttered counters and cabinets make your kitchen feel chaotic. Decorative jars and canisters are a simple, affordable way to organize and add charm. They make everyday essentials accessible and stylish. Want a neat, attractive kitchen without spending a fortune?
Imagine a row of glass mason jars filled with colorful spices or dried herbs on open shelves. Or sleek, labeled canisters holding flour, sugar, and coffee on the countertop. The transparent containers add a fresh, clean look while making it easy to grab what you need. It’s both functional and decorative.
Choose jars in different sizes for versatile storage. Personalize with labels or painted designs. Use vintage jars for a rustic look or modern, matte-finished containers for a sleek vibe. Group similar items together for visual harmony. Incorporate small decorative items inside jars for extra personality.
Start by cleaning the jars or canisters thoroughly. Label or decorate them as desired, using vinyl labels or paint pens. Fill with essentials or decorative items like pebbles, shells, or dried flowers. Arrange on open shelves or inside cabinets for easy access. Keep lids tight for freshness and safety. Regularly update contents for a fresh look.
Create themed collections—like baking supplies or coffee station. Add personal touches with custom labels or handcrafted tags. Mix and match with other decor elements like textiles or artwork. Use decorative trays or risers to elevate the display. Personalization makes your kitchen uniquely yours.
Decorative jars and canisters are a simple way to upgrade your kitchen’s style and organization. They’re budget-friendly, functional, and endlessly customizable. Once you see the tidy, attractive display, you’ll be motivated to keep things looking great. Ready to add some charm?
19. Install Cheap but Stylish Open Shelves with Brackets and Wood

Closed cabinets and cluttered counters can make your kitchen feel cramped. Installing open shelves is a cost-effective way to add storage and style. Using inexpensive brackets and reclaimed wood keeps costs low while creating a trendy, functional focal point. Want quick, impactful storage?
Picture sturdy black metal brackets supporting reclaimed wood planks holding dishes, bowls, and glassware. The open design showcases your favorite pieces and adds visual interest. The natural wood grain combined with industrial brackets creates a modern rustic look that’s both warm and practical.
Adjust the length and height of shelves based on your space. Mix materials like wood and metal for a layered look. Use different finishes—stained, painted, or raw—to match your decor. Incorporate decorative brackets for extra flair or keep it simple for minimalism. Large or small, these shelves adapt to your needs.
Mark the wall where you want the shelves, using a level for accuracy. Drill into wall studs for stability. Attach brackets securely with screws, ensuring they are level. Cut your wood to size, sanding edges smooth. Mount the wood on brackets, then arrange your items artistically. Seal or paint the wood if desired for protection.
Decorate with colorful dishes or vintage collectibles. Incorporate small potted herbs or decorative jars. Use lighting under the shelves to highlight your display. Personal touches like painted patterns or signage add character. Style it to reflect your personality and taste.
Open shelving is a stylish, budget-friendly upgrade that enhances storage and display. It encourages creativity and makes your kitchen more inviting. Once installed, it’s a visual statement you’ll be proud of. Ready to add some open-shelf charm?
20. Paint or Stain Old Wooden Chairs or Stools for a Cohesive Look
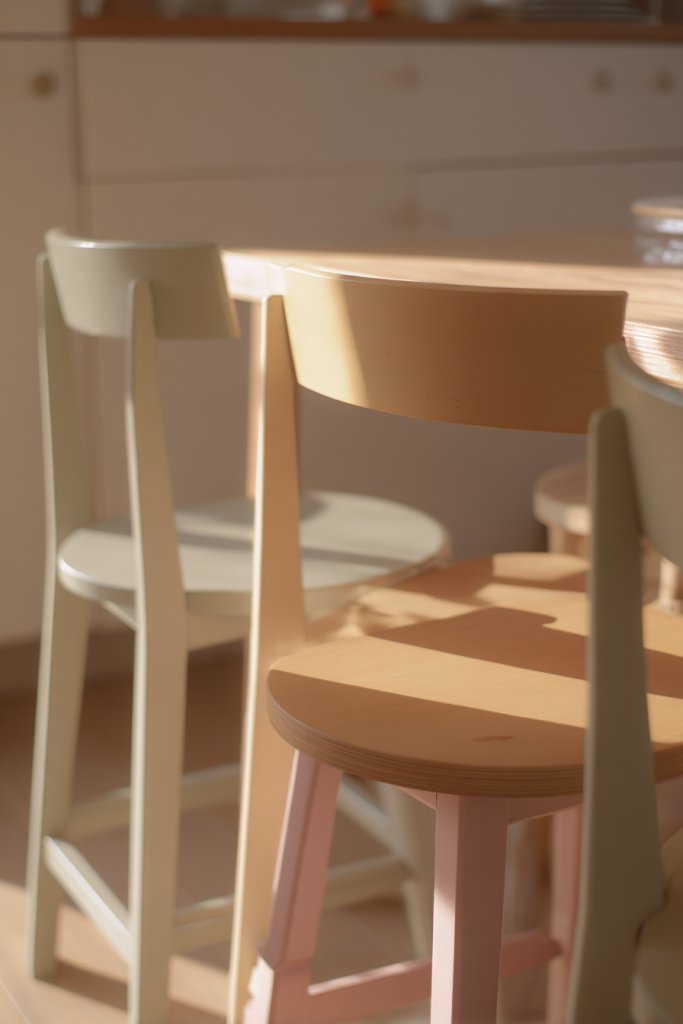
Old wooden chairs or stools often look tired and mismatched, dragging down your kitchen’s style. Giving them a fresh coat of paint or stain is an easy way to create a cohesive, updated look. It’s a simple project that can dramatically change your space’s vibe. Want uniformity and style without buying new?
Imagine a set of vintage wooden stools painted in a soft pastel hue, perfectly matching a newly painted island. Or a rustic chair stained dark to add warmth and richness. The new finish highlights the wood’s grain or adds a pop of color, transforming old furniture into statement pieces. It’s a quick, impactful update.
Choose bold colors for a playful look or neutral tones for versatility. Distress or weather the paint for a shabby chic effect. Stain different wood types to highlight natural grains and imperfections. Match the finish to your decor style—modern, farmhouse, or eclectic. These small tweaks make a big difference.
Sand the furniture to remove old paint or finish, preparing a smooth surface. Apply a primer if you’re painting, then paint or stain with a brush or sprayer. Use multiple thin coats for even coverage, allowing drying time between layers. Seal with a clear topcoat for durability, especially if the furniture is used frequently. Replace or add new cushions for comfort and style.
Decorate with custom stencils, patterns, or hand-painted designs. Add decorative trim or new hardware for extra flair. Mix and match colors or finishes for a layered, personalized look. Use fabric or leather cushions to add comfort and style. Personal touches make furniture uniquely suited to your space.
Refinishing old chairs and stools is a budget-friendly way to unify your kitchen’s look. It’s a satisfying project that showcases your DIY skills and creativity. Once finished, these pieces will feel like they belong, elevating your entire decor. Ready to give your furniture a fresh look?
21. Use Creative Organization Hacks to Maximize Space and Style

Cluttered countertops and cabinets make your kitchen feel chaotic and less functional. Creative organization hacks help you maximize space while keeping everything looking neat and stylish. They’re budget-friendly solutions that can be customized to your needs. Want a clutter-free, efficient kitchen?
Picture tension rods mounted under shelves holding hanging utensils or cleaning supplies. Or stackable bins and stacking shelves to make use of vertical space. Magnetic strips for knives or metal spice jars keep essentials within reach. These hacks create a tidy, streamlined look that’s also practical.
Mix and match storage solutions—use baskets, jars, or DIY hacks—to fit your space and style. For small kitchens, vertical storage is key; for larger spaces, dedicated zones work well. Use clear containers for easy identification or label everything for quick access. Adjust and reorganize seasonally or as your needs change.
Identify problem areas and plan your layout. Install tension rods, hooks, or shelves in strategic spots. Repurpose everyday items like jars or crates as organizers. Secure heavy or frequently used items at accessible heights. Regularly declutter and reassess your system to stay organized. Keep tools and supplies tidy and within reach.
Decorate storage with colorful labels or patterned liners. Incorporate personalized containers or DIY tags. Use decorative baskets or bins to add visual interest. Arrange items in a way that’s both functional and attractive, reflecting your personality. Personal touches make organization feel less like a chore.
Creative hacks turn a cluttered kitchen into a functional, beautiful space. They boost your confidence in DIY projects and keep you motivated. Once you see your kitchen organized, you’ll enjoy cooking and entertaining more. Ready to hack your way to an organized kitchen?
Conclusion
With a diverse range of budget-friendly ideas, you now have plenty of inspiration to refresh your kitchen in a cost-effective way. From simple paint updates to smart organizational hacks, these ideas are designed to maximize style and functionality while minimizing expenses. Don’t hesitate to try these tips and make your dream kitchen a reality—your stylish, budget-friendly transformation awaits!
Leave a Reply