Ever since IKEA revolutionized the way we furnish our homes, the concept of hacking their products has become a creative craze. People love DIY IKEA hacks because they combine affordability with customization, allowing everyone to craft unique and personalized spaces without breaking the bank.
In this article, you’ll find an exciting mix of ideas to transform ordinary IKEA items into extraordinary decor, storage solutions, and statement pieces. Whether you’re into sleek minimalism, rustic charm, or bold designs, there’s something here to inspire your next home project. Get ready to unlock your creativity and elevate your living space with these innovative hacks!
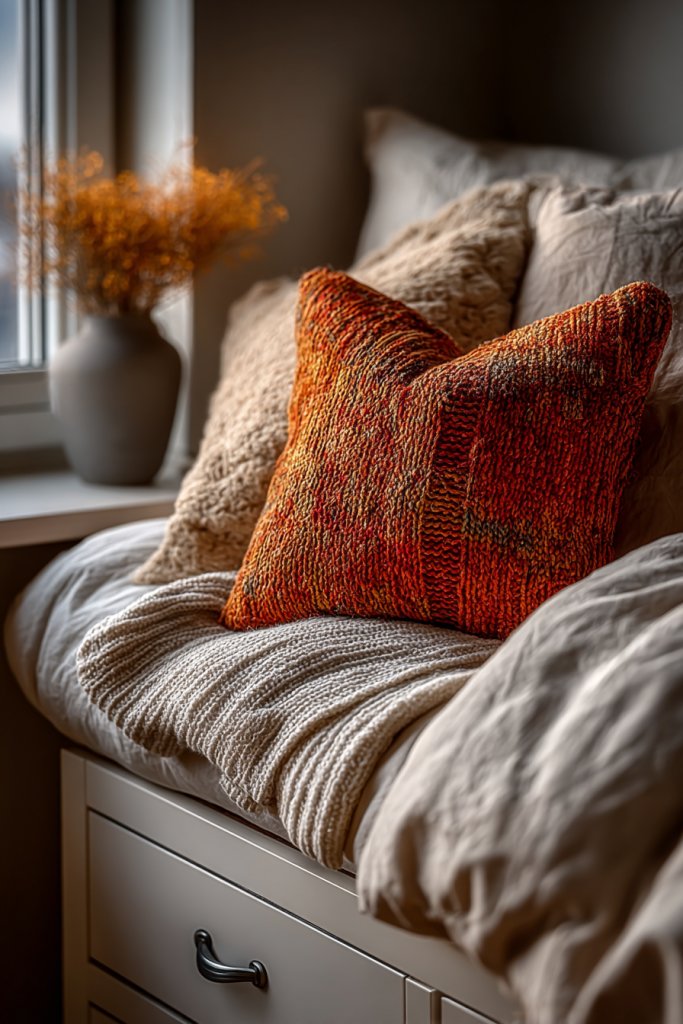
1. Custom Under-Bed Storage Drawers with IKEA Kallax Units
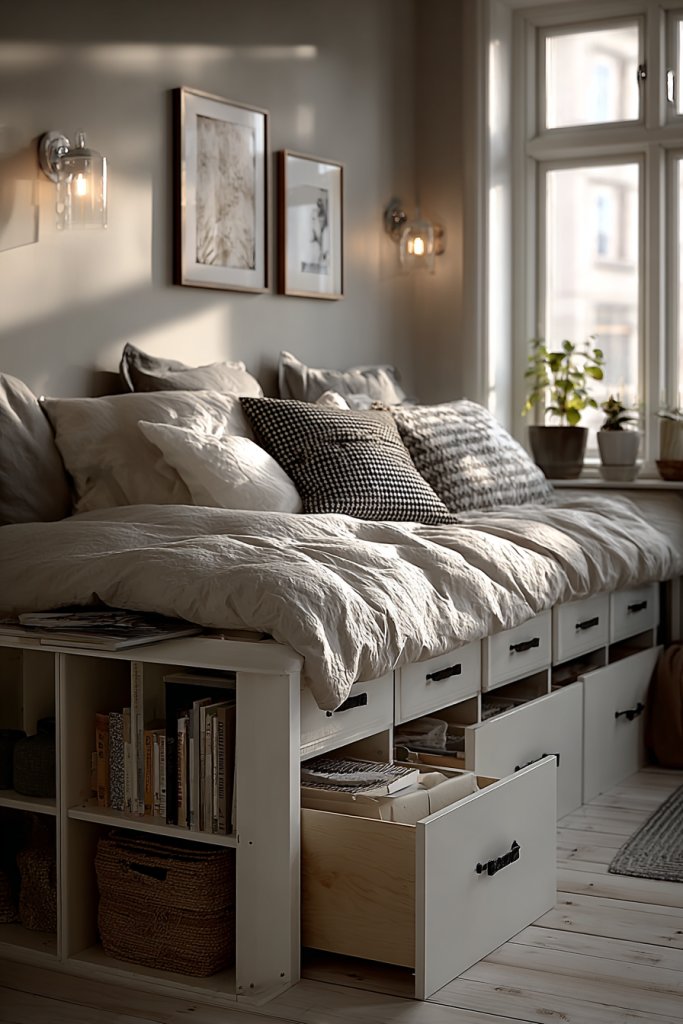
Ever struggle with finding enough hidden storage in your bedroom without sacrificing style? Conventional drawers can clutter your space or look bulky. You want a sleek solution that keeps things organized and accessible. The challenge is creating storage that fits seamlessly under your bed while adding a personal touch.
Imagine sliding open a painted or wallpapered front panel revealing a deep drawer tucked neatly beneath your bed. The painted edges contrast with soft bedding, while decorative knobs add charm. The drawer fronts could feature bold patterns, textured finishes, or subtle metallic accents. It feels like custom furniture, but it’s just a DIY upgrade.
Choose bold colors or calming neutrals based on your decor. For a kids’ room, fun patterns or playful textures work well, while sophisticated fabrics suit master bedrooms. Adjust the height of the drawers to match your bed frame for a flush look. Seasonal wallpaper swaps can refresh the look without a complete overhaul.
Start by measuring your bed clearance and the Kallax unit dimensions. Paint or wallpaper the drawer fronts with durable, washable material for easy maintenance. Attach the fronts to the Kallax shelves with hinges or adhesive strips, ensuring smooth opening. Use sturdy handles or knobs for better grip. Optional casters can make sliding the drawers easier. Finish with a sealant or lacquer for longevity.
Add decorative trims or metallic accents to match your room’s vibe. Incorporate labels or monogrammed handles for a custom effect. Use soft fabric linings inside the drawers for delicate items. You can also label each drawer for quick access, making it both functional and stylish.
This simple hack transforms basic storage into a personalized feature that elevates your entire bedroom. It proves that with a little effort, you can create custom furniture without the hefty price tag. Your space will feel more organized, stylish, and uniquely yours, inspiring confidence in DIY projects everywhere.
2. Repurposed IVAR Cabinets as Vintage Bathroom Vanities
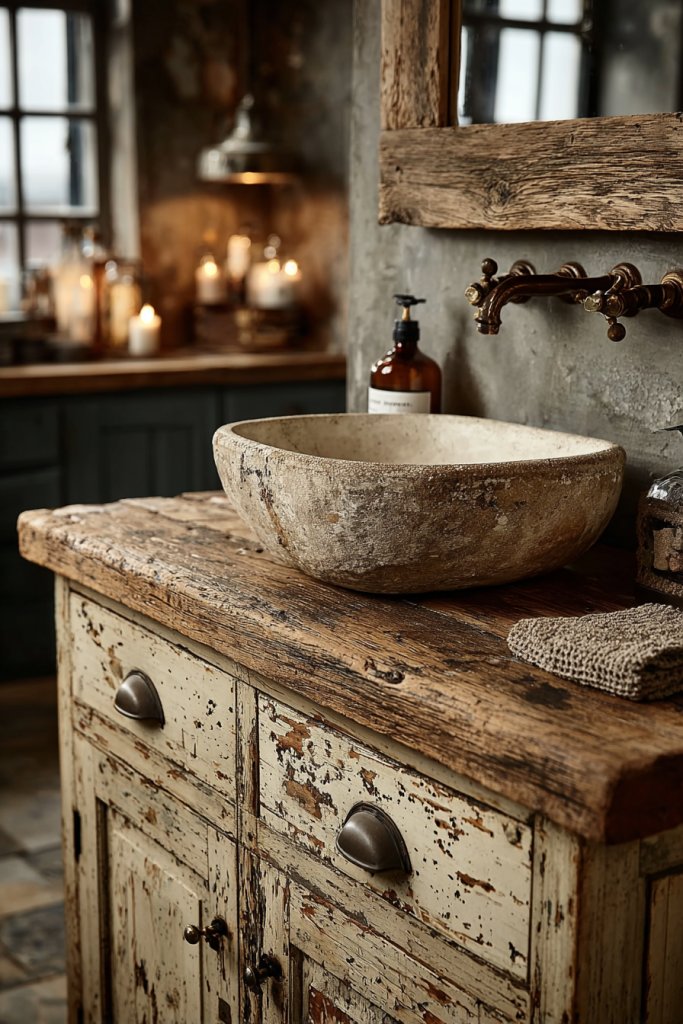
Ever wish your bathroom had that charming vintage feel without the hefty price tag? Standard vanities often look plain or lack character. You crave a rustic or modern vibe that truly reflects your style. The trick is transforming affordable shelving into a bespoke bathroom centerpiece.
Picture a weathered IVAR cabinet painted in soft matte shades or left raw for a rustic look. It’s topped with a sleek, custom-made countertop—perhaps wood or stone—that complements the open shelving. Baskets or woven containers sit inside for towels and toiletries, giving a cozy, organized feel. The result is a unique vanity that feels like it belongs in a boutique hotel.
Pick finishes that match your decor—distressed paint for farmhouse charm or clean, matte black for a modern touch. Add a simple vessel sink or a vintage-style basin for character. Adjust the height or add caster wheels for mobility in small bathrooms. Decorate with vintage hardware or modern knobs for subtle style shifts.
Refinish the IVAR shelves with chalk paint, stain, or varnish. Seal with a protective top coat to withstand moisture. Attach a custom top—wood, ceramic, or composite—that fits your space perfectly. Install a faucet and plumbing, ensuring the cabinet structure can support the weight. For added stability, reinforce corners or add extra supports if needed. Incorporate baskets or jars inside for efficient storage.
Personalize with decorative hardware or painted accents. Use fabric-lined baskets or ceramic containers to organize small items. Add a vintage mirror or rustic light fixtures nearby to complete the look. You can also customize with decals or stencils to add patterns or monograms, making it truly one-of-a-kind.
This DIY vanity proves that you don’t need to buy expensive furniture to get a high-end look. It’s a creative way to add character and function while keeping costs down. With a little effort, your bathroom becomes a reflection of your style and personality, inspiring more DIY adventures.
3. Stylish Wall-Mounted Shoe Organizer Using BILLY Bookcases
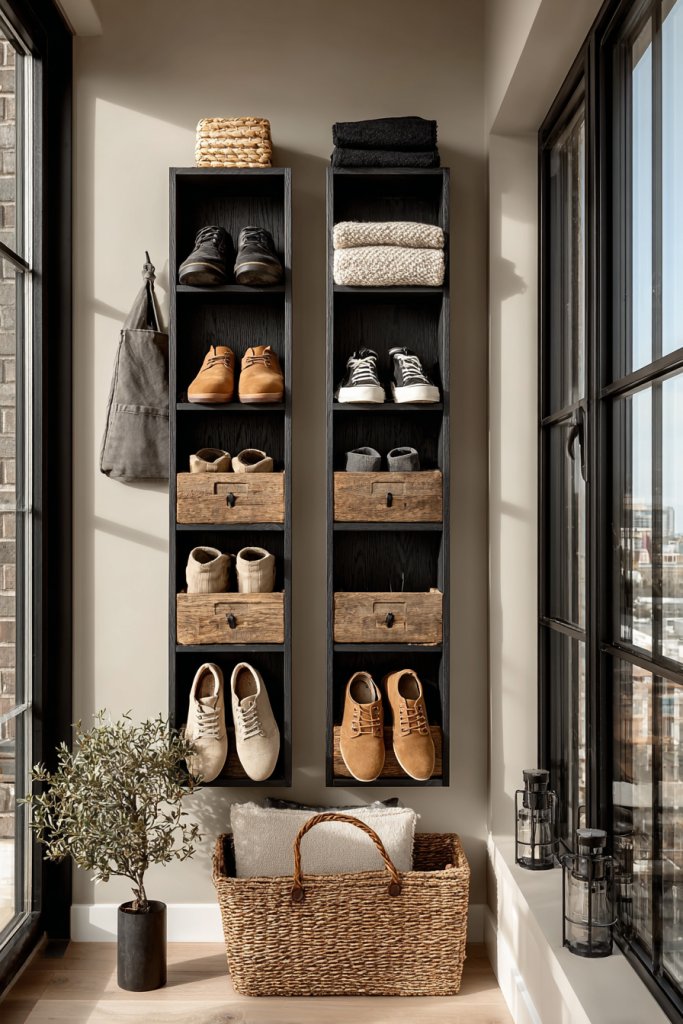
Tired of shoes cluttering your entryway or closet floor? Conventional shoe racks can look bulky and take up precious space. You want a stylish, space-saving solution that keeps your footwear accessible and organized. The goal is to turn simple bookcases into a functional decor piece.
Imagine mounting horizontal BILLY bookcases along a wall, with shoes neatly arranged on each shelf. The clean lines of the bookshelves contrast beautifully with your wall color, creating a modern gallery of footwear. You can add small decorative elements like textured baskets or storage bins for accessories. The setup feels effortless, sleek, and highly personalized.
Paint or wallpaper the back panels of the shelves to add visual interest. Vary shelf heights to accommodate different shoe types, from sneakers to heels. For tighter spaces, stack multiple units vertically or install angled shelves for easy access. Incorporate hooks or small bins for keys, sunglasses, or scarves nearby.
Secure the BILLY units to the wall with brackets for safety. Use a level to ensure perfect alignment. Customize the exterior with paint or contact paper for a cohesive look. Arrange shoes by size or style for efficiency. Add non-slip pads or mats on each shelf to prevent shoes from slipping. For a final touch, add decorative hardware or labels.
Decorate the edges with washi tape or metallic accents. Incorporate small LED strip lights for better visibility. Label sections for family members for quick retrieval. Mix in decorative elements like small sculptures or textured panels to elevate the display.
This idea turns cluttered shoe chaos into a curated wall display. It’s a practical project that instantly upgrades your space while showcasing your style. Once done, you’ll wonder why you didn’t do this sooner—making organization both beautiful and fun.
4. Turn IKEA Lack Tables into Chic Coffee Tables with Decoupage
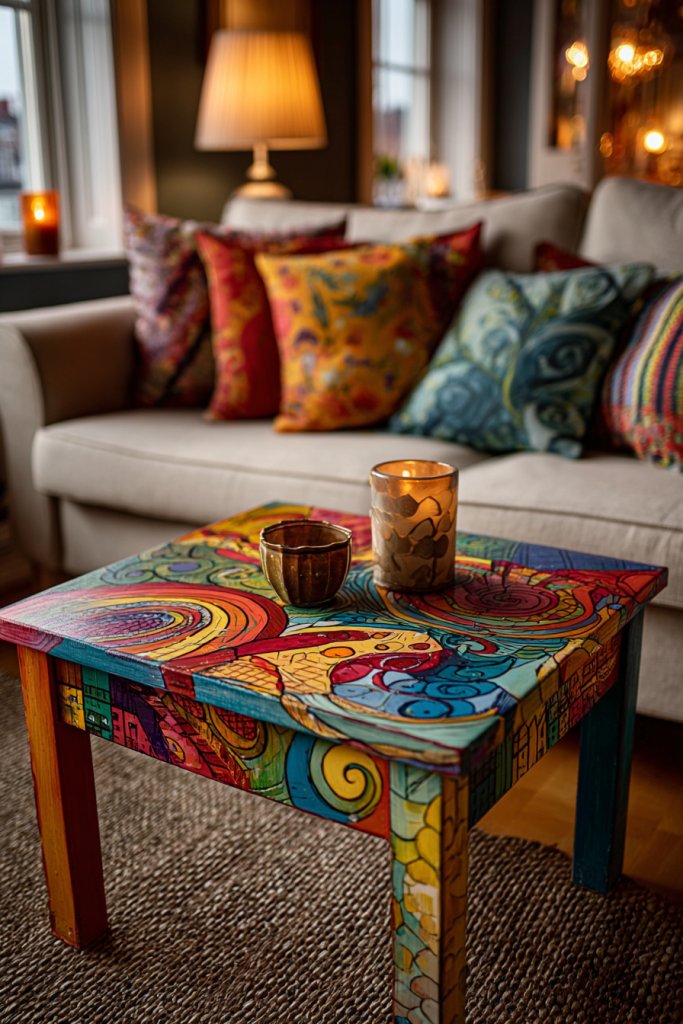
Looking for an affordable way to elevate your living room decor? Standard coffee tables can be boring or clash with your aesthetic. You want a piece that stands out, reflecting your personality. The solution: give a basic Lack table a chic, personalized makeover.
Visualize a white Lack table transformed with colorful, patterned paper or fabric glued onto the surface. Once sealed with a glossy finish, it becomes a textured, vibrant centerpiece. The edges could be decorated with metallic foil or painted accents for extra flair. It’s a DIY project that adds instant character and color.
Use floral prints for a feminine touch, geometric patterns for modern vibes, or vintage maps for an eclectic look. Choose waterproof paper or fabric to handle spills. Incorporate a clear protective topcoat for durability. You can also add decorative trim or painted legs to match your room’s style.
Start by sanding the Lack surface lightly for better adhesion. Cut your chosen paper or fabric to fit the tabletop, then glue it down smoothly with decoupage medium. Seal with multiple layers of gloss or matte topcoat for a durable finish. Clip or paint the table legs in coordinating colors or patterns. Allow ample drying time between coats. For extra polish, add a few decorative elements like metallic accents or textured tape.
Mix and match patterns or create a collage for a unique look. Add stenciled borders or hand-painted details for a custom touch. Use contrasting colors on the legs for visual balance. Incorporate small felt pads underneath to prevent scratching floors. Replace the tabletop periodically for seasonal refreshes.
This simple hack proves you don’t need to splurge for style. It’s a fun way to showcase your creativity and make your living space truly yours. Once finished, it’s a conversation starter and a testament to your DIY skills—who knew a Lack table could look this good?
5. Modular Closet System with PAX Wardrobes and Custom Inserts
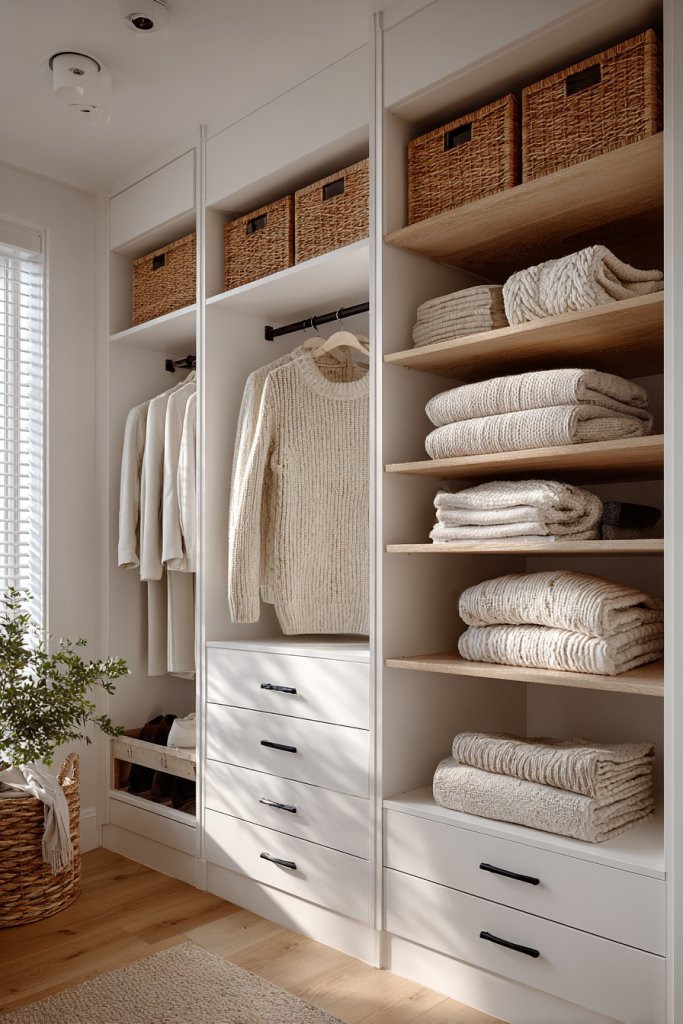
Is your closet a chaotic mess? Standard wardrobes often don’t fit your needs or style. You want a tailored storage solution that maximizes space and keeps everything in its place. The answer is a modular system that adapts to your wardrobe dreams.
Picture opening a sleek PAX wardrobe customized with interior organizers, drawers, and hanging rods. Each section is tailored for shirts, pants, or accessories, with adjustable shelves and compartments. The interior lighting adds a soft glow, highlighting your neatly arranged clothes. It’s a personalized, clutter-free sanctuary that looks as good as it functions.
Opt for different finishes—wood veneer, matte, or high-gloss—to match your decor. Incorporate pull-out baskets or tie racks for accessories. For a compact room, use narrower units and maximize vertical space. Seasonal adjustments can include swapping out shelves or adding extra drawers. Personal touches like decorative handles or subtle trim elevate the design.
Plan your space carefully, measuring door openings and interior dimensions. Choose PAX units with appropriate internal accessories—hanging rods, shelves, or drawers. Assemble the units following instructions, then customize with inserts and organizers. Secure the units to the wall for safety. Install lighting if desired, using LED strips or puck lights. Keep tools handy for precise adjustments.
Add decorative hardware or painted accents to the doors. Use labels or custom tags inside drawers for quick identification. Incorporate a mirror or small shelf on the outside for convenience. Mix different finishes or textures for visual interest. Keep your system flexible by adding or removing modules as your wardrobe evolves.
This modular approach shows how you can turn a bland closet into a bespoke storage haven. It’s a satisfying project that pays off with long-term organization. Your wardrobe will become a reflection of your personality, inspiring better dressing habits every day.
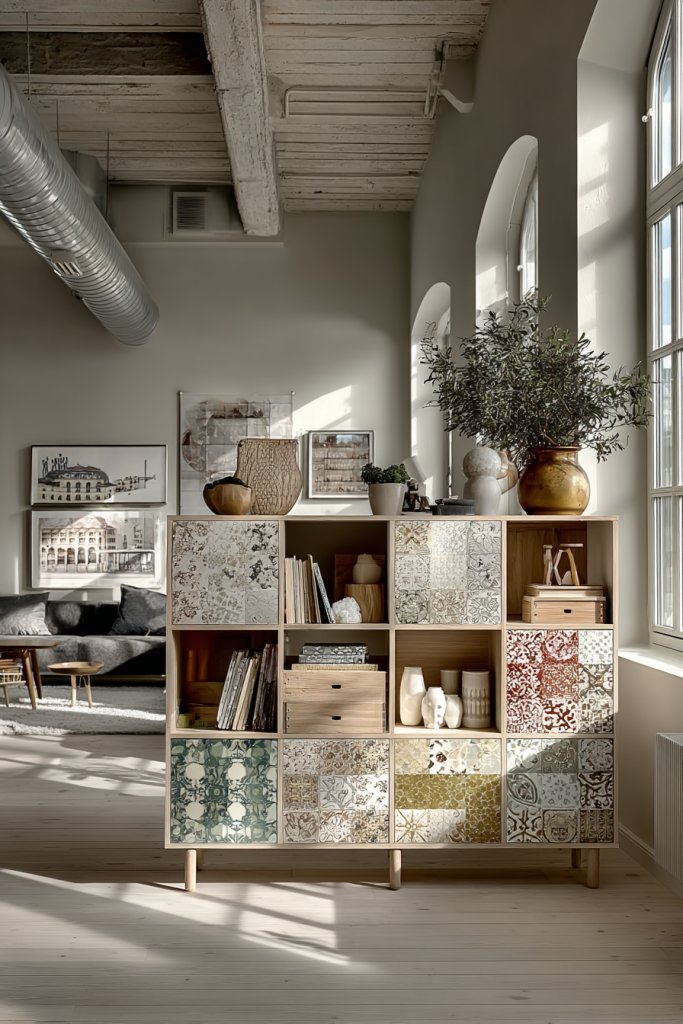
6. DIY Hanging Plant Shelf from IKEA EKET Modules (without plants)
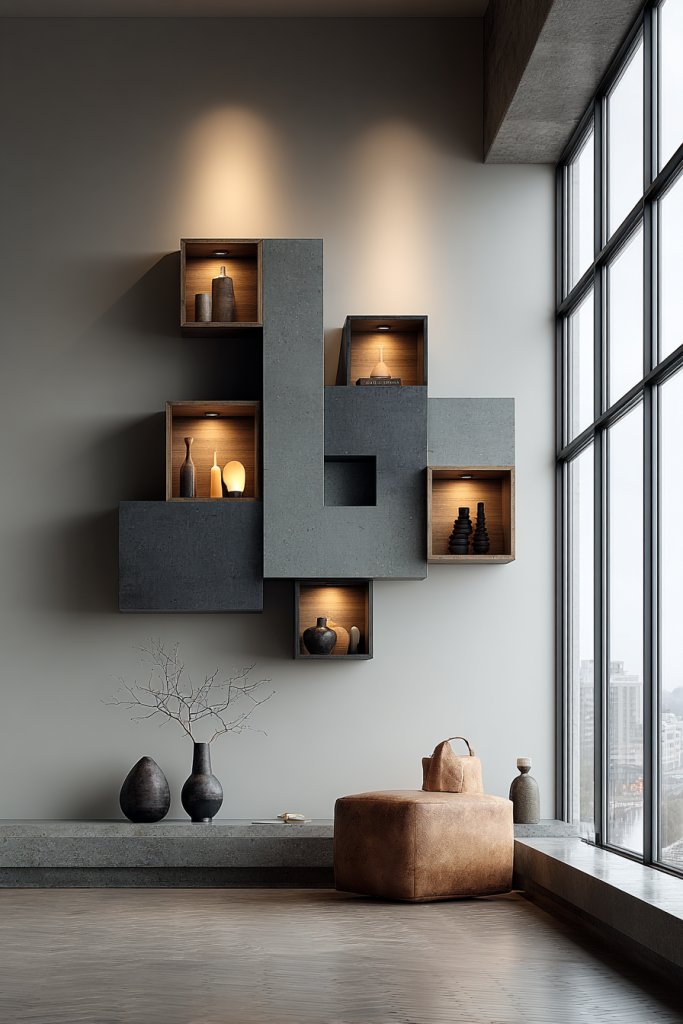
Want a stylish way to display decorative items or books on your wall? Hanging shelves are great, but often look generic or cluttered. You desire a clean, geometric look that adds visual interest without taking up floor space. The trick is creating a minimalist wall display using modular units.
Visualize assembling a series of EKET modules into a sleek, geometric pattern on your wall. The units are arranged in a grid or staggered layout, painted in coordinating colors or left in natural wood. You can display decorative objects like ceramic sculptures, framed photos, or stacks of books—no plants needed. The clean lines and neutral palette give your space a modern, organized vibe.
Mix different sizes or orientations for visual rhythm. Use bold colors for a playful look or monochrome tones for sophistication. Secure the modules with brackets or hidden hardware for a floating effect. For a more eclectic style, add decorative trims or textured wall backgrounds. Adjust the arrangement seasonally or as your collection grows.
Start by planning your wall layout on paper or a digital app. Paint or wallpaper the EKET modules in your preferred colors. Attach the modules to the wall with appropriate hardware, ensuring they are level and secure. Use a level tool during installation for precision. Inside, you can add small baskets or dividers for organization. Finish by hiding hardware or adding decorative touches to the edges.
Customize the look with metallic or matte finishes. Incorporate LED strip lighting behind the modules for ambient glow. Use decorative hardware or stickers to label or add motifs. Change out displayed items periodically to keep the look fresh. You can also add a few floating shelves for additional display options.
This modular wall system showcases how simple, geometric design can transform your space. It’s a fun project that adds personality and order without clutter. Once installed, it will inspire you to keep your decor minimal yet impactful, making your walls a statement of style.
7. Create a Multi-Functional Kitchen Island from IKEA SEKTION Cabinets
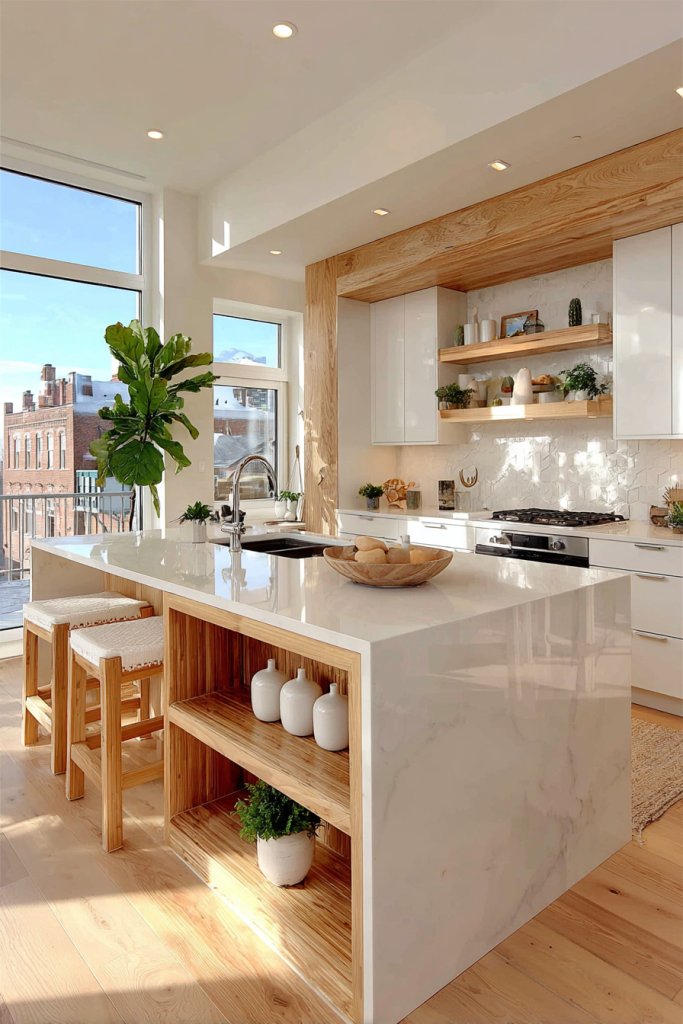
Does your kitchen lack a central workspace or sufficient storage? Buying a pre-made island is costly and often bulky. You want a customized, functional piece that fits your space and lifestyle. The solution is assembling a DIY kitchen island from IKEA SEKTION cabinets.
Imagine combining several base cabinets topped with a sturdy wooden or stone countertop. The island offers ample storage underneath for pots, pans, and utensils, while the surface provides a generous prep area. You can add open shelving or decorative panels for a personalized touch. It anchors your kitchen with style and practicality.
Choose cabinet finishes that match or contrast your cabinetry—matte, high-gloss, or wood veneer. Add wheels or casters for mobility, especially if your space is small or needs flexibility. Incorporate open shelves or closed drawers depending on your storage needs. Seasonal decor or textiles like a patterned runner can change the look for different occasions.
Start by planning your layout and measuring available space. Assemble the SEKTION cabinets with interior organizers like drawers and pull-outs. Attach a durable top—wood, laminate, or stone—secured to the cabinets. Install any additional accessories or hardware for ease of use. Use locking casters if mobility is desired but ensure stability during use. Finish with sealant or protective coating on the surface.
Decorate with decorative hardware or paint the cabinet fronts for a custom look. Add hooks or rails on the sides for utensils or towels. Incorporate under-counter lighting or small pendant fixtures for task lighting. Use decorative storage bins inside for organization and style.
This DIY approach provides a practical, stylish upgrade to your kitchen without breaking the bank. It’s a project that combines craftsmanship with everyday functionality. Your new island will become the heart of your home, encouraging culinary creativity and social gatherings.
8. Design a Cozy Reading Nook with IKEA LACK Shelves and Cushions
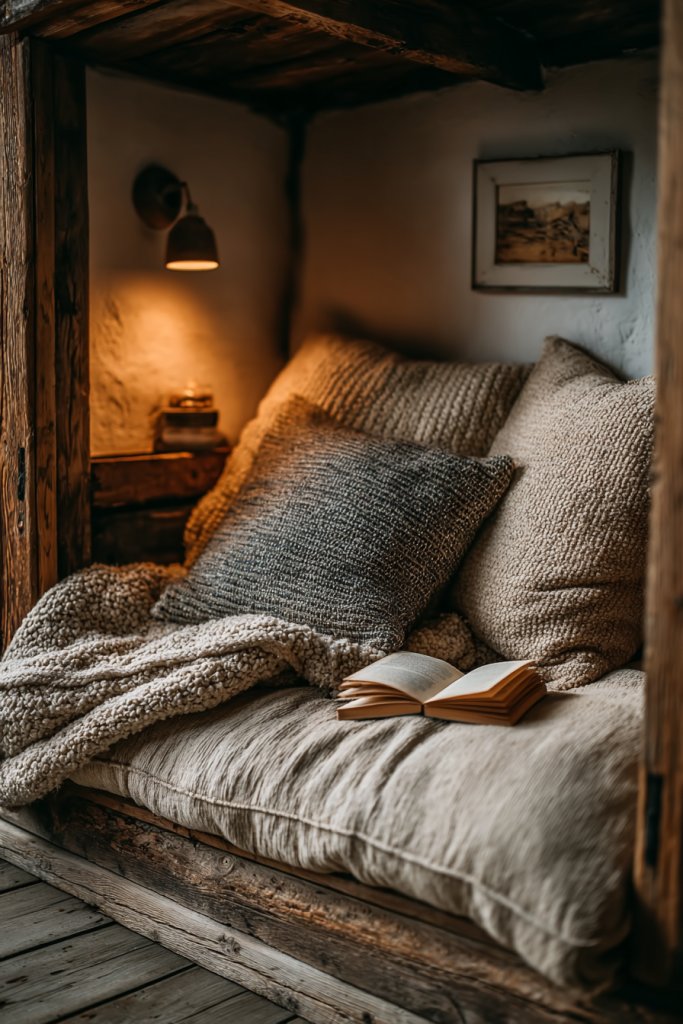
Craving a quiet corner to unwind with a book, but your space is too small or lacks a dedicated reading spot? A cozy nook can make a big difference. You want a comfortable, inviting space that feels personal and relaxing. The solution is creating a custom reading corner with simple IKEA LACK shelves.
Visualize stacking LACK shelves vertically along a wall, creating a makeshift bookshelf that curves around a cozy corner. Add a plush cushion or bean bag underneath, with an assortment of throws and pillows for comfort. Soft lighting, like fairy lights or a small wall sconce, enhances the ambiance. The result is an inviting retreat that beckons you to relax and read.
Paint or wallpaper the back wall for a burst of color or pattern. Use a variety of textured cushions and throws—think faux fur, chunky knits, or velvet—to add tactile richness. Incorporate a small side table or storage ottoman for convenience. Adjust the height and number of shelves based on your space and collection. Seasonal decor or artwork can change the mood.
Install the LACK shelves securely into wall studs or anchors. Mix and match shelf lengths and orientations for visual interest. Add a thick, comfortable cushion or small sofa on the floor. Decorate the shelves with books, decorative boxes, or art pieces, avoiding restricted items. Use soft lighting to create a warm glow, and add a small side table or footstool for extra comfort. Keep the space clutter-free for maximum coziness.
Layer textiles like rugs, throws, and cushions for tactile comfort. Incorporate decorative storage baskets or boxes inside the shelves. Personalize the space with framed photos or inspiring quotes. Change up the color palette seasonally to keep the nook fresh and inviting.
This nook transforms a simple corner into your personal sanctuary. It encourages you to spend more quality time reading and relaxing at home. Plus, it’s a project that’s easy to tweak over time, keeping your space feeling fresh and aligned with your mood.
9. DIY Floating Wall Desk Using IKEA LINNMON and ADILS Legs
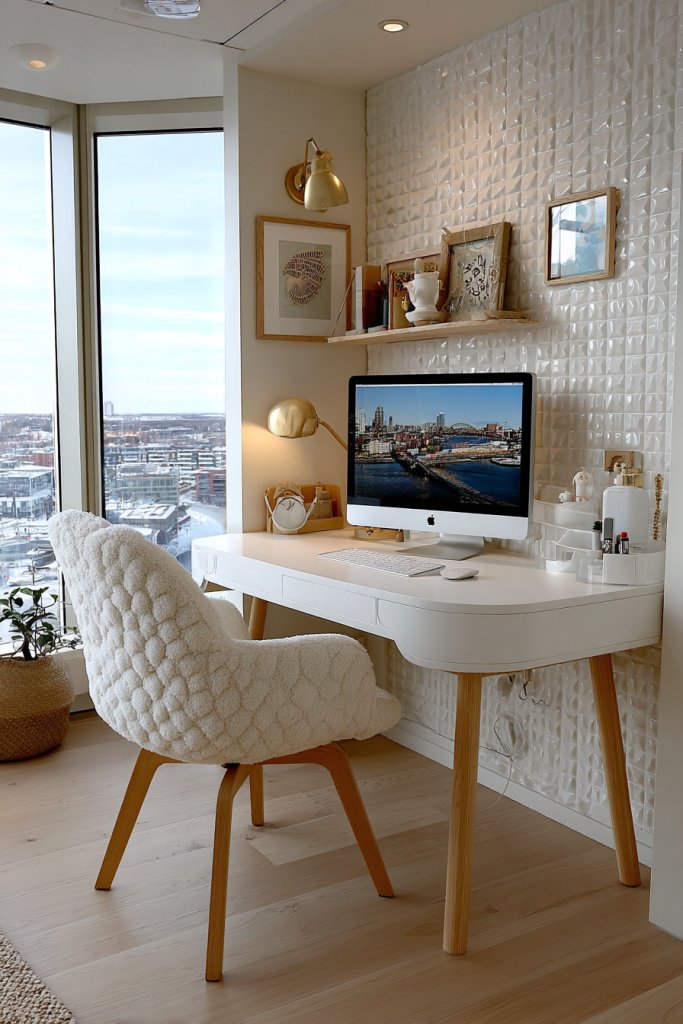
Struggling to find a functional workspace in your small apartment? Conventional desks take up too much room or look bulky. You want a sleek, space-saving solution that blends into your decor. The answer is a floating wall desk made from simple IKEA components.
Imagine a slim LINNMON tabletop mounted directly onto your wall, supported by minimalist ADILS legs. It appears to float effortlessly, creating a modern, open feel. The surface holds your laptop, notebooks, and a few accessories, while the space underneath remains free for storage or foot traffic. The clean lines and neutral tones make it versatile for any room.
Choose a tabletop size that fits your needs—long for multiple monitors or compact for quick tasks. Paint or veneer the surface to match your style. Attach additional wall-mounted shelves or pegboards for extra organization. For a more industrial look, opt for black or metallic legs. Adjust the height for ergonomic comfort or to suit your space.
Start by measuring your available wall space and marking the desired height. Attach the LINNMON panel securely using appropriate wall anchors and screws. Install the ADILS legs at each corner, ensuring they’re level. Decorate the surface with minimal accessories—think a stylish mouse pad or a small lamp—avoiding clutter. Consider cable management solutions for a tidy look. Finish by adding a small wall-mounted organizer or corkboard for notes.
Paint the legs or add decorative tape for a pop of color. Incorporate a fold-down shelf or extend the surface with additional panels if needed. Use decorative adhesive decals or stencils to personalize the underside or edges. Keep the workspace organized with small containers or clips, making it both functional and stylish.
This floating desk combines style with practicality, perfect for small spaces. It shows that with a little ingenuity, you can create a comfortable workspace that looks great and saves space. Now, you have a dedicated spot to work or craft that enhances your home environment.
10. Transform IKEA RAST Dressers into Rustic Nightstands
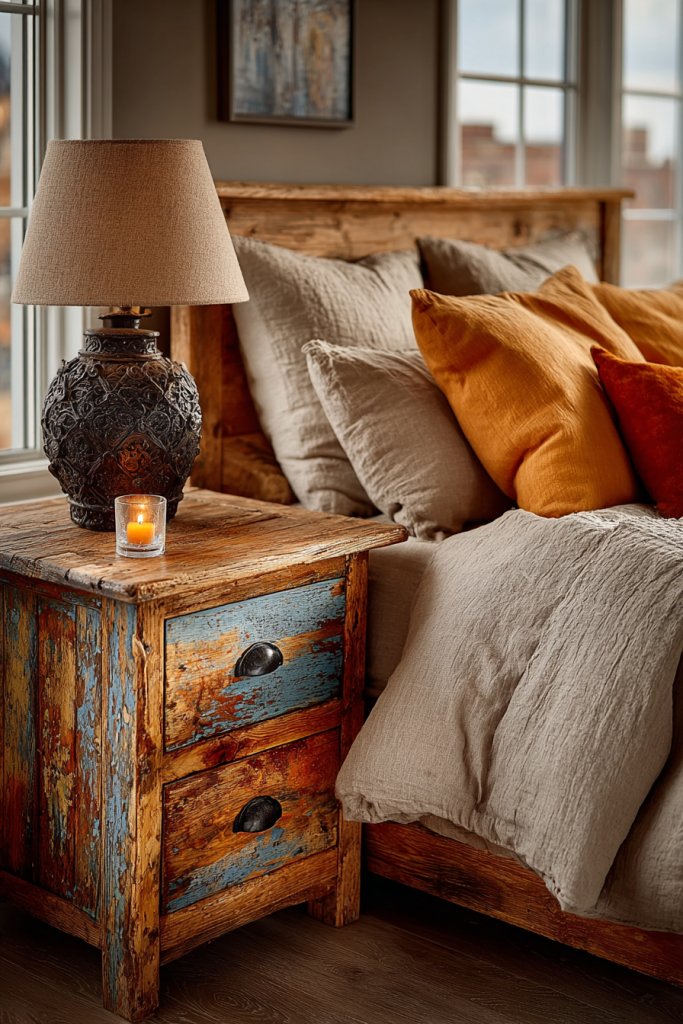
Looking for budget-friendly nightstands that add charm to your bedroom? Off-the-shelf options often lack personality or look generic. You want a unique piece that feels warm and inviting. Turning simple RAST dressers into rustic nightstands is a fun and affordable solution.
Picture sanding down the RAST drawers to reveal the natural wood grain, then staining or painting them in earthy tones. Add vintage-style knobs or handles for a charming touch. Place a soft, textured throw blanket or a decorative tray on top—no vases or artwork needed. The end result is a cozy, rustic bedside table with character.
Leave the wood natural for a Scandinavian look, or stain it dark for a more dramatic effect. For a coastal vibe, paint it in soft blues or whites. Attach small casters for mobility or add a drawer liner for a finished look. Incorporate decorative hardware or paint accents for added personality. Adjust the size or height to fit your space perfectly.
Sand the dresser thoroughly to smooth out rough edges and prepare for finishing. Apply stain, paint, or a combination—think two-tone for extra interest. Install vintage or modern hardware, ensuring they’re securely attached. Seal the finish with a protective coat suitable for furniture. Place a soft cloth or textured mat on top for a cozy feel. Optionally, add small protective pads underneath.
Personalize with stenciled patterns, painted accents, or decorative hardware. Use fabric or leather drawer pulls for a luxe touch. Incorporate small storage baskets or trays inside if needed. Keep the look consistent with your bedroom decor by choosing complementary finishes and hardware.
This project proves that transforming basic furniture into personalized decor is easier and more affordable than you think. It’s a way to add warmth and character to your space while enjoying a creative outlet. Your rustic nightstand will be a conversation piece and a reflection of your style—perfect for cozy nights in.
11. Convert IKEA BILLY Bookcases into Stylish Home Bar Units
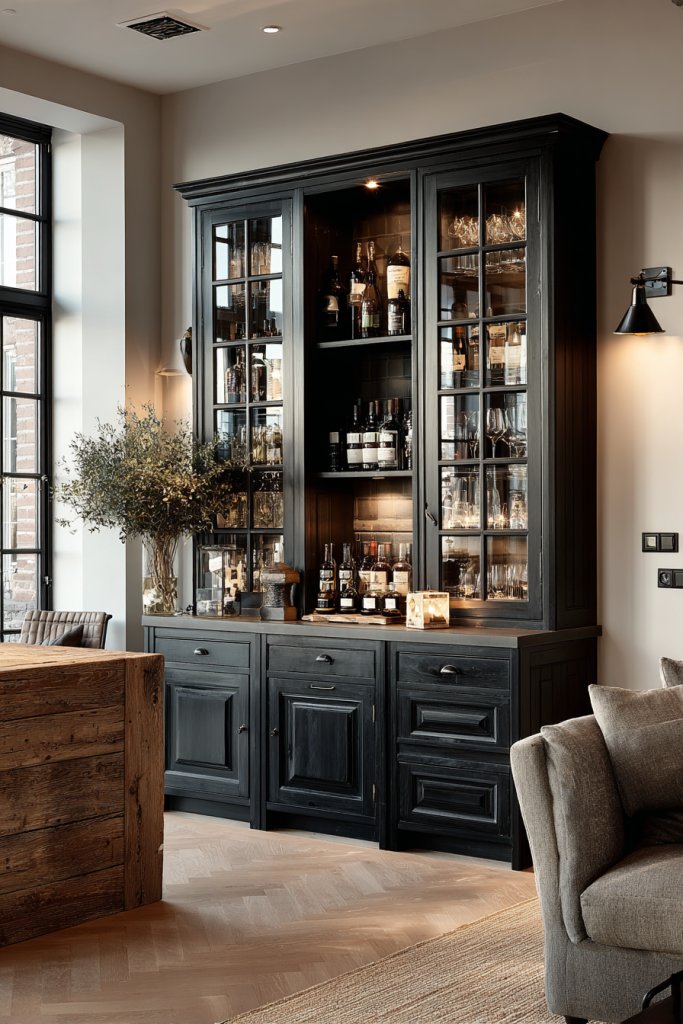
Ever wanted a sleek, compact bar area but thought it was out of reach? Pre-made bar carts can be pricey and limited in style. You desire a customized, stylish solution that fits your space and personality. Turning BILLY bookcases into a home bar is a clever and budget-friendly trick.
Imagine assembling a BILLY unit with glass doors or open shelving, filled with bottles, glassware, and bar tools. Add LED strip lighting inside for a warm glow. Decorate the exterior with metallic or painted accents to match your aesthetic. The finished piece looks like a designer bar, yet it’s just a customized bookshelf.
Paint or wallpaper the back panels for visual depth. Incorporate glass doors, metal handles, or decorative trims for a luxe feel. Adjust the height with additional legs or stacking units for more storage. Use decorative labels or tags to organize bottles and accessories. Seasonal decor or small decorative objects can personalize it further.
Assemble the BILLY bookshelves and secure them to the wall for stability. Customize the interior with removable shelving, bottle holders, or glass racks. Install lighting to highlight the bottles and glassware. Decorate the exterior with a fresh coat of paint or metallic foil for a modern look. Accessorize with cocktail shakers, stirrers, and stylish coasters—avoiding restricted decor items.
Add decorative hardware or stencils for a themed look. Incorporate small decorative trays or bowls inside for garnishes or cocktail accessories. Use labels or tags for different spirits for quick access. Seasonal or themed decor can make your bar a conversation starter.
This DIY bar demonstrates how simple furniture hacks can create a luxurious, functional space. It’s a project that combines style with practicality, perfect for entertaining or relaxing at home. Your custom bar will impress guests and boost your hosting confidence.
12. Reimagine IKEA IVAR as a Vintage Kitchen Pantry
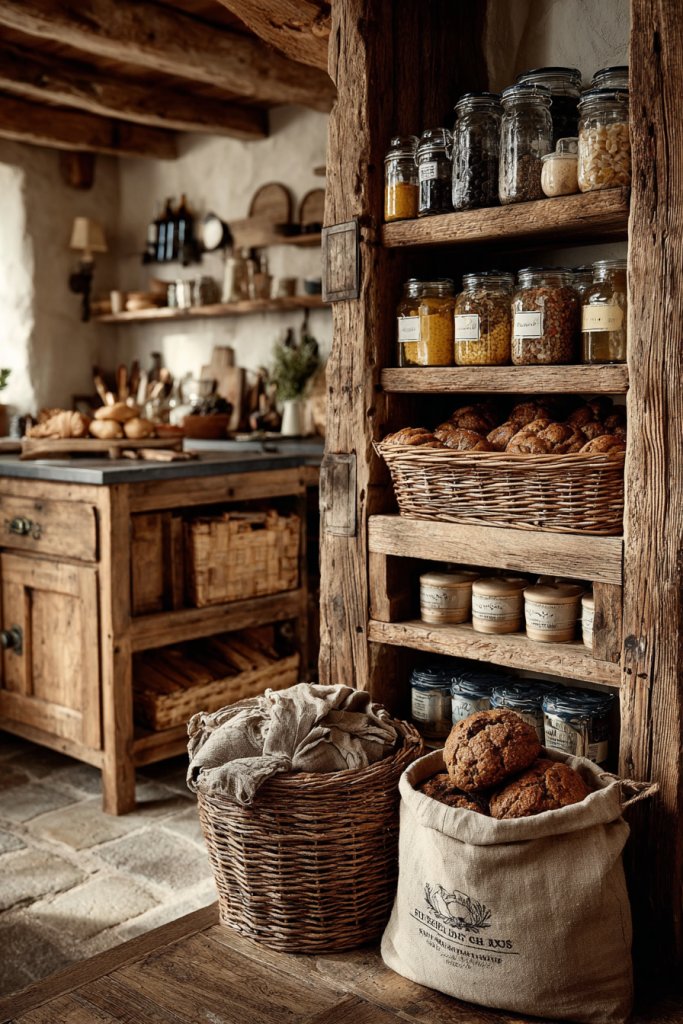
Tired of cluttered countertops and disorganized cabinets? A vintage-inspired pantry can add charm and order to your kitchen. You want an open, accessible storage solution that feels rustic yet functional. Reusing IVAR shelving as a vintage pantry is the perfect DIY fix.
Picture painting or staining IVAR shelves in warm, distressed shades. Arrange baskets, jars, and vintage-style containers inside for grains, spices, and snacks. Add a chalkboard label or stencil for a charming touch. The open shelves and rustic finish create a cozy, farmhouse vibe that’s both practical and beautiful.
Use distressed paint or multiple stain layers for an aged look. Incorporate vintage hardware or decorative brackets. Adjust shelf heights for different container sizes. Add small decorative elements like enamelware or ceramic jars for extra character. Seasonal decor or fabric liners inside baskets can refresh the look.
Refinish the IVAR shelves with chalk or milk paint, then sand lightly for a worn-in effect. Seal with a protective matte finish. Arrange baskets or jars inside, labeling each with handwritten tags or decals. Reinforce the structure if needed for heavier items. Place on a sturdy base or wall-mount for safety. Decorate with vintage-inspired hardware or decorative accents.
Add decorative hardware or stenciled labels for a personalized touch. Use fabric liners or paper inside baskets for visual interest. Incorporate small vintage signs or motifs on the sides. Keep the look cohesive with matching containers and accents, creating a warm, inviting space.
This project shows that even basic shelving can be transformed into a charming vintage feature. It’s a practical upgrade that adds personality and order. Your kitchen will feel more inviting, inspiring you to cook and entertain with confidence.
13. DIY Multi-Purpose Entryway Bench with IKEA KALLAX and Cushions
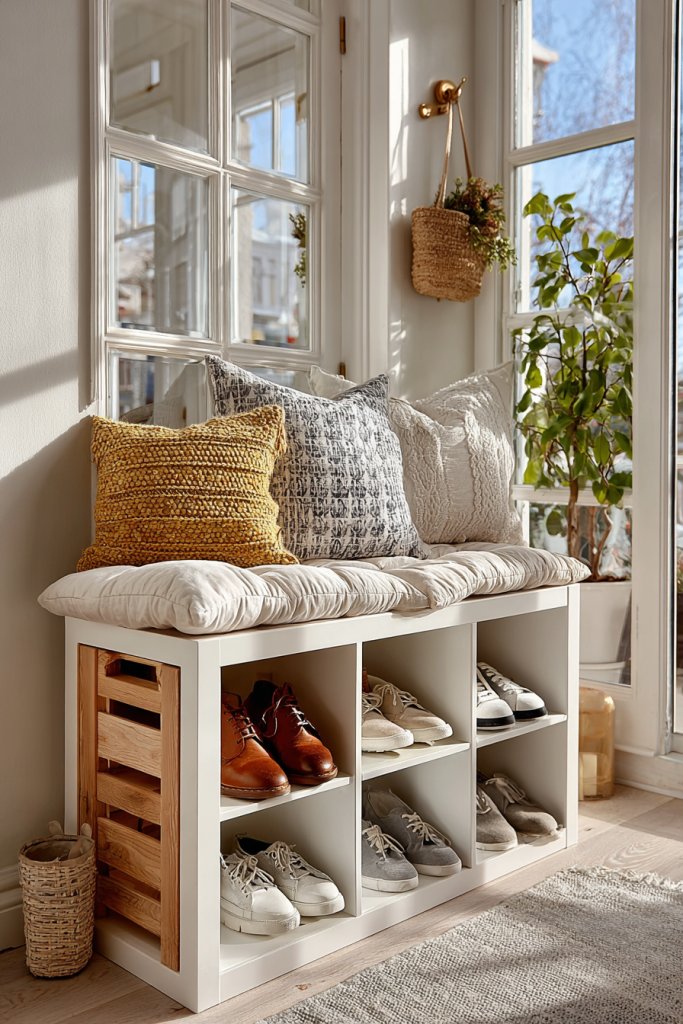
Is your entryway cluttered and lacking seating? You need a practical piece that offers both storage and a place to sit. Off-the-shelf options can be generic or expensive. Building a multi-purpose bench from KALLAX units is a smart, customizable solution.
Visualize stacking KALLAX cubes in a row, topped with a thick, padded cushion for comfort. Inside, store shoes, umbrellas, or bags in decorative baskets or bins. The exterior can be painted or left in a natural finish, blending with your decor. It’s both functional and inviting, creating a welcoming arrival point.
Paint or stain the KALLAX units to match your style—bright colors for a playful vibe or neutral tones for calm elegance. Add hooks or a coat rack above for extra hanging space. Incorporate decorative pillows or throws for added comfort and style. For small spaces, use a narrower unit or corner design.
Secure the KALLAX units to the wall for safety. Choose a comfortable, washable cushion or DIY your own with fabric and foam. Fill the cubbies with baskets, shoe racks, or decorative boxes to keep everything organized. Place a small rug or mat underneath for extra coziness. Decorate the top with a tray or small decor items, avoiding restricted decor. Ensure the cushion stays in place with non-slip backing.
Personalize the cushion with removable covers or decorative trims. Add hooks or a small shelf above for keys, scarves, or bags. Use labels or tags inside baskets for organization. Incorporate seasonal textiles or decorative accents to change the look over time.
This DIY entryway bench combines style with practicality, turning a cluttered space into an organized, welcoming zone. It’s a project that adds value and personality, making coming home more enjoyable. Plus, it’s a fun, achievable challenge that boosts your DIY confidence.
14. Create a Statement Wall with IKEA HEJNE Metal Shelves and Industrial Decor
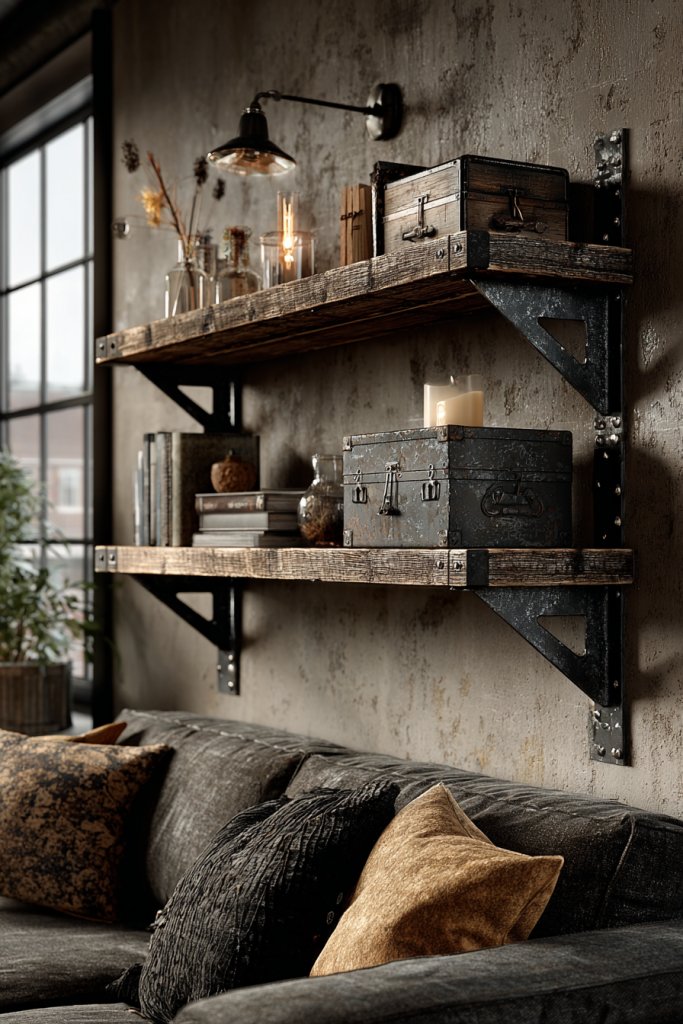
Want to add a bold, industrial touch to your living space? Flat walls can feel plain and uninspired. You desire a statement feature that combines function with edgy style. Using HEJNE steel shelves can turn a blank wall into an eye-catching display.
Imagine installing several HEJNE shelves in varying lengths along a wall, painted in dark matte or metallic finishes. Fill them with vintage-looking storage boxes, sculptural objects, or decorative lighting. The open metal structure contrasts with softer elements, creating a balanced industrial aesthetic. It’s both practical and artistic, making your wall stand out.
Paint the shelves in black, gunmetal, or distressed finishes for a rugged look. Mix in decorative brackets or add small hooks underneath for hanging tools or accessories. For a cleaner look, keep the shelves minimal with only a few select items. Adjust spacing and arrangement based on the wall’s size and your collection.
Secure the shelves into wall studs or anchors, ensuring stability for heavier objects. Use a level for perfect alignment. Decorate with a mix of practical and decorative items—think vintage tins, small sculptures, or textured containers—avoiding restricted decor items. Consider adding LED strip lighting for extra impact. Finish by cleaning dust and sealing any exposed hardware for a sleek look.
Add decorative wall decals or stencils around the shelves for a personalized touch. Incorporate small potted plants or textured boxes for visual interest, avoiding restricted items. Change out displayed items seasonally or for special occasions. Keep the design cohesive with your overall decor theme.
This statement wall showcases how industrial elements can elevate your decor. It’s a project that combines creativity with practicality, adding an edgy focal point to your home. Once finished, you’ll feel empowered to experiment with more bold, stylish upgrades.
15. Make a Custom Kids’ Play Table from IKEA LACK and Legs
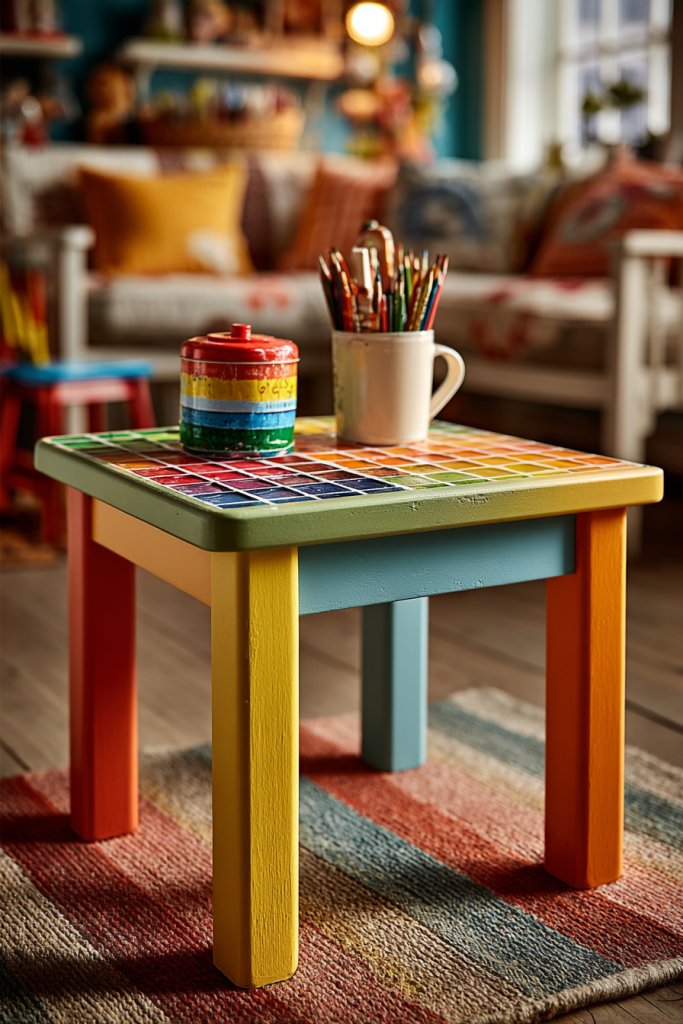
Kids need a dedicated space for crafts, games, and homework, but buying a custom table can be expensive. Standard options often lack personality or don’t fit your space. Creating a playful, functional play table from IKEA LACK and legs is an easy, affordable fix.
Picture a bright, colorful LACK tabletop supported by sturdy, playful legs—think bold colors or whimsical patterns. Underneath, add storage bins or baskets for art supplies and toys. The tabletop can be painted or decorated with stickers, making it a fun centerpiece. It’s perfect for a kids’ corner or playroom.
Paint the tabletop in vibrant colors or add fun patterns like polka dots or stripes. Attach colorful or themed legs—think cloud shapes or animal motifs—for extra personality. Adjust the height for different age groups or add a whiteboard surface for doodling. Seasonal themes or decals can keep it fresh.
Sand and prime the LACK surface before painting or decorating. Attach the legs securely with screws, ensuring stability. Use non-toxic, washable paints suitable for children. Add storage baskets or drawers underneath for easy cleanup. Decorate with themed stickers or decals that are easy to remove or change.
Personalize with your child’s name or favorite characters. Use removable stickers or decals for quick updates. Add a soft, washable mat underneath for comfort and safety. Incorporate a small corkboard or chalkboard section for notes or drawings.
This DIY play table brings joy and function into your child’s space while being budget-friendly. It encourages creativity and organization, making playtime more fun and less chaotic. Plus, it’s a project you’ll be proud to say you built yourself—kids will love it!
16. Repurpose IKEA BILLY Bookcases as Display Cabinets with Glass Doors
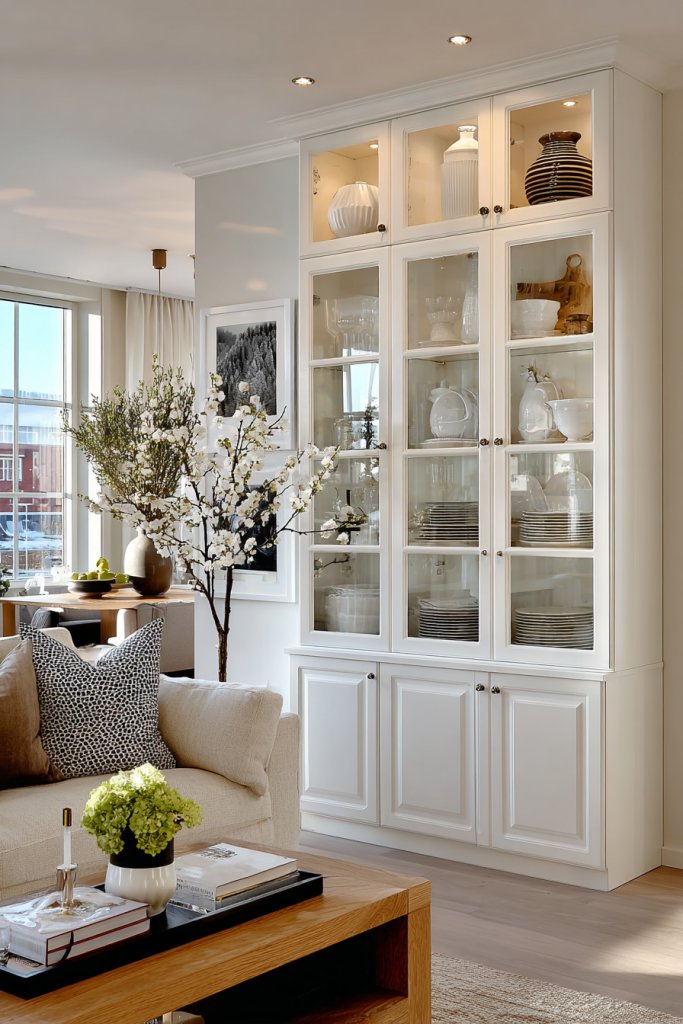
Do you have collectibles or dinnerware you want to showcase but lack elegant storage? Standard cabinets can be plain or expensive. Transforming BILLY bookcases with glass doors into display cabinets is a clever way to elevate your decor. It’s affordable, customizable, and functional.
Imagine replacing the solid doors with glass panels or acrylic sheets, allowing your treasures to shine. Inside, add lighting or decorative backing for enhanced display. The open shelving and glass create a museum-like vibe, perfect for collectibles or fine china. It’s a statement piece that combines practicality with style.
Paint or stain the BILLY frames to match your room’s aesthetic. Choose clear or frosted glass for different effects. Incorporate decorative hardware or hinges for a seamless look. Use adjustable shelves to accommodate various item sizes. Seasonally rotate displayed items for freshness.
Remove the existing doors, then measure and cut glass or acrylic panels to size. Attach the panels with hinges or clips, ensuring they open smoothly. Clean the glass thoroughly to avoid smudges. Inside, organize items with small risers or display stands for visual balance. Seal or protect the wood if needed.
Add LED lighting inside the cabinets for a dramatic effect. Incorporate decorative trim or painted accents for a custom finish. Use labels or small tags for organization. Change displayed items periodically to showcase new collections or seasonal themes.
This project turns ordinary bookcases into elegant display pieces, proving that a little DIY effort can make a big impact. It’s perfect for showcasing your personality and collections in style. Your home will feel more curated, sophisticated, and uniquely yours.
17. Upgrade IKEA KALLAX with Decorative Wallpaper and Legs for a Stylish Room Divider
Need to divide a large open space without sacrificing style? Room dividers are functional but often look plain or bulky. You want something chic, movable, and tailored to your decor. Upgrading a KALLAX with wallpaper and legs turns it into a stylish, versatile piece.
Visualize covering the back panels of the KALLAX with decorative wallpaper or contact paper in bold patterns or textures. Attach sleek legs for elevation, giving it a floating appearance. Use it as a room divider that also provides storage or display space. It becomes a statement piece that blends function with design.
Choose wallpaper that complements your room’s color palette—metallics for glam, matte for minimalism. Vary the height or add casters for mobility. Incorporate baskets or decorative boxes inside for added storage, avoiding restricted decor. Adjust the configuration to suit your space and needs.
Apply wallpaper or contact paper smoothly on the back panels, avoiding bubbles. Attach the KALLAX to the floor or wall for stability, especially if mobile. Install legs at each corner, ensuring they are level. Inside, add storage bins or decorative objects. Seal the wallpaper edges if necessary for durability. Finish with a clear topcoat if desired.
Decorate with labels, metallic accents, or removable decals for a personalized touch. Incorporate small LED lights inside for ambient illumination. Change out storage baskets or decorative objects seasonally. Keep the look fresh with minimal changes.
This upgrade transforms a simple storage unit into a visual centerpiece, showing how small tweaks can make a big difference. It’s a project that combines creativity and practicality, inspiring you to personalize your space with confidence.
18. DIY Compact Laundry Station Using IKEA TROFAST Storage and Accessories
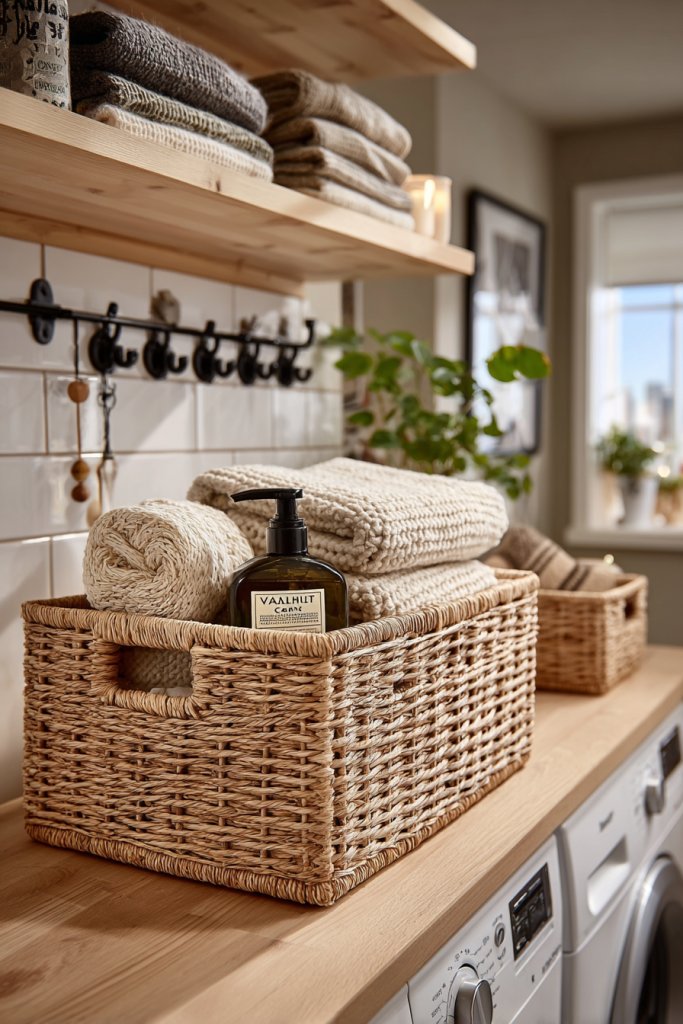
Is laundry day chaos with baskets and supplies spread everywhere? A dedicated, organized laundry station can save time and frustration. You want a compact, stylish setup that fits your space and keeps everything within reach. Using TROFAST storage makes it possible.
Picture stacking TROFAST units with labeled baskets for detergents, fabric softeners, and cleaning supplies. Add hooks or small shelves above for hanging clothes or holding brushes. The setup is tidy and accessible, with a playful, child-friendly look. It turns a mundane chore into a streamlined routine.
Paint or personalize the TROFAST frames in bright or neutral colors. Incorporate small rolling carts or bins for mobility. Use decorative labels or stickers for clarity. Adjust the height of the setup based on your space or add a fold-down drying rack if space allows. Seasonal decor can make the space more inviting.
Assemble TROFAST units and assign baskets for different laundry categories. Secure the units to the wall if necessary for safety. Use labels or color coding for quick identification. Add hooks or pegs for hanging clothes or accessories. Incorporate small mats or non-slip pads for stability. Maintain organization by regularly rotating and cleaning the baskets.
Decorate with fun labels, decals, or themed stickers. Use fabric or decorative liners inside baskets for a finished look. Add a small folding station or extra shelving for supplies. Incorporate a small decorative element like a framed quote or a cute clock to make it cheerful.
This DIY laundry station simplifies chores and adds a splash of personality to an often-overlooked space. It’s a practical project that boosts efficiency and pride in home organization. Once set up, laundry becomes less of a hassle and more of a quick, satisfying task.
19. Turn IKEA EKET Modules into a Modern Media Console
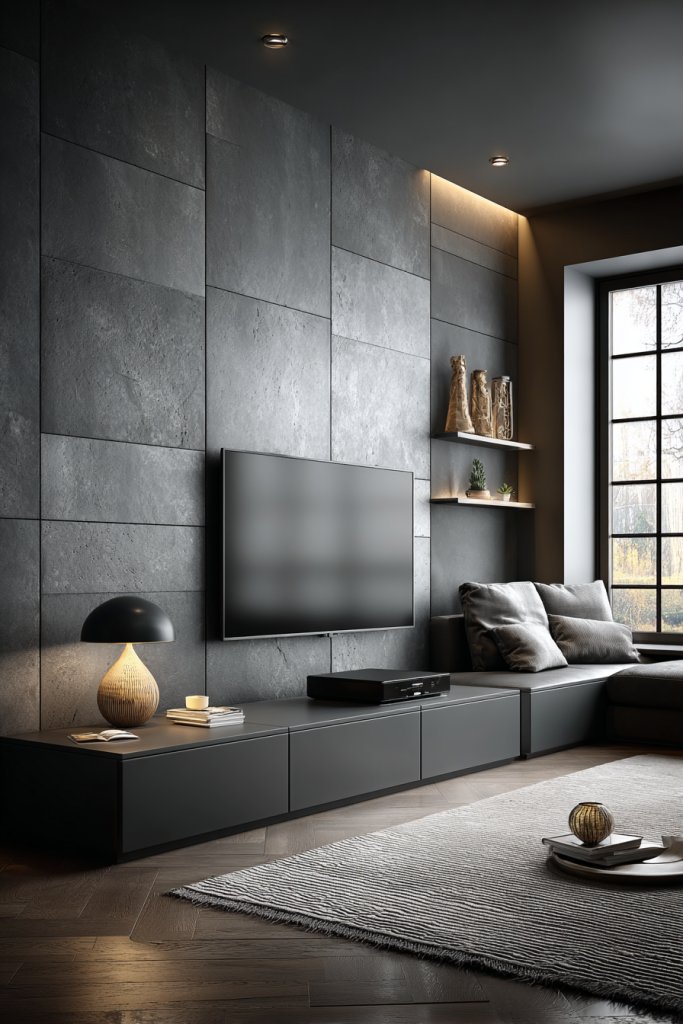
Your current TV stand looks tired or doesn’t fit your modern aesthetic? Off-the-shelf media consoles can be pricey or lack customization. Creating a sleek, modular media unit from EKET modules allows you to design a perfect fit for your space and style.
Visualize stacking and securing several EKET units in your desired configuration—horizontal, vertical, or grid. Finish with a stylish top, like a wood veneer or laminate, to hold your TV and electronics. Inside, add baskets or dividers for remote controls, gaming gear, or DVDs. The result is a contemporary, customizable piece that’s both functional and attractive.
Paint or veneer the modules in matching or contrasting colors. Use decorative handles or hardware for a polished look. Incorporate open shelves, closed compartments, or a mix, depending on your needs. Adjust the height and layout to suit your space, keeping accessibility in mind. Add cable management clips or covers for a clean finish.
Plan your layout on paper before assembly. Secure the EKET units together with brackets or connectors. Finish the top with a wood or laminate surface for stability and style. Inside, organize with small baskets or boxes, avoiding restricted decor items. Install cable clips or sleeves to hide wiring. Mount the entire unit to the wall for safety if needed.
Decorate with decorative hardware or paint accents. Add LED strip lighting behind or inside for ambiance. Label baskets or compartments for easy access. Change display items seasonally or for holidays to keep the look fresh. Keep the design minimal for a sleek, modern aesthetic.
This project showcases how modular furniture can be both stylish and adaptable. It’s a fun DIY that results in a high-end look without high-end costs. Your media console will be a centerpiece that sparks admiration and confidence in your decorating skills.
20. Create a Cozy Pet Bed with IKEA MALM Drawers and Cushions
Your furry friend deserves a comfortable, stylish spot to rest, but store-bought beds often look generic or don’t match your decor. You want a cozy, personalized space that’s easy to clean and fits your aesthetic. Turning an IKEA MALM drawer into a pet bed is a simple, chic solution.
Imagine removing the drawer from the MALM unit, lining the interior with a soft cushion or plush blanket. Decorate the outside with paint, stencils, or cozy fabric wraps that match your decor style. Place the unit in a corner or under a window, creating a dedicated, inviting space for your pet. It’s both functional and adorable.
Paint or stencil the exterior in colors or patterns that complement your room. Use removable, washable cushions for easy cleaning. Add a small side blanket or toy holder nearby. Elevate the drawer slightly with short legs or casters for better airflow. Personalize with a name tag or decorative patch.
Remove the MALM drawer and make sure it’s clean and smooth. Line the interior with a plush cushion or foam pad, secured with fabric or Velcro strips. Decorate the exterior with paint or fabric wraps, sealing with a clear coat for durability. Place the bed in a quiet corner, and add a blanket or plush toy for extra comfort. Ensure the pet can easily access it.
Add decorative patches, stencils, or personalized labels to the exterior. Incorporate seasonal fabrics or themed patterns for variety. Use a washable cushion cover for easy cleaning. Place a small, soft mat underneath for extra comfort and safety.
This project proves that a little creativity can turn basic furniture into a custom pet haven. It’s a budget-friendly upgrade that’s both practical and stylish. Your pet will love their new cozy corner, and you’ll enjoy the satisfaction of DIY craftsmanship.
21. Craft a DIY Entryway Coat Rack from IKEA RIGGA and Hooks

Is your entryway cluttered with coats, bags, and accessories? You need an organized, stylish station that’s both functional and attractive. Store-bought coat racks often lack personality or don’t fit your space. Creating a custom rig from IKEA RIGGA and hooks is a practical, modern solution.
Imagine mounting the RIGGA rail along a wall, with a series of hooks hanging below for coats, hats, and bags. A small bench or shelf underneath offers a place to sit or drop keys. Use decorative hooks or paint the rail for a personalized touch. The setup is sleek, minimal, and highly functional, turning your entry into a clutter-free zone.
Paint the rail in bold or neutral tones to match your decor. Add hooks in different styles—metal, wood, or decorative shapes—for visual interest. Incorporate a small shelf or cubby for shoes or accessories. Adjust the height and number of hooks based on your needs. Seasonal decorations or labels can add personality.
Install the RIGGA rail securely into wall studs or anchors. Add hooks, ensuring they are evenly spaced and sturdy. Attach a small bench or seat underneath if desired, with storage space inside. Decorate with a mat or rug to define the space and keep it clean. Keep tools handy for precise alignment and secure fixing. Avoid restricted decor items.
Decorate the hooks with paint or decorative caps. Add small labels or tags for family members. Incorporate seasonal accents like faux greenery or themed hooks for holidays. Use a stylish cushion or throw on the bench for comfort. Keep the design consistent with your overall decor theme.
This custom coat rack makes your entryway both functional and inviting. It’s a simple project that makes daily routines easier and more organized. Plus, it’s satisfying to craft a piece that’s tailored specifically to your needs and style—your home, your rules.
22. Refinish IKEA IVAR as a Rustic Plant Stand with Shelves
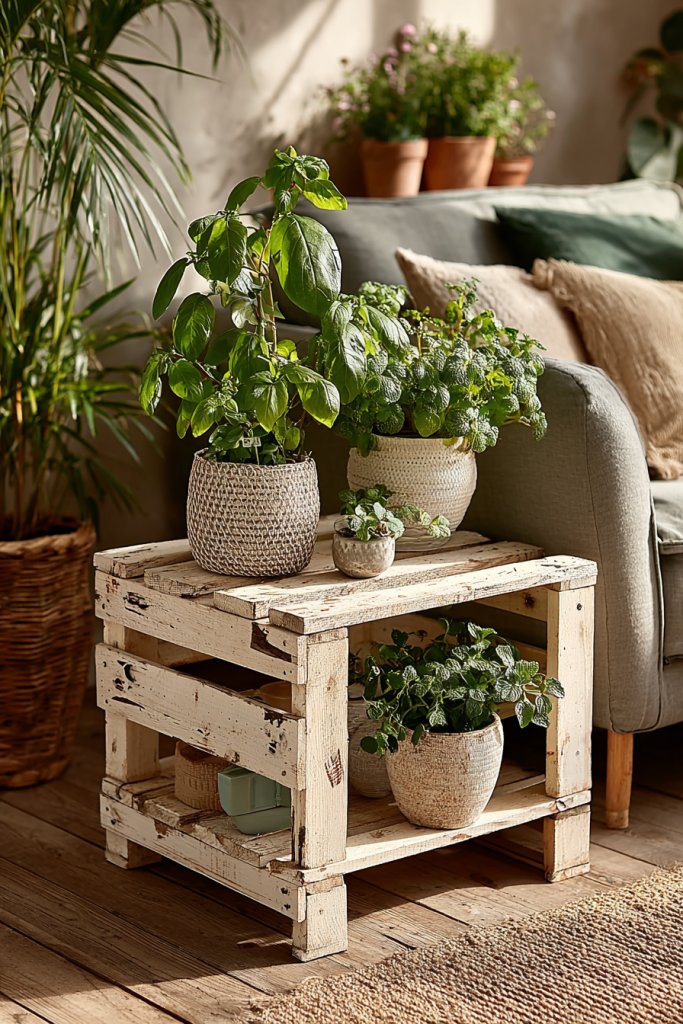
Want to add a green touch to your home but hate overdone or generic plant displays? A rustic, DIY plant stand can elevate your space with style and personality. The challenge is creating a stand that’s attractive, functional, and fits your decor. Refurbishing IVAR shelves into a rustic plant stand is an ideal project.
Picture staining or painting IVAR shelves in warm, earthy tones. Stack or arrange the shelves into a tiered display, perfect for different-sized plants or decor. Decorate with textured fabrics or rope accents for a rustic feel. Place the stand near a sunny window, with lush greenery cascading over the edges, creating a lively, natural vibe.
Use distressed paint or natural wood finishes for a rustic look. Add decorative brackets or supports for stability. Adjust shelf spacing for larger or smaller plants. Incorporate decorative elements like twine or burlap for extra texture. For seasonal updates, change the color or add decorative touches like faux moss or stones.
Refinish or stain the IVAR shelves, sealing with a weatherproof or matte finish. Stack or assemble into a vertical or tiered structure. Secure the units with brackets or screws for safety. Decorate with textured fabrics or twine. Place plants in decorative pots or baskets, avoiding restricted decor. Position near natural light for best growth.
Add decorative hardware or painted motifs for a personalized look. Incorporate small decorative stones, moss, or fairy lights around the plants (avoiding restricted decor). Use labels or tags for plant care tips. Change the arrangement seasonally or add additional shelves for more plants. Keep it fresh with new textures or colors.
This project proves that simple shelving can become a charming, functional plant display. It’s a rewarding way to bring nature indoors while showcasing your DIY skills. Your green space will be more lively, and your confidence in creating personalized decor will grow.
23. Design a Compact Home Office with IKEA BASIC DESK and Storage
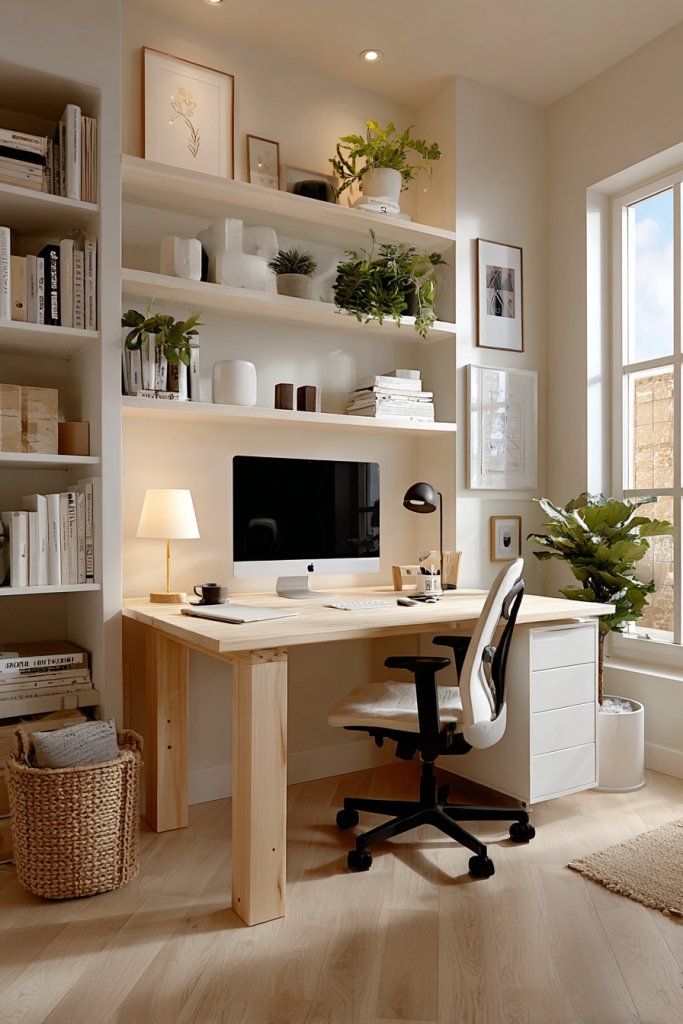
Working from home and struggling with clutter or lack of space? A compact, organized home office can boost productivity and reduce stress. Off-the-shelf desks often don’t fit or look uninspired. Building a customized workspace from IKEA BASIC desk components offers a practical, stylish solution.
Imagine combining a simple, sturdy desk surface with wall-mounted shelves or cubbies for storage. Use adjustable legs or supports to customize height, while the tabletop provides ample space for your laptop, notebooks, and essentials. Decorate with a few personal items, textured organizers, or a cozy chair—creating a functional yet inviting workspace.
Paint or veneer the desk in colors that match your decor—neutral, pastel, or bold. Incorporate wall-mounted or freestanding storage options for flexibility. Adjust the size of the desk based on your available space, adding foldable or extendable surfaces if needed. Combine open shelving with drawers for a balance of accessibility and concealment.
Assemble the basic desk frame, ensuring stability and levelness. Attach a durable tabletop, sealing it with a protective coat if necessary. Mount shelves or organizers on the wall above for additional storage. Place your tech and supplies thoughtfully, avoiding clutter. Use cable management clips or sleeves for a clean look. Add a comfortable chair and task lighting for long work sessions.
Decorate with framed photos, motivational quotes, or textured accessories. Use decorative containers or trays to organize supplies. Change decor seasonally or for special projects. Incorporate a small plant or decorative element (avoiding restricted decor items). Keep the space tidy with labeled storage solutions.
This DIY home office shows that creating a functional, stylish workspace is achievable and affordable. It encourages productivity and personal expression. Once finished, you’ll enjoy a space that motivates you daily and reflects your personality, proving that small projects can have a big impact.
24. Personalize IKEA TROFAST with Colorful Baskets for Kid’s Storage

Kids’ rooms can quickly become chaotic, with toys and clothes everywhere. You want a fun, organized storage solution that encourages independence. Off-the-shelf storage often lacks personality or flexibility. Personalizing TROFAST with colorful baskets turns chaos into a playful, tidy space.
Imagine stacking TROFAST units filled with bright, coordinated baskets in fun colors or patterns. Label each basket with stickers or tags for toys, clothes, or craft supplies. The colorful setup creates a cheerful atmosphere, making tidying up a game. It’s a practical yet playful centerpiece that sparks joy.
Paint or decorate baskets with stickers or fabric for added personality. Mix and match colors or patterns for visual interest. Incorporate themed baskets—like animals or superheroes—to match your child’s interests. Adjust the height or add extra units for more storage. Seasonal or themed decor updates keep it fresh.
Assemble the TROFAST frames and insert baskets, labeling each for clarity. Secure the units to the wall if needed for safety. Use colorful or patterned baskets, ensuring they are durable and washable. Organize items by type or user, and encourage your child to help with the setup. Keep items accessible for independent tidying. Regularly rotate or clean the baskets for hygiene.
Personalize with stickers, decals, or fabric wraps on baskets. Add a small chalkboard or whiteboard for reminders or doodles. Incorporate themed accessories or plush toys nearby for comfort. Change the baskets’ look seasonally or for special occasions to keep the space engaging.
This project not only tidies your child’s space but also fosters responsibility and independence. It’s a simple, colorful upgrade that makes organization fun and achievable. Your kid’s room will be a cheerful, clutter-free zone that’s uniquely theirs—and proof that DIY can be playful and practical.
25. Assemble a Minimalist Floating Nightstand with IKEA NORDLI or MALM

Cluttered bedside tables can make your space feel cramped and chaotic. You want a sleek, space-saving nightstand that offers storage without bulk. The solution: mounting a drawer unit like NORDLI or MALM to the wall for a minimalist, floating nightstand.
Imagine a slim drawer unit mounted just beside your bed, with a soft, textured lamp and a cozy throw nearby. The floating design creates a sense of openness and modern elegance. Inside, store your essentials—books, glasses, or a small notepad—out of sight but close at hand. The streamlined look makes your bedroom feel calmer and more organized.
Paint or veneer the drawer units in colors matching your decor—classic neutrals or bold hues. Mount the unit at the perfect height for easy access. Add decorative trims or hardware for a personalized touch. For a more functional setup, include a small shelf or caddy for nighttime essentials. Adjust placement to maximize space and comfort.
Secure the NORDLI or MALM unit to the wall using appropriate brackets—ensure it’s level and stable. Clear out the drawer and add a soft cloth or small tray on top for essentials. Hide wiring or cords behind the unit for a clean look. Decorate the top with a small plant, book, or decorative object, avoiding restricted decor. Double-check stability before use.
Decorate the drawer front with decals, stencils, or custom hardware. Use removable labels inside for organization. Incorporate LED lighting underneath or inside for a subtle glow. Change out the decorative items seasonally or to match your mood. Keep the look minimalist but inviting.
This floating nightstand saves space and adds a sleek, modern touch to your bedroom. It’s a simple project that elevates your decor while keeping essentials close and organized. Once installed, you’ll wonder why you ever settled for bulky furniture—making your space both functional and stylish, with confidence.
Conclusion
From clever storage solutions to stylish decor upgrades, these IKEA hack ideas demonstrate how versatile and inspiring DIY projects can be. They offer a fantastic way to personalize your home and make your space truly yours. Don’t hesitate to try these ideas—your dream home is just a hack away. Embark on your DIY journey today and turn everyday furniture into extraordinary creations!
Leave a Reply