
Ever wondered how to turn your garage from a cluttered storage spot into a functional, stylish space? Garage design ideas have gained immense popularity because they combine practicality with creativity, allowing homeowners to optimize every inch of this versatile area.
In this article, you’ll find a variety of innovative ideas to transform your garage into a personalized haven—whether for parking, work, hobbies, or relaxation. From clever storage solutions to inviting finishing touches, these ideas will inspire you to reimagine your space and make it work perfectly for your lifestyle.
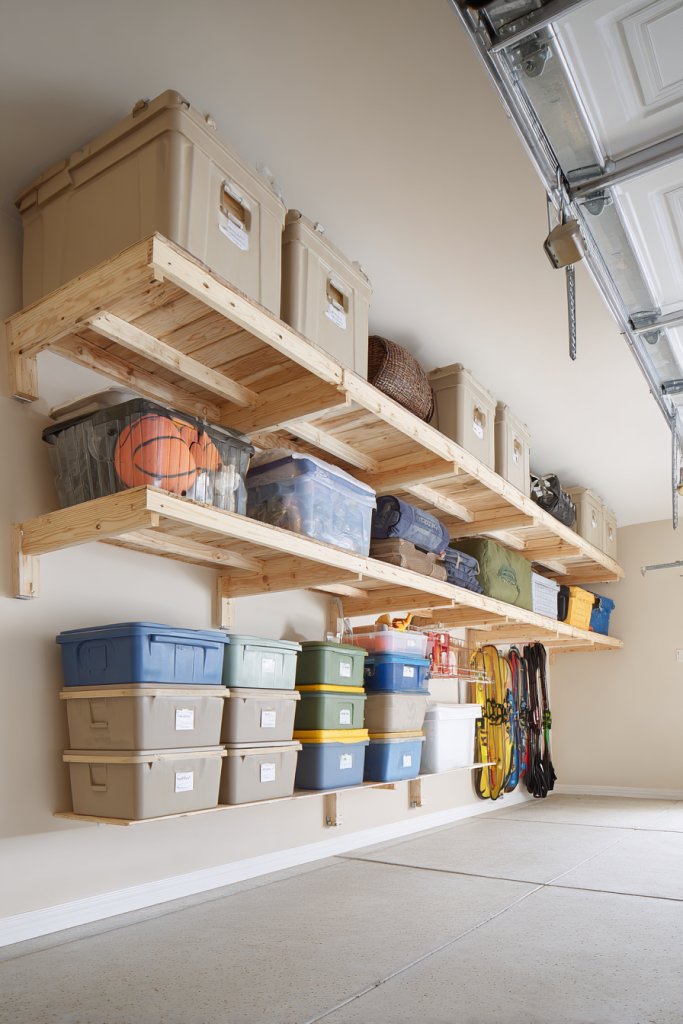
1. Bright and Organized Storage Wall with Adjustable Shelving
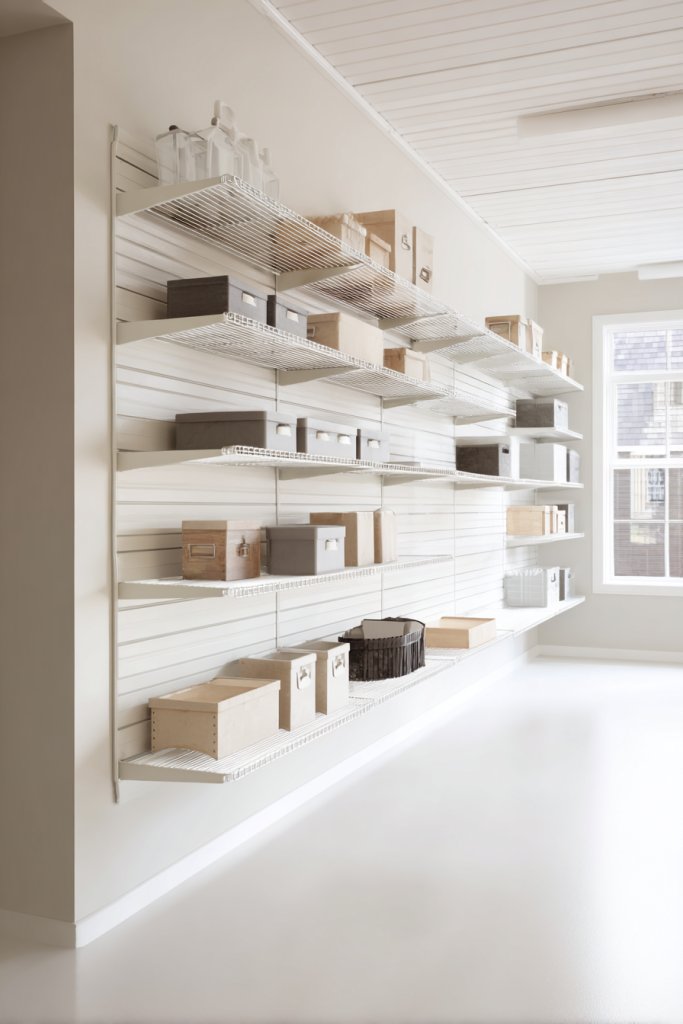
Ever struggle to find space for all your tools and gear in the cluttered chaos of your garage? A disorganized wall can turn into a nightmare, making even simple tasks frustrating. You want a solution that keeps everything visible and accessible without turning your garage into a storage jungle. Luckily, an adjustable storage wall can transform your space from chaos to calm, saving time and reducing stress.
Imagine a sleek, wall-mounted system with bright, sturdy shelves that can be repositioned at will. Clear bins sit neatly on each level, with labels for quick identification. The wall’s vibrant backdrop contrasts against the metallic and plastic containers, creating a cheerful, organized vibe. The sunlight hits the glossy surfaces, reflecting a sense of order and cleanliness, making your garage inviting rather than intimidating.
Choose adjustable shelving in neutral tones for a minimalist look or go bold with bright colors to energize the space. You can incorporate pegboards or hooks for hanging smaller items, adapting to seasonal needs or personal style. For a more rustic feel, opt for reclaimed wood shelves, which add warmth and character. This system is flexible enough to grow with your collection of tools, sports gear, or hobby supplies.
Start by measuring your wall space and selecting adjustable shelving units that fit. Use wall anchors and brackets for secure mounting, especially if heavier items will be stored. Organize items by size or function, placing frequently used tools at eye level. Clear plastic bins with lids are ideal for small parts, while larger bins hold bulkier items. Regularly reassess and adjust the shelves to keep everything current and accessible.
Personalize your wall with color-coded bins or labels for easy identification. Incorporate decorative elements like a chalkboard label area or a small magnetic strip for metal tools. Add a soft fabric liner to shelves for delicate items or a splash of color to match your overall garage theme. Consider small hooks or baskets for quick-grab essentials, making your system both functional and stylish.
A well-organized storage wall makes your garage feel more like a workshop and less like a storage unit. It boosts your confidence to tackle DIY projects or maintenance tasks without digging through piles. Plus, it’s a visually satisfying way to keep your space neat and inviting. Ready to turn chaos into order? Your perfect garage setup is just a few adjustable shelves away.
2. Industrial-Style Workstation with Metal and Wood Elements
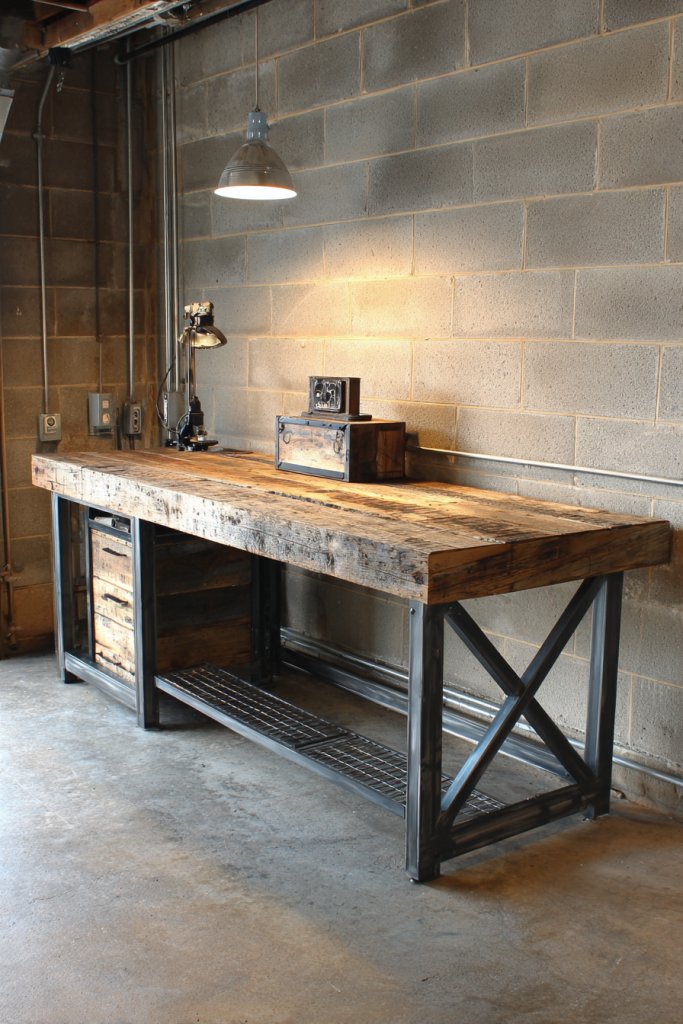
Does your garage work area feel more makeshift than professional? A rough, cluttered bench can kill your motivation to start projects. You want a sturdy, stylish workspace that inspires creativity and handles heavy-duty tasks without wobbling or falling apart. An industrial-style workstation with a mix of metal and wood offers durability and a cool aesthetic that screams craftsmanship.
Picture a robust workbench with a thick reclaimed wood top supported by black metal piping legs. The surface shows character with natural knots and markings, giving it a rugged charm. Metal brackets hold shelves underneath for storing tools or materials, while vintage-style hooks hang nearby for quick access. The overall look combines raw materials with a utilitarian vibe, creating a workspace that’s both functional and visually striking.
You can customize the finish—opt for a distressed wood finish for a vintage look or a sleek polished surface for modern appeal. Add industrial-style lighting fixtures like exposed Edison bulbs to enhance the aesthetic and illuminate your work area. Incorporate open shelving or closed cabinets depending on your storage needs, or mix both for versatility. The design can adapt to small nooks or large garages, making it ideal for any space.
Choose a sturdy reclaimed wood slab or thick plywood for the tabletop, and pair it with metal pipes or brackets for support. Secure the frame into the wall using heavy-duty anchors, ensuring stability for heavy tools or equipment. Keep the workspace clear of clutter, installing a pegboard or magnetic strip nearby for small tools. Use oil or sealant on the wood to resist stains and wear, prolonging its lifespan. Regular maintenance involves tightening bolts and cleaning surfaces.
Add a personal touch with custom metal nameplates or painted accents on the wood. Use vintage metal containers or jars for storing screws and nails on open shelves, adding to the industrial charm. Incorporate a comfortable stool with metal accents or a leather cushion for longer projects. You could also install a small power strip for easy access to electricity without cluttering the work area.
This industrial workstation not only looks great but also encourages a DIY mindset and pride in craftsmanship. It’s a statement piece that invites you to get started on projects with confidence. Plus, the durable materials mean your workspace will last for years, no matter how tough your projects get. Ready to craft your own industrial masterpiece? The perfect garage upgrade awaits.
3. Modular Pegboard System for Tools and Supplies
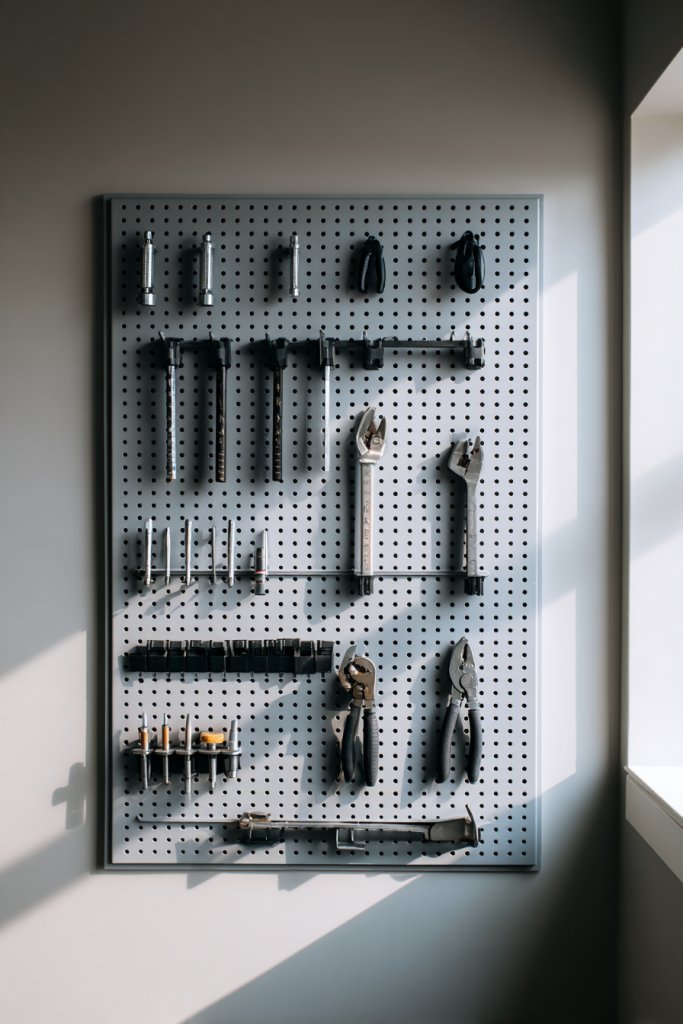
Ever find yourself rummaging through drawers or piles just to grab a screwdriver? A messy tool setup wastes time and causes frustration. You want a system that keeps your tools visible, organized, and within arm’s reach, so you can start projects without the hassle. A modular pegboard system offers a flexible solution that adapts as your collection grows.
Visualize a large, perforated board painted in a bright color to add a pop to your garage wall. Various hooks and baskets snap into the holes, holding everything from hammers to small screwdrivers. Labels are neatly written on small containers attached to the board, making it easy to find what you need. The entire setup looks tidy, with tools hanging in an orderly fashion that invites quick access and efficient workflow.
Opt for a monochrome pegboard for a sleek, modern look or go vintage with distressed paint and rustic hooks. You can customize the layout with different-sized containers, adding shelves or cup holders for specific tools. For seasonal or hobby-specific needs, swap out or add new hooks and containers easily. This modular system scales with your skill level and interests, fitting in compact or expansive garage spaces.
Start by mounting the pegboard at an ergonomic height, using sturdy anchors to prevent sagging. Invest in a variety of hooks, bins, and shelves that suit your tool types. Organize by frequency of use—daily tools close at hand, specialty items stored higher or lower. Use a level during installation to keep everything straight. Regularly reevaluate your setup to add or remove components as your collection evolves.
Personalize with color-coded hooks or labels for different tool categories. Incorporate small magnetic strips for metal parts or accessories. Use decorative yet durable containers that match your garage’s color scheme. Add a small whiteboard nearby for notes or maintenance schedules, keeping everything functional and stylish without clutter.
A modular pegboard transforms your chaotic tool stash into a tidy, professional-looking setup. It makes projects more enjoyable when everything is organized and easy to find. Plus, it boosts your confidence in tackling repairs or DIY tasks efficiently. Ready to hang up your tools and get to work? Your organized garage awaits!
4. Multi-Functional Folding Worktable for Flexibility
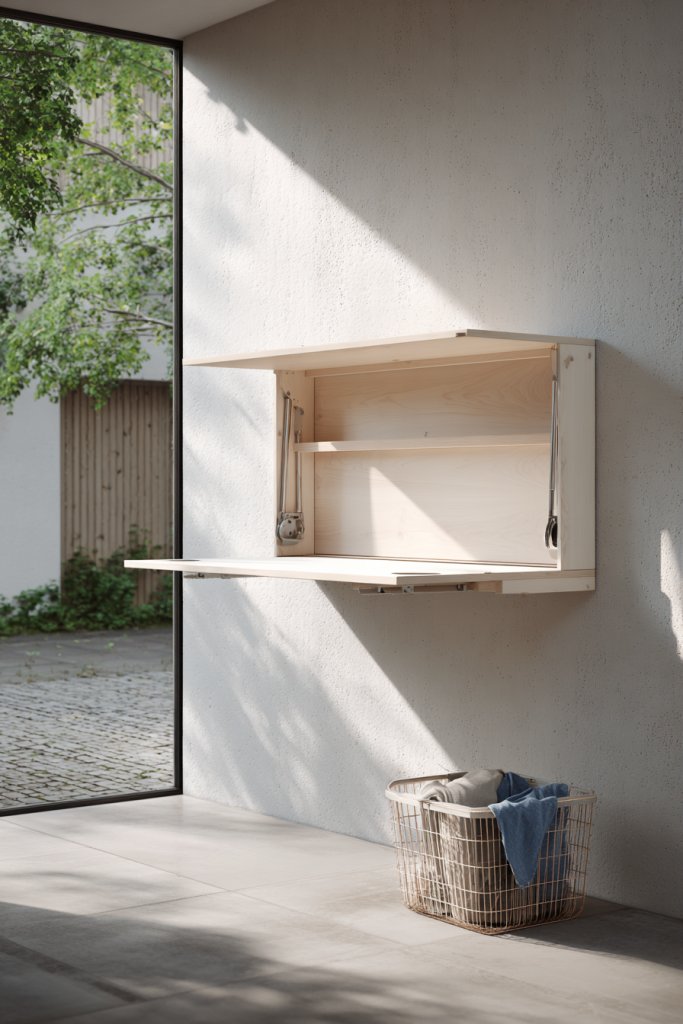
Does your garage work surface seem permanently cluttered or just too small? A dedicated worktable is great, but sometimes you need extra space or a place to fold laundry or organize gear. You want a versatile solution that can expand or hide away as needed, making your garage more functional without sacrificing style. A multi-functional folding worktable ticks all these boxes.
Picture a sturdy table with a sleek, fold-down panel that tucks neatly against the wall when not in use. When opened, it reveals a smooth surface perfect for projects, repairs, or craft work. The table’s finish is a matte wood-look laminate that resists scratches and stains. Bright LED strip lights are installed along the edges, illuminating your workspace, while the surrounding area remains tidy and free of clutter.
Choose a fold-down table in a neutral wood tone for a classic look, or go bold with bright colors to energize your workspace. You can add a foldable stool or chair that stows away inside a nearby cabinet. The table’s size can vary from small, compact units for quick fixes to larger surfaces for detailed projects. For seasonal needs, consider adding a removable cover or mat to protect the surface.
Install sturdy hinges into wall studs, ensuring the table can support heavy tools or materials. Use a level to align the folding surface for smooth operation. Attach locking mechanisms to keep the table secure when open. Keep the folding area clear of obstructions and add storage underneath for tools or supplies. Regularly check the hinges and locks for wear, tightening screws as needed.
Add custom labels or decals to the folded surface for personal flair. Incorporate small built-in compartments or magnetic strips on the underside for screws and small parts. Use weather-resistant materials to ensure longevity in a garage environment. Consider integrating a small power strip nearby for powering tools or charging devices during work sessions.
A multi-functional folding worktable makes your garage a versatile space ready for any task. It encourages you to take on projects with confidence, knowing you have a dedicated, adaptable surface. Plus, it keeps your space uncluttered when not in use, making your garage both practical and inviting. Time to fold out your new favorite workspace!
5. Overhead Ceiling Storage for Seasonal Items
Is your garage floor cluttered with seasonal decorations, sports gear, or rarely used equipment? Finding space for these items often means sacrificing valuable floor area or stacking boxes haphazardly. You need a solution that keeps these items out of sight but still accessible when needed. Overhead ceiling storage offers a practical fix that frees up space and declutters your garage.
Imagine sturdy metal racks or wooden platforms installed high above the garage door, holding neatly stacked bins or boxes. The ceiling’s white or neutral tone contrasts subtly with the colorful containers, making the storage look tidy and unobtrusive. When you need seasonal gear, you lower a pulley or remove a few items, revealing everything stored overhead. The space feels open, bright, and organized, ready for your next project or season.
Use wire shelving for a lightweight, adjustable solution or solid wooden platforms for heavier loads. Incorporate color-coded bins to quickly identify seasonal contents. For smaller items, add labeled containers or hooks underneath the platforms. This system adapts well to different garage heights and ceiling configurations, and can be expanded easily as your needs grow.
Securely attach heavy-duty ceiling mounts into ceiling joists or beams, ensuring they can handle the weight. Use adjustable straps or chains to hang platforms or racks. Organize items in labeled, stackable bins or sealed boxes for protection from dust and pests. Regularly check the mounts and straps for wear, tightening as needed. When not in use, simply lift and store your boxes out of the way.
Add labels or color-coding to bins for easy identification. Incorporate a pulley system with a handle for smooth lowering and raising of storage units. Use cushioned or padded platforms for delicate items. Combine with other storage solutions like sidewall shelves for a comprehensive organizational system.
Ceiling storage maximizes vertical space, transforming your garage into a clutter-free zone. It’s a smart way to keep seasonal or seldom-used items out of the way while maintaining easy access. Plus, it gives you a sense of mastery over your space, making every project and chore more manageable. Your garage can be both spacious and perfectly organized—just hang it high!
6. Vertical Bike Racks with Colored Accents
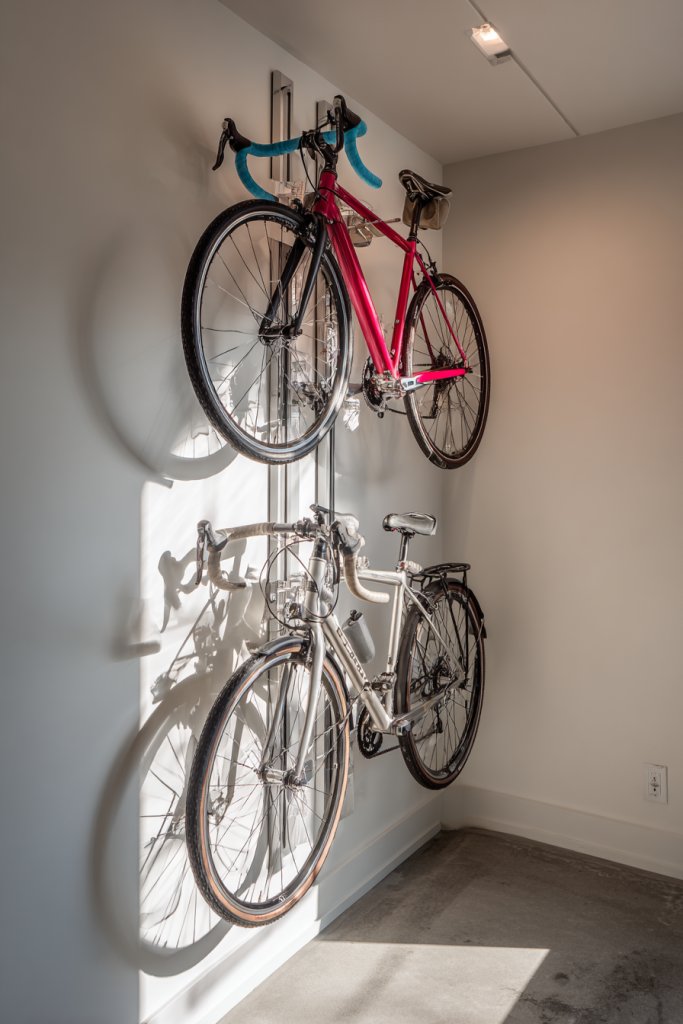
Tired of bikes leaning against the wall or cluttering your garage floor? A messy bike area not only looks bad but also makes it hard to find or access your ride quickly. You want a clean, organized way to store bikes that adds a splash of personality. Vertical bike racks with colored accents provide a stylish, space-saving solution that keeps your bikes upright and your garage neat.
Envision a sleek wall-mounted rack with vibrant, color-coded hooks supporting your bikes by the frame or wheel. The hooks are mounted on a painted accent wall, perhaps in a bold hue that complements your garage decor. Bikes hang vertically, freeing up floor space while making a visual statement. The bright accents contrast against the neutral wall, adding energy and color to the space.
Choose different colors for hooks based on bike type or family member, creating a playful or organized vibe. For a minimalist look, opt for monochrome hooks with subtle finishes. Adjustable or modular racks allow customization for different bike sizes. For small garages, install multiple racks in a vertical stack to maximize space efficiency.
Mount the rack at a height that allows bikes to hang freely without obstructing doors or pathways. Use sturdy anchors and heavy-duty screws to ensure stability, especially if supporting heavier bikes. Attach the hooks securely to the wall, ensuring they can support the weight over time. Add rubber padding or coatings to prevent scratches on your bikes’ frames. Regularly check for loose screws or signs of wear.
Incorporate colorful labels or stickers on the hooks for quick identification. Use matching storage bins or shelves nearby for helmets, trails, or maintenance tools. Consider adding a small chalkboard or whiteboard for reminders or bike maintenance schedules. Customize the rack with your favorite colors or patterns to match your garage’s overall style.
A dedicated bike wall makes storage simple and attractive, encouraging more outdoor adventures. It shows off your bikes like artwork and keeps your space safer by preventing tripping hazards. Plus, with everything organized and easy to access, you’re more motivated to ride and maintain your bikes regularly. Ready to hang up and pedal out?
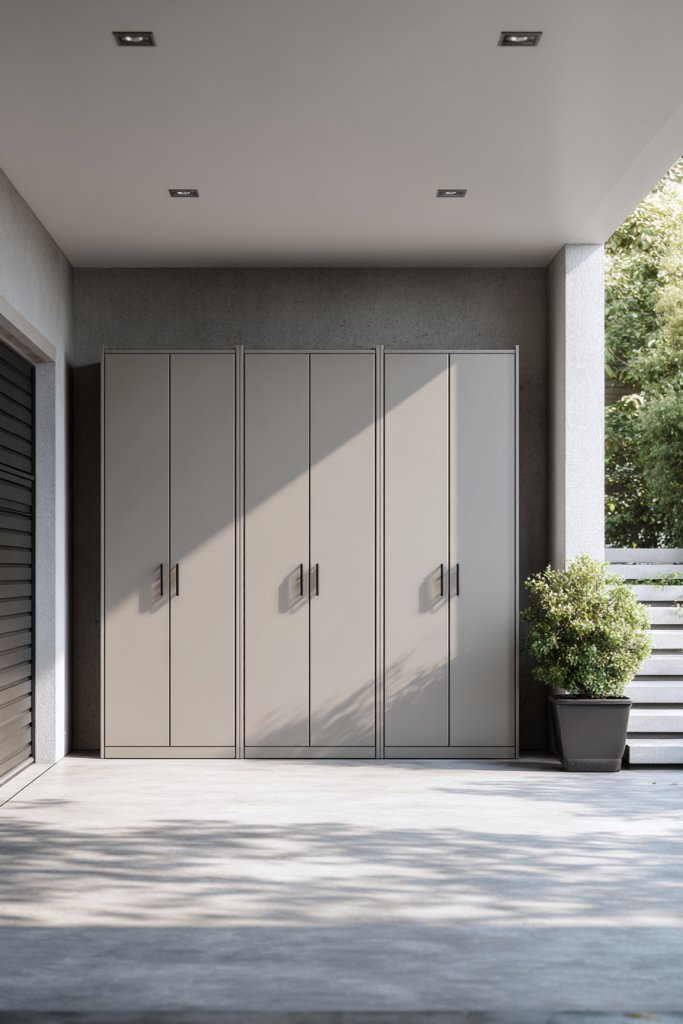
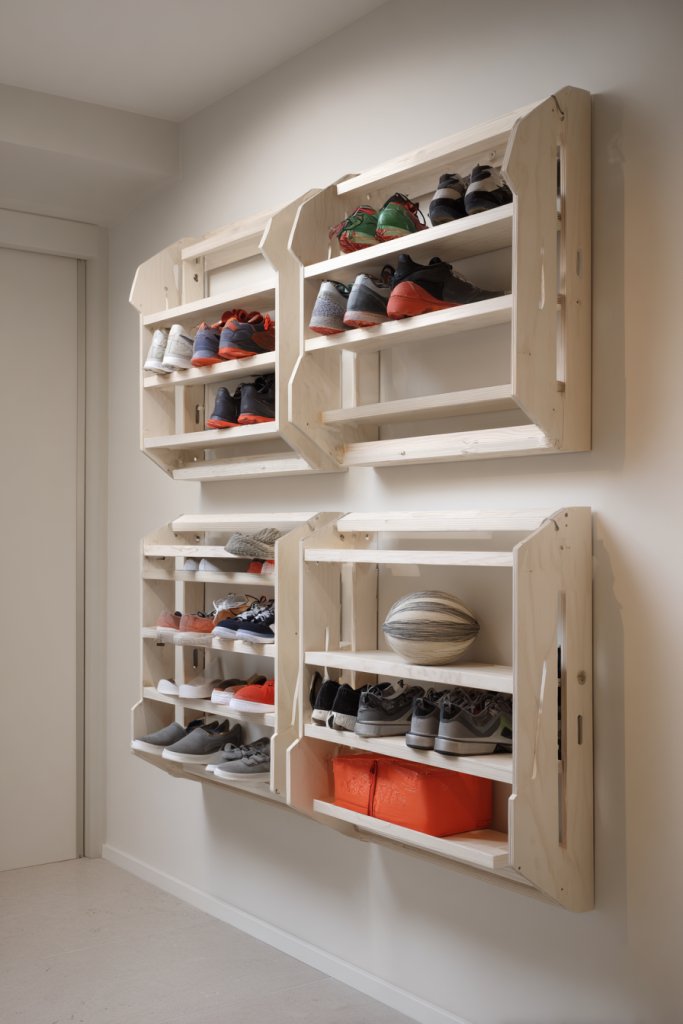
7. Customized Shoe and Boot Storage Cabinets
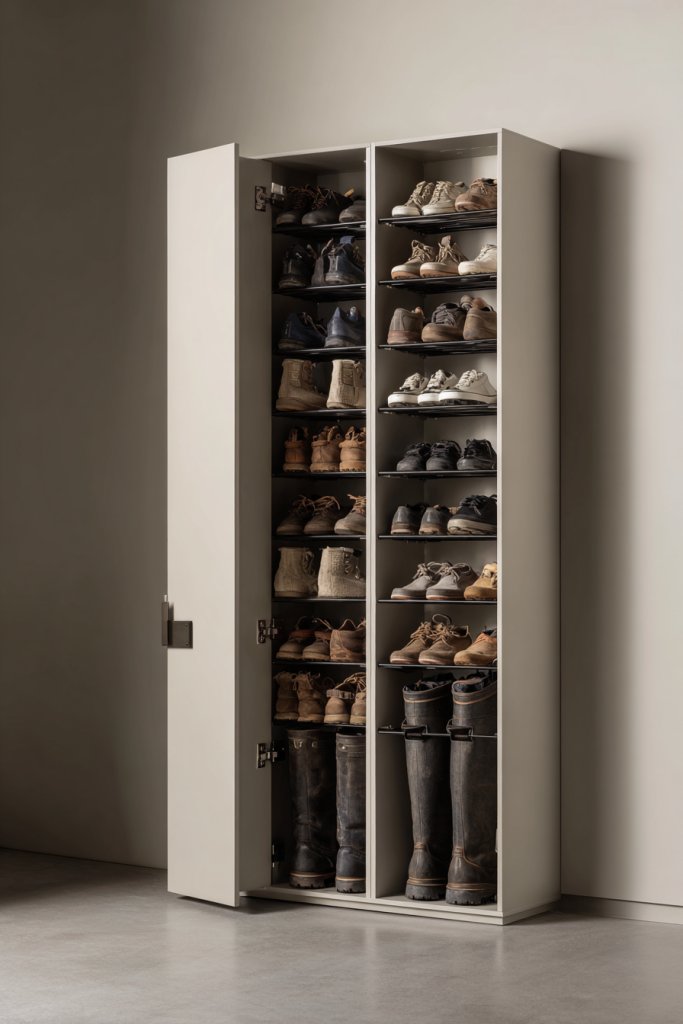
Are your shoes and boots scattered across the garage floor or stuffed into cramped closets? An disorganized footwear setup can turn a quick exit into a frustrating scavenger hunt. You want a dedicated, stylish cabinet that keeps your footwear neat, protected, and easy to find. Custom shoe and boot storage cabinets can elevate your garage’s function and look.
Visualize a tall, slim cabinet with multiple cubbies, each tailored for different shoe sizes or types. The doors are sleek, with a matte finish, possibly in a color that complements your overall garage decor. Inside, shoes are arranged neatly, with some cabinets featuring pull-out trays or angled shelves for easy visibility. The cabinet’s design minimizes clutter while adding a modern touch to your garage environment.
Select cabinets with adjustable shelves to accommodate different footwear, from sneakers to tall boots. Incorporate ventilation panels or small openings to prevent odors from building up. For a rustic look, choose cabinets made of reclaimed wood or metal with distressed finishes. For smaller spaces, opt for wall-mounted units or tiered cubbies that maximize vertical storage.
Measure your available space and choose cabinets that fit without obstructing pathways. Install on sturdy wall anchors, ensuring they can support the weight of multiple pairs of shoes. Use labeled bins or small baskets inside the cabinets for accessories like laces or insoles. Maintain airflow by leaving small gaps or installing vented doors. Regularly clean and reorganize to keep footwear fresh and accessible.
Personalize your cabinets with custom labels, decorative handles, or paint accents. Add small hooks on the sides for hanging accessories or tools. Incorporate a shoe cleaning station nearby—like a textured mat and cleaning brushes—to keep shoes in top shape. Match the cabinet style to your overall garage theme, whether industrial, modern, or rustic.
A dedicated shoe cabinet keeps your garage tidy and makes selecting footwear quick and satisfying. It prevents clutter from spilling into other areas and extends the life of your shoes. Plus, a sleek storage solution adds a polished, intentional look that boosts your pride in your space. Ready to step into organized comfort?
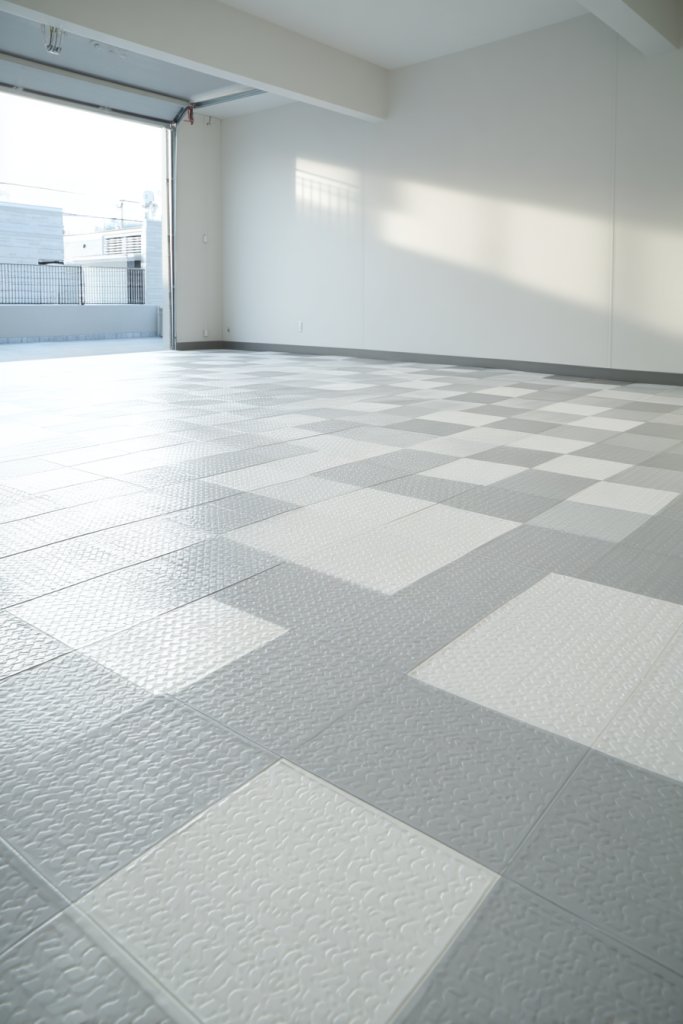
8. Bright Epoxy Floor Coating for Durability and Style
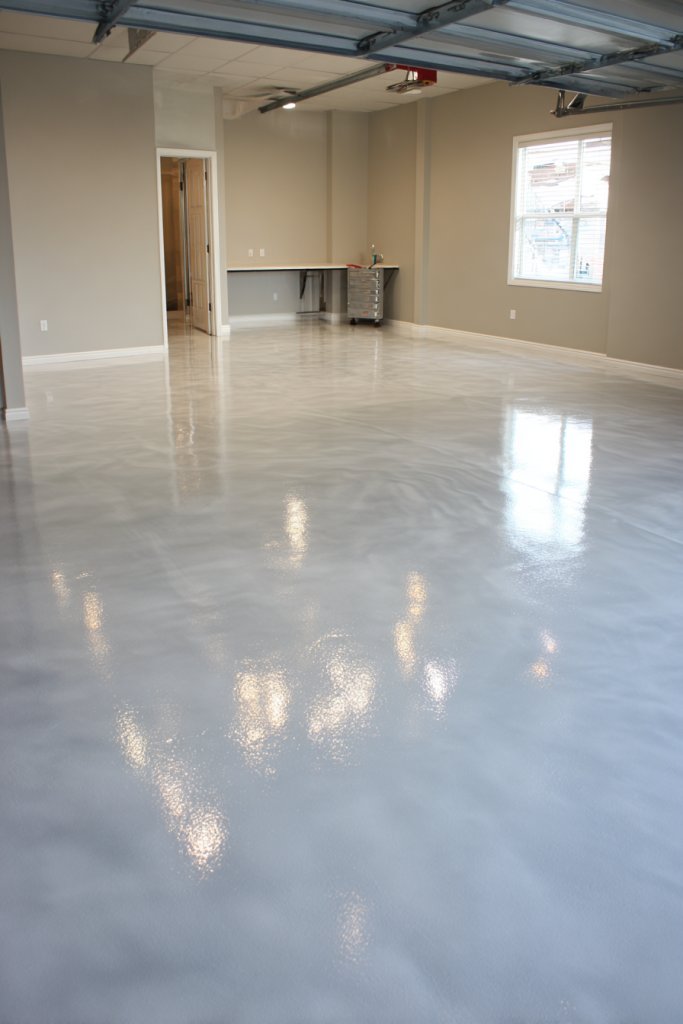
Does your garage floor look worn, stained, or just plain dull? A simple concrete slab can quickly become a source of embarrassment and slip hazards. You need a durable, attractive finish that stands up to heavy traffic, oil spills, and scratches. Bright epoxy coatings offer a stylish upgrade that transforms your garage into a sleek, safe workspace.
Imagine a glossy, high-shine surface that reflects light and instantly brightens the entire space. The epoxy’s smooth finish hides minor imperfections and stains, while vibrant colors or metallic finishes create a modern, eye-catching look. The seamless surface feels soft underfoot but tough enough to withstand daily wear and tear. It’s like giving your garage a facelift with a professional-grade, stylish coating.
Choose from a variety of colors—gray for a neutral look, bold hues for personality, or metallics for a futuristic vibe. Add decorative chips or quartz for texture and slip resistance. For a more subtle appearance, go for a clear epoxy over your existing concrete, enhancing natural texture. This coating can also be tinted to match your overall garage aesthetic or outdoor palette.
Start with thorough cleaning and prepping of the concrete surface, removing grease, dust, and loose particles. Use a primer if recommended by the epoxy manufacturer. Mix and pour the epoxy evenly using rollers or brushes, working in sections to avoid overlaps. Apply multiple coats if needed, allowing proper curing time between layers. Finish with a clear topcoat for extra protection and shine. Professional installation guarantees the best results, but DIY is possible with careful preparation.
Customize your epoxy with colored flakes or metallic pigments for unique visual effects. Add non-slip additives during mixing for safety, especially in wet conditions. Incorporate subtle patterns or borders for a custom look. Maintain the shine with periodic re-coating or cleaning, which prolongs durability and appearance.
A bright epoxy floor not only increases your garage’s curb appeal but also makes it safer and easier to clean. It’s an investment that pays off in both style and function, encouraging more use of your space. With a professional finish, your garage becomes a proud showcase of your organization and DIY spirit. Ready to coat your floor and shine?
9. Bright Wall-Mounted Tool Organizers with Labels

Is your toolbox overflowing and your tools scattered everywhere? Searching for that one screwdriver or wrench wastes time and kills productivity. You long for a smart, clear system that keeps your tools visible, organized, and easy to find. Wall-mounted tool organizers with labels can turn chaos into order and make your garage more functional.
Imagine a bright, painted wall with neatly arranged hooks, bins, and magnetic strips. Each tool has its place, labeled clearly, hanging in a tidy grid. The labels are bold and colorful, making it quick to identify and grab what you need. The whole setup radiates efficiency, with tools displayed like artwork, transforming your garage into a professional workshop.
Opt for a minimalist look with monochrome hooks and labels or go vibrant with contrasting colors. You can choose magnetic strips for quick access or individual hooks for heavier tools. Modular panels allow you to customize the layout, adding or removing sections as your collection grows or shifts. For more delicate tools, incorporate foam or padded slots for extra protection.
Start by choosing a durable, paint-ready wall surface. Install strong anchors and hooks at heights that suit your reach and workflow. Organize tools by type or frequency of use, labeling each section clearly with a permanent marker or printed labels. Attach magnetic strips for small metal parts or accessories. Regularly reassess and reorganize to keep the system functional and clutter-free.
Use color coding for different tool categories or projects, making identification even faster. Add small bins or trays for screws, nails, or other small parts, labeled for easy inventory management. Incorporate a whiteboard or chalkboard nearby for notes or maintenance reminders. Personal touches like custom decals or themed labels can make the space uniquely yours.
A well-organized tool wall boosts your confidence to start projects without delay. It makes your entire workspace more inviting and efficient, turning a chaotic clutter into a showcase of order. Plus, it saves you time, reduces frustration, and encourages ongoing organization efforts. Ready to hang your tools and get working?
10. Compact Vertical Garden for Indoor Greenery
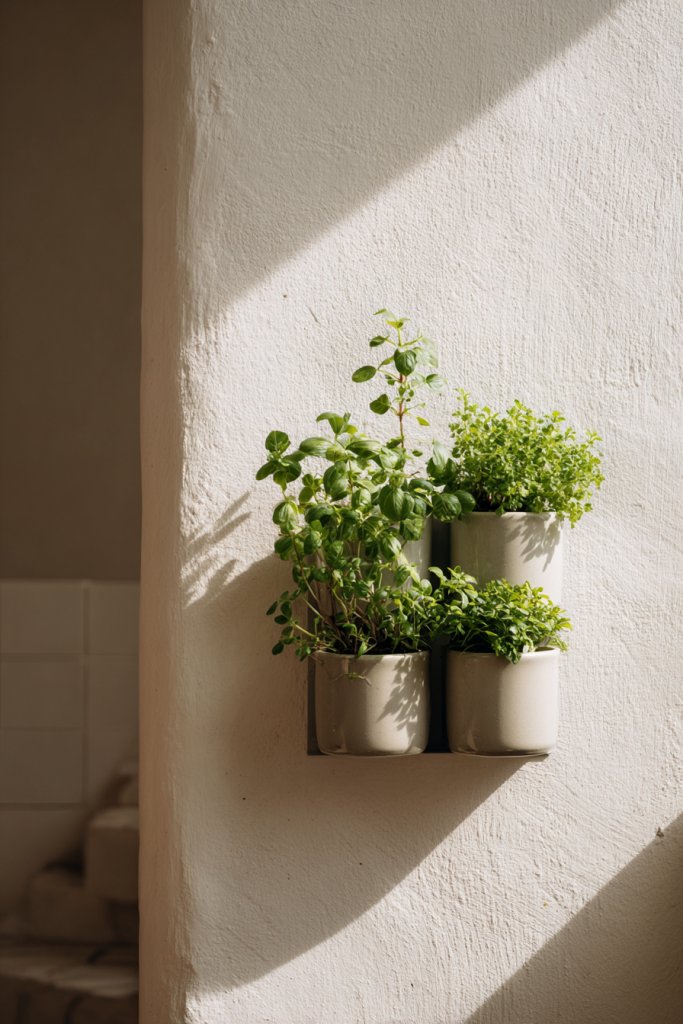
Feeling like your garage could use a breath of fresh air? Cluttered spaces often lack natural elements that boost mood and creativity. You want a touch of greenery without sacrificing precious space or risking damage from dirt and water. A compact vertical garden offers a neat, stylish way to introduce indoor plants into your garage.
Picture a slim, wall-mounted panel with small pots or pockets holding low-maintenance plants. The lush greenery contrasts beautifully with industrial or neutral walls, adding life and color. The plants sway gently with air circulation, creating a calming atmosphere. Light filters through nearby windows, highlighting the vibrant leaves and making the space feel alive and inviting.
Choose low-maintenance, space-efficient plants such as succulents or air plants for easy care. Use modular pockets or small containers in a grid pattern to customize your garden. For a modern look, pick sleek, minimalist containers, or go boho with woven baskets or ceramic pots. You can also incorporate a small watering system or self-watering pots for convenience.
Mount the garden panel securely into studs or solid wall anchors. Select plants suitable for low light and infrequent watering, and arrange them for aesthetic balance. Use a drip tray or waterproof backing to prevent water damage or leaks. Schedule regular watering and pruning, and rotate plants to ensure even growth. Consider adding a grow light if your garage doesn’t get enough natural sunlight.
Decorate with small decorative stones or moss at the base of each plant for visual interest. Customize the layout with themed pots or painted containers. Add small figurines or decorative trims to personalize your garden. Incorporate a moisture indicator or mini watering system to make maintenance easier.
A vertical garden brings a fresh, lively vibe to your garage, making it more than just a storage space. It promotes a sense of calm and well-being, inspiring you to care for your plants and projects alike. Plus, it’s a low-cost, high-impact upgrade that’s easy to maintain and endlessly customizable. Ready to green up your garage wall?
11. Chalkboard or Whiteboard Wall for Planning and Notes
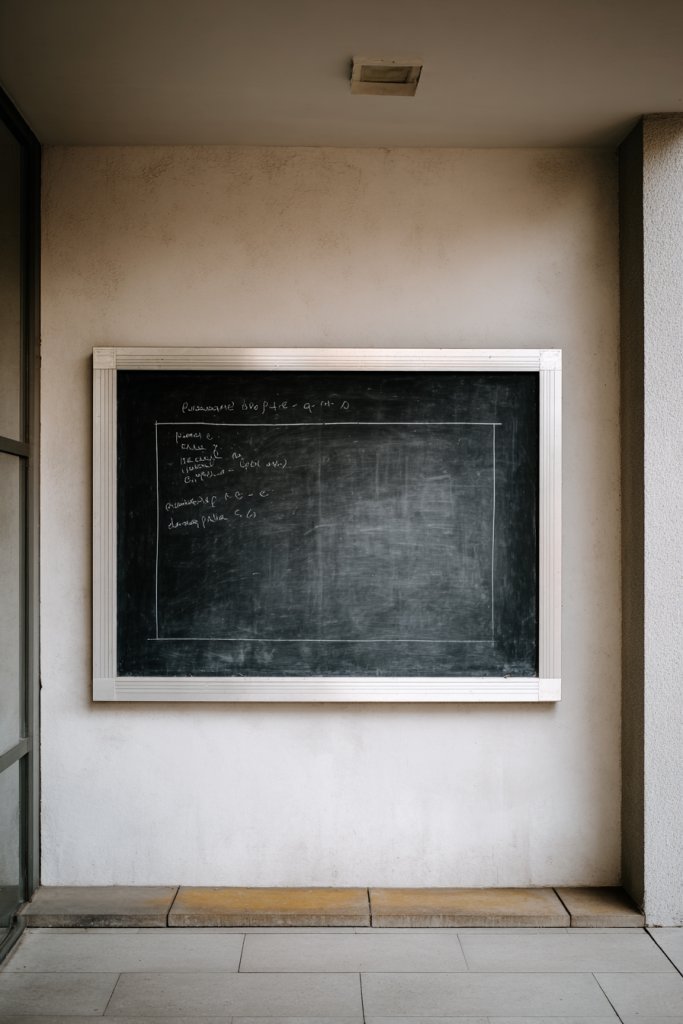
Forgetful about upcoming projects or maintenance tasks? A cluttered workspace can lead to forgotten chores and missed deadlines. You need a dedicated space to jot down notes, ideas, or plans without cluttering your phone or paper piles. A chalkboard or whiteboard wall turns your garage into a command center for organization and motivation.
Imagine a large, smooth wall painted with chalkboard paint or fitted with a sleek whiteboard. Notes, sketches, or schedules are written in colorful chalk or marker, easily erasable and changeable. Surrounding the board, hooks or small shelves hold markers, erasers, and magnets for quick access. The space becomes a hub of productivity and inspiration, with a playful yet practical aesthetic.
Choose a classic black chalkboard for a vintage vibe or a clean whiteboard for a modern look. Frame the board with trim or leave it unframed for a minimalist style. You can also segment sections for different purposes—one for tasks, one for ideas, one for reminders. Add sticky notes or magnetic accessories for quick updates. The board’s size can be tailored to your space and needs.
Apply chalkboard paint directly onto a smooth wall surface or install a pre-made whiteboard panel. Mount the board securely with brackets or adhesive strips, ensuring it’s level and easily accessible. Stock your space with colorful markers, erasers, and cleaning supplies. Use different colors for different categories or priorities for clarity. Regularly update and clean the surface to keep it functional.
Add decorative elements like border trim or themed decals around the board. Incorporate a small corkboard or magnet strips for additional notes or photos. Use custom labels or stickers to organize supplies related to planning or projects. Personal touches like inspiring quotes or motivational notes can make the space inviting and productive.
A planning wall keeps your projects on track and your mind clear. It transforms your garage into a functional hub that motivates action and creativity. Plus, it makes tracking progress and setting goals more engaging. Ready to start planning your next big project? Your organized, inspired garage is just a wall away.
12. Hidden Storage Drawers Beneath Workbenches
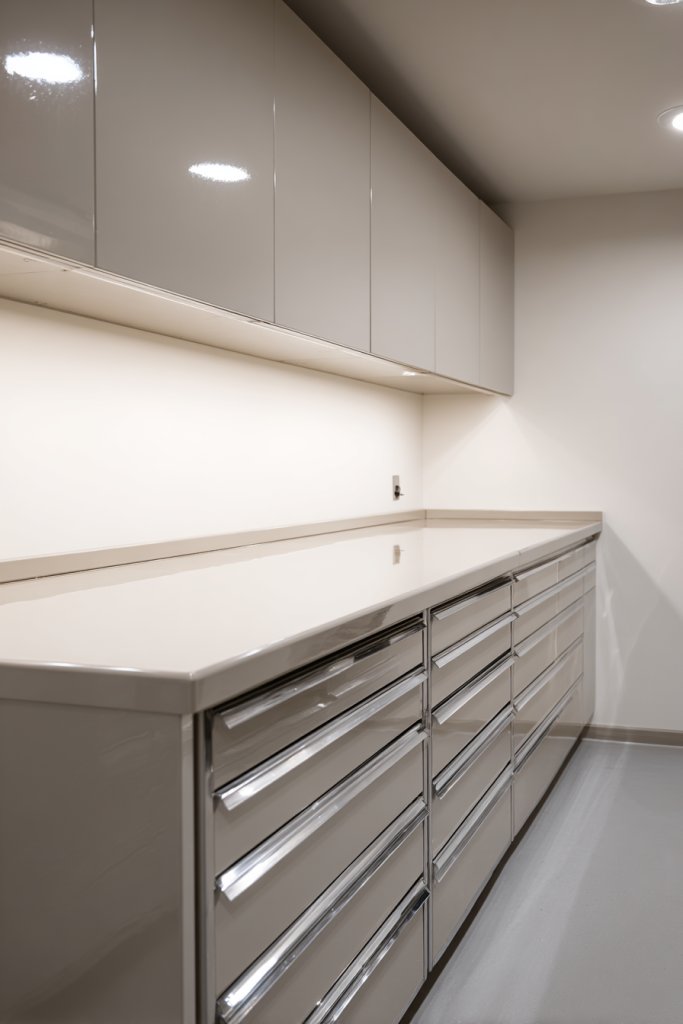
Do your workbenches turn into black holes where tools and supplies disappear? An untidy work surface hampers efficiency and makes cleanup a nightmare. You want a clean, clutter-free workspace that still offers ample storage without sacrificing surface area. Hidden drawers underneath your workbench can keep everything out of sight but within easy reach.
Visualize a sturdy wooden or metal workbench with sleek, pull-out drawers tucked beneath the tabletop. The drawers are flush with the frame, maintaining a clean, minimalist appearance. When opened, they reveal neatly organized compartments for screws, nails, and small tools. The entire setup exudes orderliness, with a smooth finish that invites you to work comfortably and efficiently.
Choose drawer fronts in matching or contrasting finishes for aesthetic appeal. Incorporate dividers or small trays inside drawers for better organization. For a more industrial look, opt for metal drawers with rivet details; for rustic charm, go with reclaimed wood. You can add locks for security or soft-close mechanisms for smooth operation. Adapt the size and number of drawers based on your storage needs.
Measure your workbench’s underside carefully to determine the drawer dimensions. Use a sturdy slide mechanism suitable for the weight and frequency of use. Mount the drawers securely into the frame, ensuring smooth operation and stability. Organize items inside with small containers or labels. Regularly clean and check the slides for wear to ensure longevity.
Label each drawer with clear tags or stickers to quickly identify contents. Add foam or fabric lining to prevent scratching delicate tools. Consider integrating a small power strip or charging station on the side for convenience. Personalize the look with paint, decals, or custom hardware that matches your overall garage theme.
Hidden drawers keep your work area tidy and professional-looking, boosting your confidence with every project. They make it easy to find what you need without cluttering the surface, encouraging more frequent use of your workspace. Plus, organized storage helps prolong the life of your tools and supplies. Ready to hide your mess and work smarter?
13. Stylish Slatwall Panels for Versatile Organization
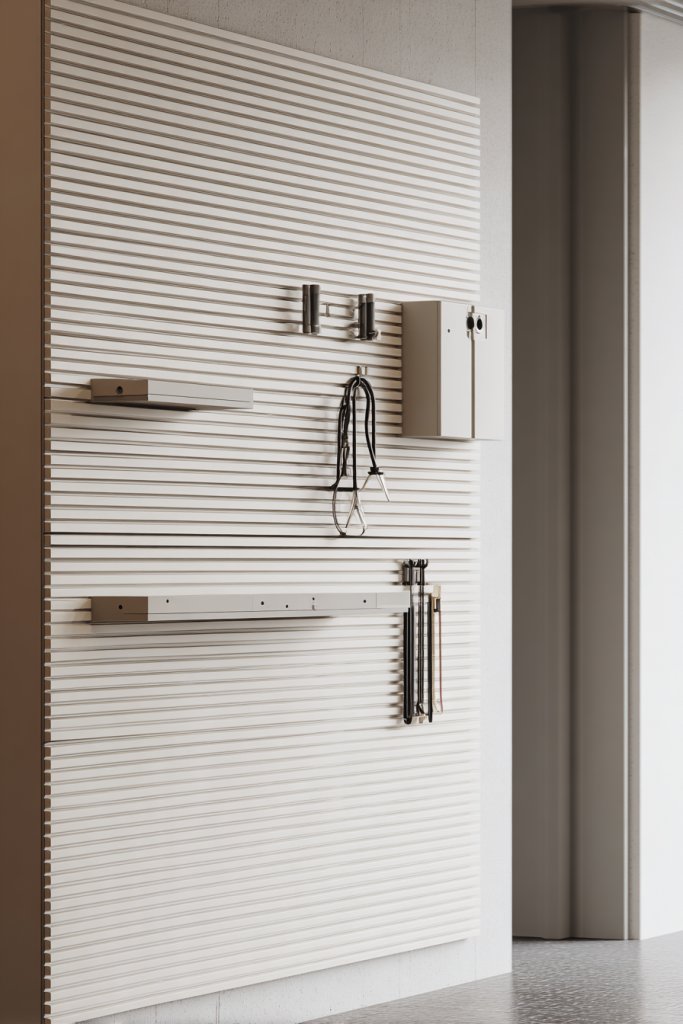
Are your tools and accessories scattered across shelves and bins, making it hard to find what you need? A cluttered garage is inefficient and visually unappealing. You crave a versatile, attractive system that offers flexibility and keeps everything visible. Stylish slatwall panels provide an elegant, customizable solution for organizing your garage essentials.
Imagine a sleek, horizontal panel with evenly spaced grooves, painted in a bold or neutral hue. Hooks, baskets, and shelves snap into the grooves, holding everything from hand tools to small parts. The arrangement looks intentional and modern, with a clean, structured appearance. Accessories can be easily moved or swapped, allowing you to change your setup as your needs evolve.
Choose materials like MDF, PVC, or metal for different looks and durability. For a high-end feel, opt for textured finishes or painted surfaces to match your garage decor. Mix and match accessories, such as baskets for small parts or hooks for larger tools. Use multiple panels for extensive storage or a single strip for a specific zone, adapting to your space and style preferences.
Mount the slatwall securely into wall studs or masonry using appropriate hardware. Arrange accessories in a logical pattern, grouping similar items together. Regularly reevaluate your setup, adding or removing hooks and shelves as your collection grows. Use labels or color-coding to identify categories quickly. Keep the panels clean with a damp cloth to maintain their sleek appearance.
Decorate with custom-painted accents or decorative hardware to match your style. Incorporate small bins or containers for organizing tiny parts and fasteners. Use a combination of open hooks and closed baskets for diverse storage needs. Personalize with themed accessories or decals for a unique, custom look that reflects your personality.
Stylish slatwall panels turn your garage into a professional-grade workshop. They make organization effortless and visually satisfying, inspiring you to keep the space tidy. With everything in its place, projects become more enjoyable and less stressful. Ready to elevate your garage organization game?
14. Bright, Weather-Resistant Outdoor Storage Cabinets
Are your bulky outdoor tools and equipment taking over valuable garage space? Weather, dirt, and pests threaten your stored items, making clutter and damage a constant concern. You need a durable storage solution that can withstand the elements while keeping everything accessible. Bright, weather-resistant outdoor cabinets are the perfect way to protect and organize your gear.
Picture a set of vibrant, high-quality cabinets with sealed doors and sturdy handles, standing against the garage wall or on your patio. The cabinets’ bold colors add a cheerful pop to your outdoor space. The doors close tightly, shielding contents from rain, dust, and pests. Inside, shelves hold gardening tools, hoses, or sports gear, all protected and neatly arranged. The bright finish and robust design make the space look inviting and organized.
Choose from different sizes and configurations, from tall cabinets for long tools to low drawers for smaller items. Use color to differentiate storage zones or match your outdoor decor. Incorporate transparent panels or windows for quick content identification. For a more natural look, select cabinets with wood-like finishes or textured surfaces that blend with outdoor aesthetics.
Position the cabinets on flat, stable ground, anchoring them if necessary to prevent tipping. Organize contents into labeled bins or trays inside for quick access. Seal all seams and doors with weatherproof caulking or gaskets for maximum protection. Regularly inspect the seals and hinges, tightening or replacing as needed. Keep the exterior clean to maintain their bright appearance.
Add custom labels or decals to identify contents easily. Incorporate hooks or small shelves on the outside for quick-use items like garden gloves or spray bottles. Match the cabinet hardware with other outdoor fixtures for a cohesive look. Consider installing a small padlock or security system for added safety.
Weather-resistant cabinets turn outdoor storage into a stylish, protected, and easy-to-maintain system. They free up your garage and keep your gear safe from the elements, encouraging more outdoor activity. Plus, their bold colors and durable build make your space feel lively and well-organized. Ready to safeguard your outdoor gear in style?
15. Multi-Purpose Laundry and Utility Corner
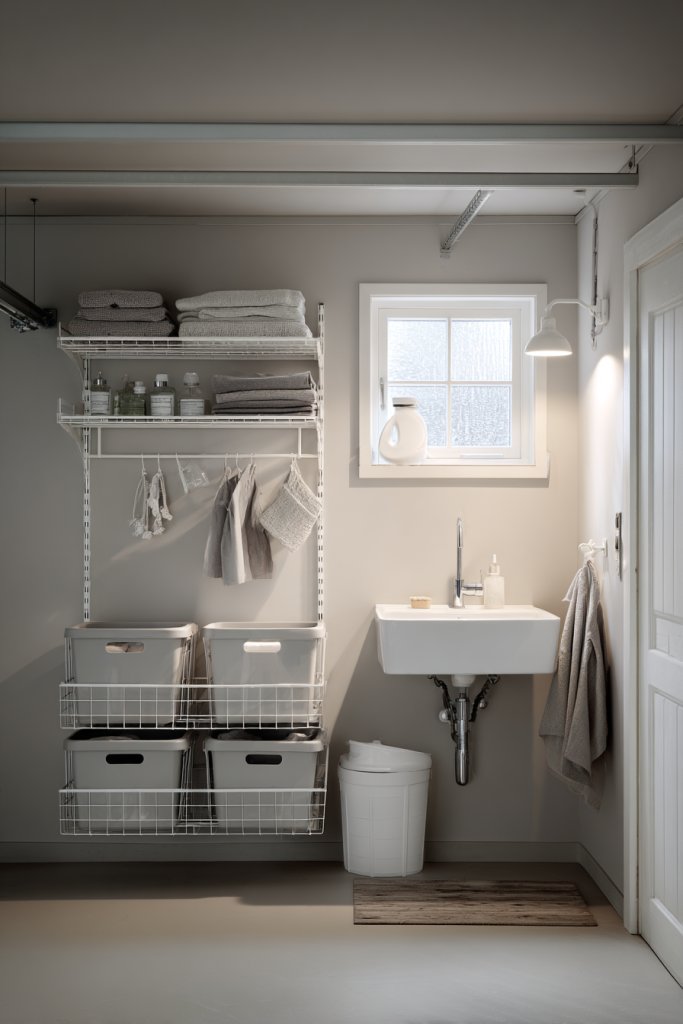
Does your garage laundry area feel cluttered, inefficient, or just plain dull? Combining laundry, cleaning supplies, and utility tasks into one space can feel overwhelming. You need a dedicated corner that’s organized, bright, and functional—making chores less of a hassle and more of a breeze. A multi-purpose laundry and utility corner can turn chores into a more pleasant, streamlined experience.
Imagine a bright, tidy nook with a compact washer and dryer stacked or side-by-side. Shelves above hold detergent, fabric softeners, and cleaning tools, all labeled and in easy reach. A folding station with a smooth countertop provides space for sorting clothes. Bright LED lighting enhances visibility, while colorful storage bins add a cheerful touch. The entire space looks clean, organized, and inviting, making laundry less of a chore.
Choose cabinetry or open shelving based on your preference for accessibility. Use moisture-resistant materials to withstand humidity, and incorporate hooks or rods for hanging clothes. For small spaces, opt for stackable units or wall-mounted fold-away stations. Add a small, comfortable seat or stool to make folding or sorting easier. The setup can be customized seasonally or as your laundry needs evolve.
Start by selecting a flat, well-ventilated spot. Install the washer and dryer securely with proper hookups and ventilation. Mount shelves or cabinets above for supplies, ensuring they’re anchored into studs or concrete. Use labeled containers for detergents and small tools. Keep a trash bin nearby for lint or waste, and add a drying rack or rod for hanging delicate items. Regularly clean and maintain all appliances and surfaces.
Add colorful or patterned storage bins for a lively look. Incorporate a small decorative rug or mat to define the area. Use labels or decals for different supplies to stay organized. Personal touches like a framed motivational quote or a small plant (out of restricted categories) can make the space more inviting. Consider a retractable clothesline or fold-down table for extra functionality.
A dedicated laundry corner makes chores quicker and less stressful. It encourages a habit of tidiness and helps keep your garage looking great. Plus, a bright, organized space boosts your motivation to stay on top of household tasks. With everything in its place, laundry day becomes just another task—less dreaded, more manageable. Ready to clean up your utility corner?
16. Sleek Wall-Mounted Racking for Sports Equipment
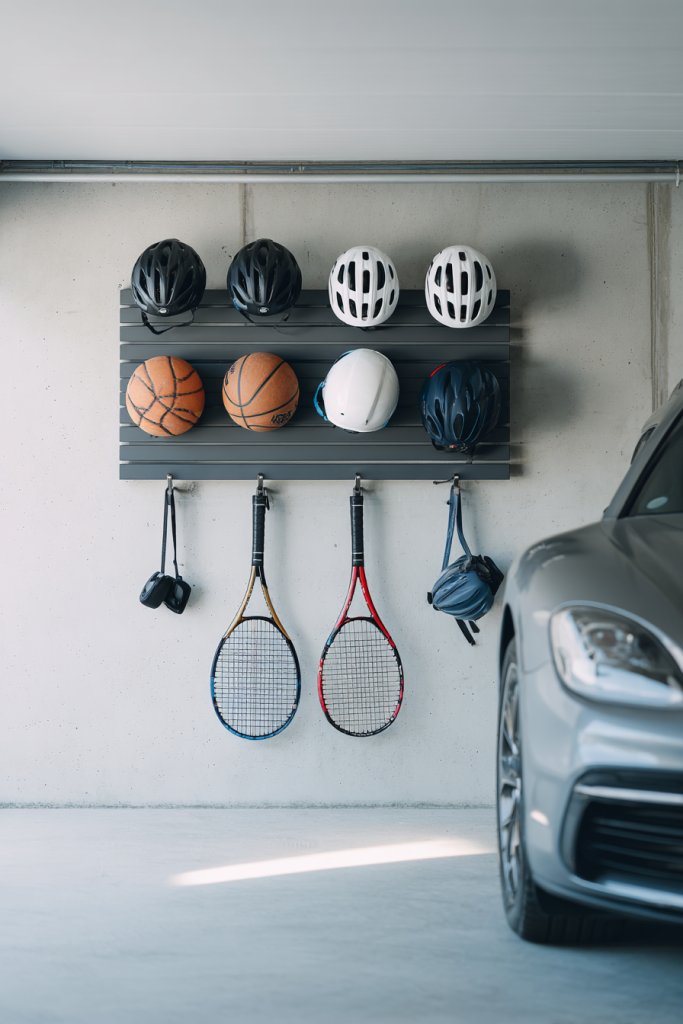
Is your sports gear taking over every corner of your garage, making it hard to park your car or find what you need? A cluttered, disorganized setup not only looks messy but also discourages outdoor activities. You want a dedicated, stylish storage solution that keeps everything tidy, accessible, and out of the way. Wall-mounted racking for sports equipment offers a sleek, space-saving fix.
Picture a set of streamlined metal or wood racks mounted on the wall, each holding bikes, helmets, balls, and skateboards. Bright-colored straps or hooks add pops of color, making it easy to distinguish different gear types. The gear is neatly hung or stored in labeled bins, with enough space for movement around the area. The overall look is modern and organized, inviting you to get active without the clutter.
Choose racks with adjustable arms or hooks to accommodate different sizes and shapes. Incorporate cubbies or bins for smaller gear or protective pads. For a more decorative touch, select racks in matching colors or finishes that complement your garage decor. For small spaces, stack multiple racks vertically or combine with ceiling storage. Flexibility is key to keeping the setup useful and attractive.
Mount the racks securely into wall studs or anchors capable of supporting heavy loads. Organize gear by activity or family member, labeling each section for quick access. Use durable straps or clips to hold items securely in place. Regularly inspect mounts and hardware for safety and wear. Clean the racks periodically to prevent dust buildup and maintain their appearance.
Add custom labels or color-coding to differentiate gear types. Incorporate small hooks or containers on the sides for accessories like gloves or goggles. Use weather-resistant, vibrant finishes to match your overall garage style. Personal touches like decorative decals or motivational stickers can make the space more inviting and themed.
A dedicated sports gear wall encourages regular use and keeps your garage looking organized and professional. It makes packing for outdoor adventures quicker and easier, boosting your confidence in planning activities. Plus, it transforms clutter into a showcase of your active lifestyle. Ready to rack up your gear and get moving?
17. Compact Workbench with Built-In Storage Solutions
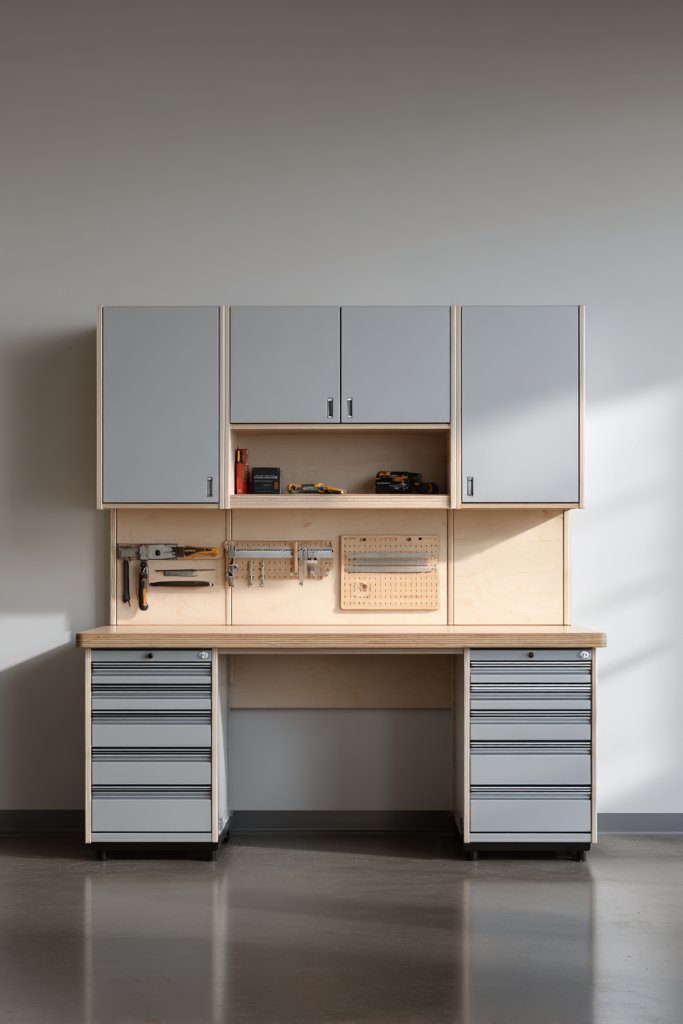
Does your current workbench take up too much space or lack enough storage for your tools? A cluttered, inefficient workspace can kill your motivation and slow down projects. You want a compact, smart workbench that packs in storage and provides a sturdy surface without sacrificing precious garage real estate. A built-in storage solution makes your workspace more functional and inviting.
Imagine a sleek, space-efficient workbench with drawers, shelves, and cubbies integrated directly into its frame. The surface is smooth and durable, perfect for detailed projects or quick repairs. The front features labeled drawers for small parts, while open shelves below hold larger tools or supplies. The entire setup looks organized, optimized for productivity, and designed to fit snugly into tight corners.
Choose a finish that matches your style—industrial metal, warm wood, or sleek laminate. You can add modular components like fold-out extensions or magnetic boards for extra versatility. For tight spaces, consider a wall-mounted fold-away workbench that can be tucked away when not in use. Personalize with custom hardware, labels, or colors that make the space uniquely yours.
Select a sturdy material for the work surface, ensuring it can withstand heavy use. Mount the frame securely into wall studs or concrete using heavy-duty anchors. Organize tools into labeled drawers or bins, and keep frequently used items within easy reach. Add a small pegboard or magnetic strip nearby for quick tool access. Regular maintenance involves tightening hardware and cleaning surfaces.
Personalize with custom drawer labels or color-coded storage zones. Incorporate a small corkboard or magnetic strip for notes or quick-reference guides. Use decorative hardware or paint accents to match your garage’s style. Consider adding a fold-out magnifying glass or task lighting for detailed work.
A compact, organized workbench turns your garage into a professional-grade workshop. It encourages DIY projects and repairs, making you more confident and productive. The built-in storage means your tools stay tidy, prolonging their lifespan. Ready to work smarter, not harder? Your perfect garage workspace is within reach.
18. Bright, Non-Slip Rubber Flooring with Patterned Accents
Is your garage floor slippery when wet or stained with oil and dirt? A dull, unsafe surface can cause accidents and make cleaning a chore. You need a bright, durable flooring solution that’s slip-resistant, easy to maintain, and adds visual appeal. Patterned rubber flooring provides a colorful, safe upgrade that transforms your garage into a more inviting space.
Imagine a vibrant rubber floor with bold, geometric patterns in cheerful colors like blue, yellow, or red. The textured surface offers excellent grip, reducing slips and falls. The seamless, cushioned material feels comfortable underfoot and absorbs impact from dropped tools or equipment. Light reflects off the glossy, patterned surface, brightening the entire garage and creating a lively, safe environment.
Select from various patterns—hexagons, chevrons, or abstract shapes—to suit your style. Mix and match colors for a custom, energetic look or stick to a single shade for a streamlined appearance. For high-traffic areas, choose thicker, more durable rubber; for decorative zones, opt for thinner, patterned tiles. This flooring is versatile enough to fit any size or shape of garage.
Prepare the concrete surface by cleaning thoroughly and leveling any uneven spots. Lay out the rubber tiles or rolls, cutting to fit as needed. Secure the edges with adhesive or interlocking edges for a seamless finish. Regularly sweep and hose down the floor to keep it looking bright and clean. Inspect for tears or loose tiles, replacing as necessary to maintain safety and appearance.
Add contrasting borders or strips to define zones or pathways. Incorporate custom patterns or logos for a personalized touch. Use anti-fatigue mats at workstations for extra comfort. Coordinate with other garage decor elements like cabinets or shelving for a cohesive look.
Bright rubber flooring enhances safety and adds a cheerful vibe to your garage. It encourages more frequent use and makes cleanup easier, boosting your pride in the space. A safe, colorful floor invites you to work, play, and relax without worry. Ready to step onto a safer, more stylish surface?
19. Vertical Storage for Lawn and Garden Tools
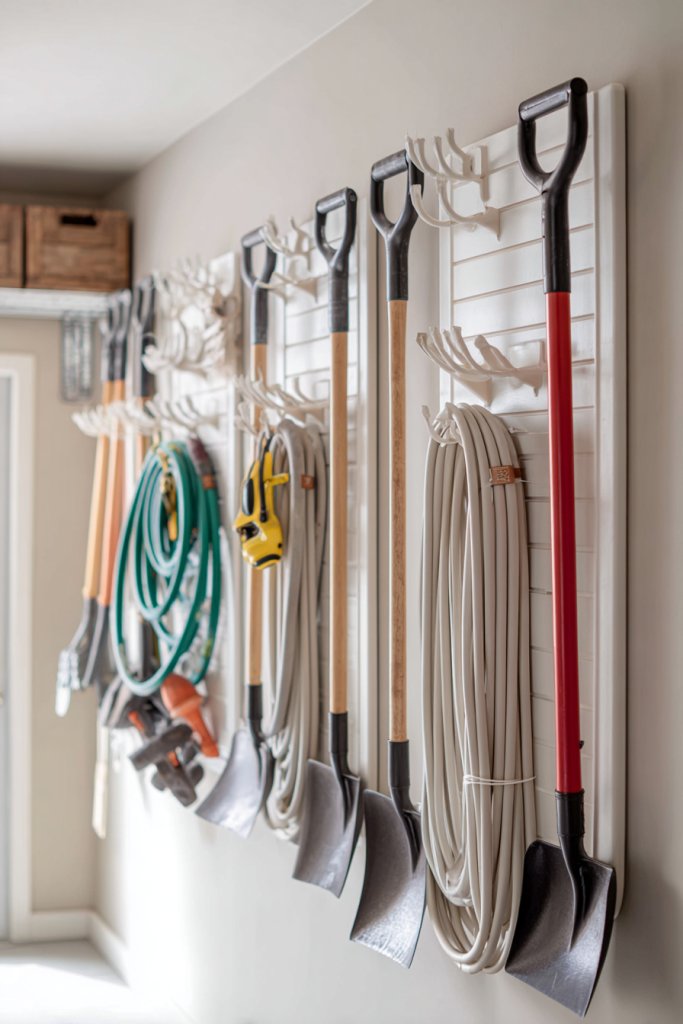
Is your garage or shed overflowing with shovels, rakes, and hoses, making it hard to find what you need? A cluttered storage space not only wastes time but also increases the risk of damage or injury. You want an efficient, space-saving system that keeps your outdoor tools organized and easily accessible. Vertical storage solutions are the answer.
Picture a wall-mounted rack with sturdy hooks and brackets holding long-handled tools vertically against the wall. The tools stand upright, with handles painted in bright colors for quick identification. Hoses are neatly coiled on specialized reel systems nearby, and small bins hold gloves or small accessories. The entire setup looks tidy, functional, and visually appealing, making outdoor chores less stressful.
Opt for heavy-duty metal hooks or coated plastic for rust resistance. Use adjustable racks to accommodate different tool sizes. Incorporate labeled bins or hooks for small items like spray bottles or gardening gloves. For a rustic look, choose wooden slat systems with hooks or pegs, blending functionality with style. The system can be scaled up or down depending on your yard size and tool collection.
Install heavy-duty wall anchors into studs or concrete walls. Organize tools by category, such as digging tools, pruning equipment, and watering accessories. Use labels or color coding for easy identification. Regularly clean and reorganize as your collection expands or shifts. Ensure hooks are securely attached to prevent accidents or damage.
Add custom labels or decals to identify different tool zones. Incorporate small shelves for seed packets or fertilizers. Use weather-resistant coatings or paints to prolong the life of wooden or metal components. Personalize with decorative touches like painted handles or themed hooks that match your outdoor aesthetic.
A dedicated vertical storage system makes outdoor maintenance less of a chore and more of an organized pleasure. It encourages regular tool maintenance and ensures everything stays in good condition. Plus, a neat yard boosts curb appeal and pride in your outdoor space. Ready to hang up and get gardening?
20. Decorative, Functional Lighting with Track or String Lights

Is your garage poorly lit, making it hard to work or find things after sunset? Harsh, uneven lighting can cause eye strain and accidents. You want a stylish, adjustable lighting solution that brightens your workspace while adding ambiance. Decorative track or string lights can create a warm, functional glow that transforms your garage into a welcoming environment.
Imagine sleek track lights mounted along the ceiling, with adjustable heads directing light exactly where needed. Or strings of Edison bulbs hung in a zigzag pattern, casting a cozy glow over your workspace. The lighting fixtures are modern yet warm, complementing your garage decor. The light’s soft warmth and adjustable focus make the space inviting, functional, and stylish.
Opt for dimmable LED track lights for energy efficiency and flexibility. Use vintage-style string lights for a rustic or industrial vibe, or sleek integrated fixtures for a minimalist look. Position lights to highlight specific zones—workbenches, shelves, or car parking areas. Combine multiple lighting types for layered, versatile illumination adaptable to different needs.
Mount fixtures securely into ceiling joists or wall brackets, ensuring proper wiring and safety. Use dimmer switches for adjustable brightness, and plan the layout to minimize shadows. For string lights, hang securely using hooks or clips, avoiding low-hanging cords. Regularly check connections and replace bulbs or fixtures for optimal performance. Consider solar-powered options for eco-friendly lighting.
Add decorative covers or shades to create different lighting effects. Incorporate smart controls or timers to automate lighting schedules. Use colored bulbs or filters for mood lighting or special occasions. Personal touches like themed fixtures or custom wiring can make your garage feel uniquely yours.
Good lighting enhances safety, productivity, and ambiance, making your garage more inviting. It encourages longer work sessions and more frequent use of your space. Bright, flexible lighting transforms your garage into a modern, stylish retreat where work and leisure blend seamlessly. Ready to light up your space with style?
21. Clear Bins with Labeling for Small Parts and Hardware
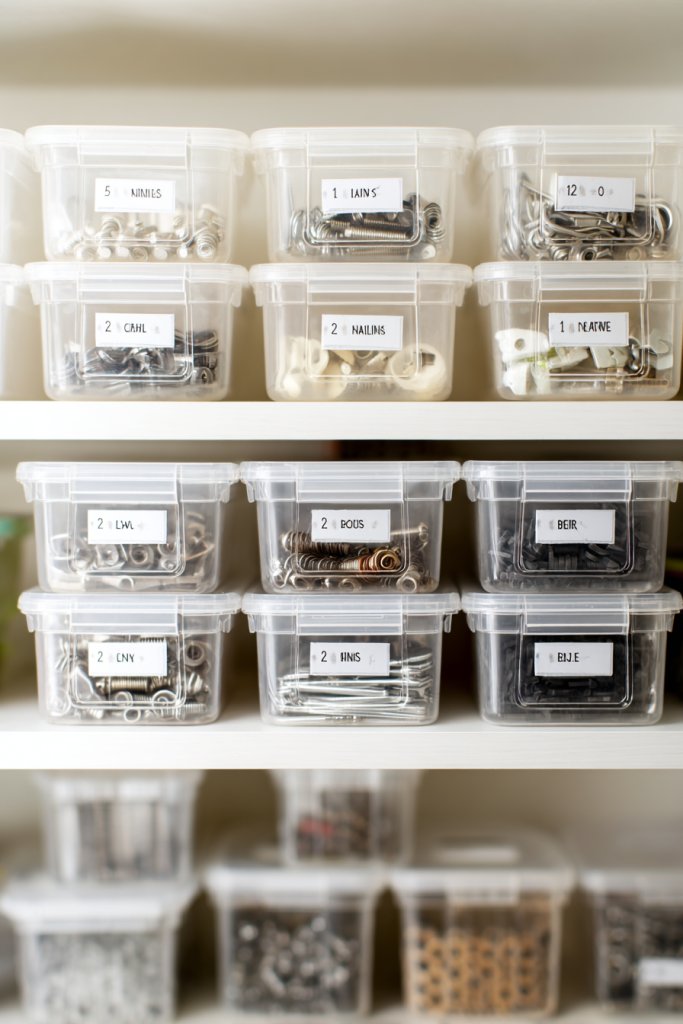
Lost screws, nails, and tiny hardware can turn into a frustrating scavenger hunt. Without proper organization, small parts clutter drawers or spill everywhere, wasting your time and patience. You need a system that keeps everything visible, sorted, and easy to access. Clear bins with labels are an affordable, effective way to conquer clutter and streamline projects.
Visualize a series of transparent containers stacked or lined up on shelves, each filled with nuts, bolts, or washers. Bright labels indicate contents, making it quick to identify what you need. The clear plastic allows you to see at a glance if supplies are running low. The overall setup looks tidy and professional, turning your garage into an organized workshop.
Choose different sizes of bins to match your collection, from tiny compartments for nails to larger ones for tools or tapes. Use color-coded labels or stickers for quick identification. Incorporate dividers within larger bins for specific small parts. For a more durable look, select sturdy plastic or stackable containers that save space and withstand wear.
Install sturdy shelves or wall brackets to hold the bins securely. Label each container clearly with a permanent marker or printed label for quick reference. Keep frequently used items at eye level and less common supplies higher or lower. Regularly refill and reorganize to keep everything current. Use small, compartmentalized containers inside larger bins for very tiny items.
Customize labels with icons or color schemes for different projects or categories. Add a small whiteboard or clip strip nearby for inventory tracking or notes. Incorporate a small magnifying glass or tool for inspecting tiny parts. Keep your labels consistent and update periodically as your collection grows or changes.
A clear, labeled parts system makes every project smoother and less stressful. It saves time searching for what you need, boosting your confidence and productivity. Plus, it keeps your workspace looking neat and professional, inspiring pride in your organization skills. Ready to label your way to a clutter-free garage?
22. Compact Folding Storage Shelves for Seasonal Items
Seasonal decorations, sporting gear, or clothing tend to clutter your garage or closet, making storage chaotic and access difficult. You want a flexible, space-saving solution that keeps seasonal items organized yet easy to pack away. Folding storage shelves offer a smart way to maximize space and manage seasonal clutter effortlessly.
Imagine lightweight, foldable shelves in neutral or vibrant colors that can be expanded or collapsed as needed. When extended, they provide ample space for storing holiday decor, sports equipment, or extra clothing. When folded, they tuck neatly into a corner or a closet, freeing up space. The shelves are made of durable, water-resistant materials, ensuring longevity. They look clean and modern, blending seamlessly into your garage or storage room.
Choose from different sizes and configurations to suit your needs—single shelves or multi-tier units. Opt for modular designs that can be stacked or combined. Use fabric or plastic bins on the shelves for added organization. For a rustic feel, select wooden or bamboo shelves; for a sleek look, go with metal or plastic. Adapt the setup seasonally or as storage needs change.
Set up the shelves on a flat, stable surface or mount them to the wall for added stability. Use the folding mechanism to expand or collapse the shelves easily, and lock them in place when extended. Organize seasonal items in labeled bins or containers on the shelves. Store frequently accessed items at the front for quick retrieval and fold away when not needed. Regularly clean and inspect the folding joints for smooth operation.
Personalize with custom labels, color schemes, or decorative trims. Incorporate small hooks or clips on the sides for hanging accessories or tools. Use protective liners or mats on the shelves to prevent damage to delicate items. Match the shelves to your overall garage decor to keep everything cohesive.
Folding shelves make seasonal storage simple, organized, and space-efficient. They help keep your garage tidy and free of clutter, encouraging you to maintain an organized environment year-round. Plus, their versatility means you can adapt them to your changing needs, making them a smart investment. Ready to fold your way to better storage?
23. Bright, Colorful Wall-Mounted Cabinets for Extra Storage
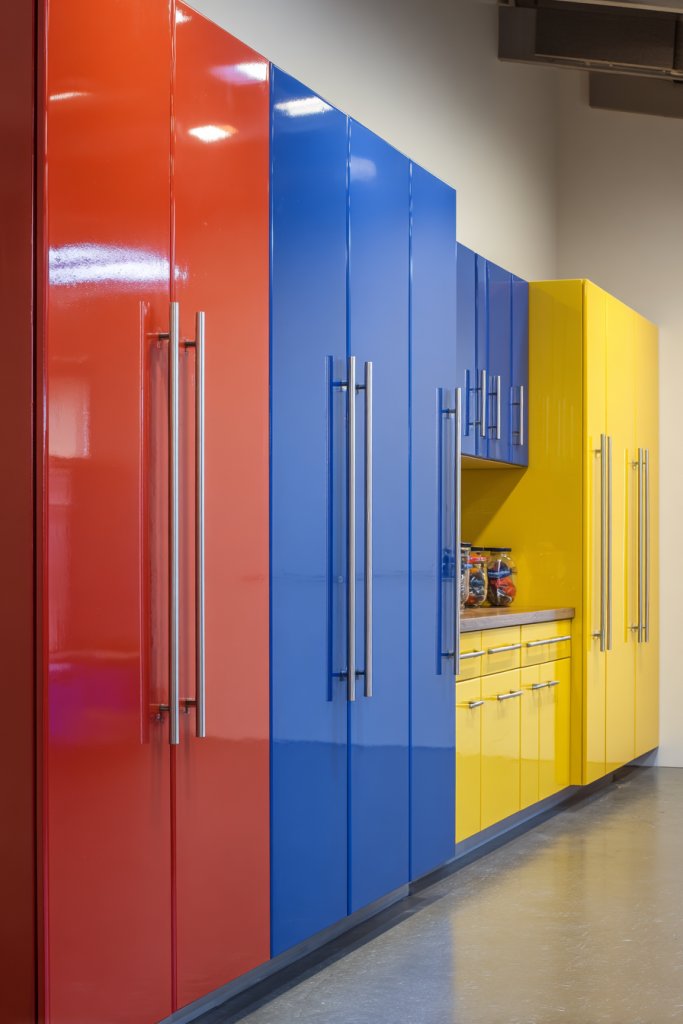
Is your garage overflowing with supplies, yet still feeling cluttered and dark? Traditional cabinets often blend into the background, making it hard to find what you need quickly. You want a storage solution that’s eye-catching, organized, and adds a pop of color. Bright wall-mounted cabinets combine function and style, transforming your garage into a cheerful, efficient space.
Picture a row of vibrant cabinets in shades like turquoise, coral, or lime green, mounted high on the wall. The doors are sleek with modern handles, hiding shelves filled with tools, paint, or cleaning supplies. The colors brighten the space, reflecting light and creating a lively atmosphere. When closed, they give a clean, organized look; when open, they reveal neatly arranged contents that make finding supplies effortless.
Choose cabinets with adjustable shelving or internal organizers to customize storage. Mix bright colors with neutral tones for a balanced look, or go monochrome for a sleek, modern vibe. Install multiple cabinets for different zones—tools, chemicals, and accessories. For a rustic or industrial style, select cabinets with distressed finishes or metal accents. Adapt the size and placement to maximize wall space and accessibility.
Mount the cabinets securely into studs, ensuring they can support the weight of stored items. Organize contents using labeled containers or baskets inside. Keep frequently used items at eye level and less-used supplies higher up. Use a level during installation to keep everything straight, and periodically check hardware for stability. Regularly clean the exterior and interior to maintain brightness and function.
Add custom labels or decals to identify contents easily. Incorporate small hooks or trays on the doors for quick-access tools or cleaning cloths. Use matching hardware or decorative trims to enhance style. Personal touches like themed stickers or painted accents can make the cabinets uniquely yours, blending practicality with personality.
Colorful, wall-mounted cabinets turn storage into a statement feature, making your garage more inviting. They encourage organization and quick access, saving you time on projects. Plus, their cheerful appearance boosts your mood and pride in your space. Ready to add a splash of color and order?
24. DIY Pallet Wall for a Rustic, Practical Look
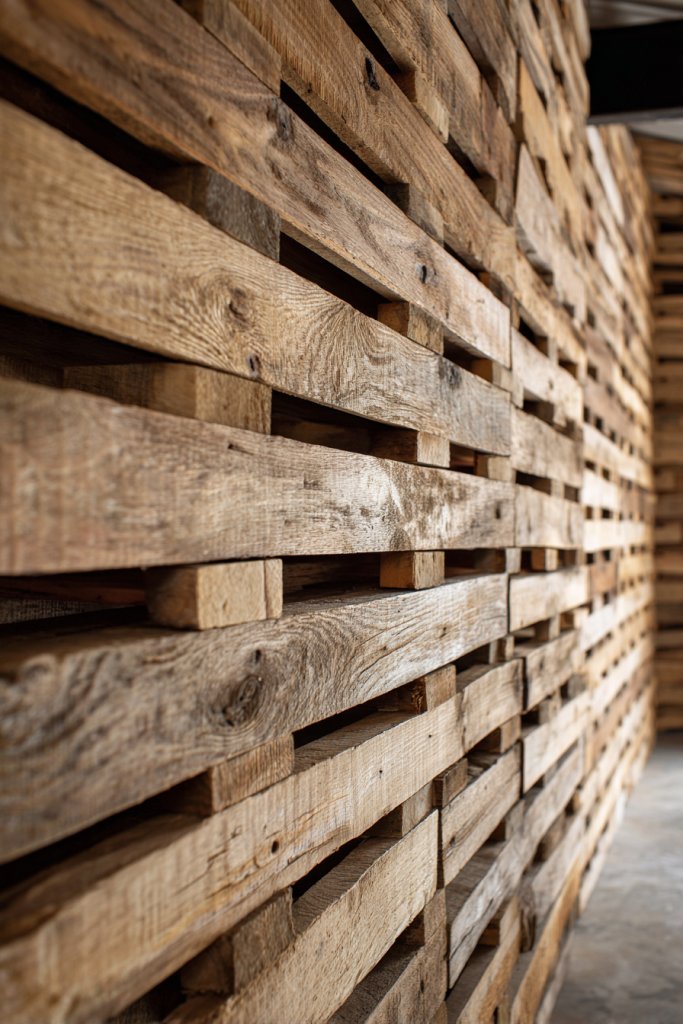
Are you craving a rustic, warm vibe in your garage but don’t want to break the bank? Reclaimed wood pallets are an affordable, eco-friendly way to add character and functionality. A DIY pallet wall is both practical for storage and a stylish statement piece. It’s perfect for anyone who loves a bit of DIY charm with a personal touch.
Visualize a wall covered with horizontally or vertically arranged wooden pallets, each with a weathered, textured surface. Hooks and shelves are mounted directly onto the wood, holding tools, ropes, or even decorative items. The natural wood tones contrast beautifully with modern fixtures or industrial accents, creating a cozy yet functional space. The rough-hewn texture adds warmth and authenticity, making your garage feel inviting and personalized.
Use pallets in their natural state for a rugged look or sand and paint them for a more refined appearance. Incorporate reclaimed wood in different shades for visual interest. Attach hooks or small shelves directly to the wood for storing tools or accessories. For a more polished look, seal or stain the wood to match your decor. Adapt the layout to fit your wall size and organization needs.
Begin by cleaning and sanding the pallets for safety and better adhesion. Mount the pallets securely into wall studs or anchors, ensuring they can support weight. Attach hooks, pegs, or small shelves in strategic spots based on your storage needs. Use heavy-duty screws and brackets for stability. Regularly inspect for loose nails or splinters, and treat the wood periodically to preserve its look.
Decorate with stenciled patterns or painted designs to add personality. Add vintage or industrial hardware for a unique touch. Incorporate personalized labels or tags on hooks for easy organization. Mix in other reclaimed materials like metal or ceramic for a mixed-media aesthetic. Keep the look cohesive by choosing complementary colors or finishes.
A DIY pallet wall combines sustainability with style, creating a warm, inviting atmosphere. It’s a project that adds value and personality to your garage, inspiring pride and ownership. Plus, it’s highly customizable, so you can change or expand it as your needs evolve. Ready to build your rustic retreat?
25. Minimalist, Hidden Storage Solutions for a Clutter-Free Look
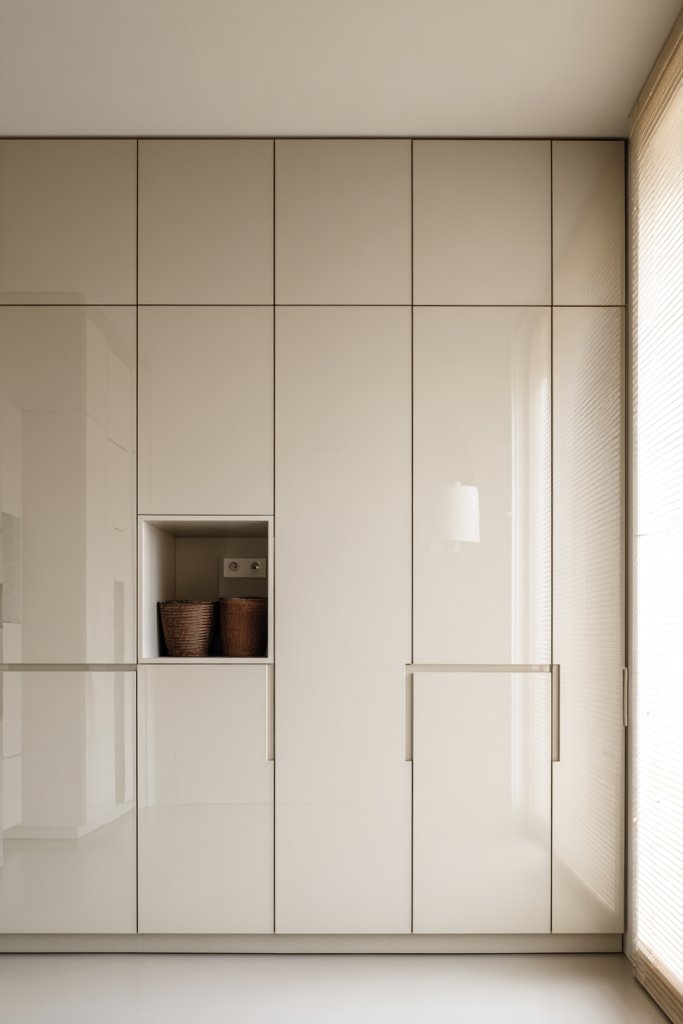
Does your garage look cluttered despite your best efforts? Visible tools, bins, and supplies can make the space feel chaotic and overwhelming. You crave a sleek, modern aesthetic that hides away clutter while keeping everything accessible. Minimalist, hidden storage solutions are the ultimate answer for a clean, clutter-free garage.
Imagine smooth, flush cabinetry or panels seamlessly integrated into walls or under counters. When closed, they appear as sleek, flat surfaces—no handles, no clutter. When opened, they reveal organized compartments for tools, supplies, or seasonal items. The overall look is minimalist and refined, with hidden compartments creating a spacious, airy feel. Light reflects softly off the clean surfaces, emphasizing order and simplicity.
Choose handleless, push-to-open cabinets for a seamless look or incorporate subtle finger pulls for easy access. Use high-gloss or matte finishes in neutral tones to match your garage decor. Incorporate hidden drawers or pull-outs behind larger panels for specialized storage. For added security or aesthetics, opt for touch-latch or magnetic closures. This system adapts to any space, big or small.
Design your cabinetry to fit your specific storage needs, measuring twice and planning carefully. Install into wall cavities or frame areas using sturdy hardware, ensuring smooth operation. Use labels or internal organizers to keep contents sorted. Regularly check that panels and hinges work smoothly and tighten screws as needed. Keep the surface clean for a sleek appearance and easy maintenance.
Add subtle lighting inside the hidden compartments for visibility. Customize with paint or veneer to match your overall garage style. Incorporate a few decorative elements on the visible panels, like textured finishes or subtle patterns, to add interest. Use magnetic or push-to-open hardware to minimize visual clutter and keep everything sleek.
Hidden storage solutions elevate your garage’s style while reducing visual clutter, making the space more inviting. They support a clutter-free lifestyle and make organization effortless. Plus, they showcase your design skills and attention to detail, inspiring ongoing tidiness. Ready to hide the mess and embrace minimalism?
Conclusion
Exploring these diverse garage design ideas can help you unlock the full potential of your space, making it more organized, functional, and visually appealing. Don’t hesitate to try out different concepts and customize them to suit your needs and style. Take the first step today—your dream garage is just an idea away, waiting to become your favorite spot in the house!
Leave a Reply